FRONT NO. 2 SPEAKER > INSTALLATION

for Preparation Click here


HINT:
  1. Use the same procedures for the LH side and RH side.
  1. The procedures listed below are for the LH side.
  1. A bolt without a torque specification is shown in the standard bolt chart (Click here).


1. INSTALL FRONT NO. 2 SPEAKER ASSEMBLY


E107381E01

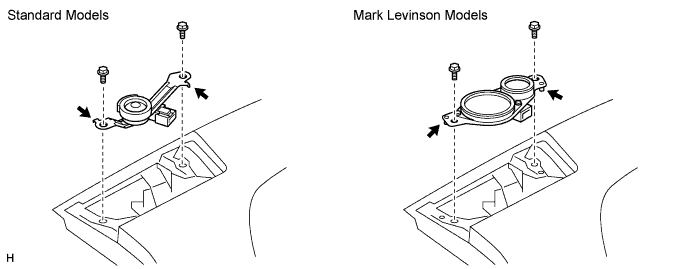
  1. Connect the connector.

  1. Temporarily install the speaker by aligning the positioning pins of the speaker to the instrument panel.

  1. Install the speaker with the 2 bolts.

    HINT:
    Do not touch the cone part of the speaker.


2. INSTALL NO. 2 INSTRUMENT PANEL SPEAKER PANEL SUB-ASSEMBLY


    B105662E05
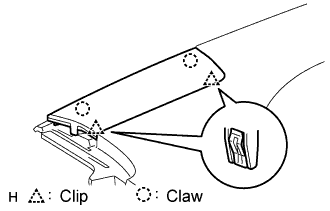
  1. Attach the 2 clips and 2 claws to install the panel.


3. CONNECT CABLE TO NEGATIVE BATTERY TERMINAL


4. PERFORM INITIALIZATION
  1. Perform initialization (Click here).

    NOTICE:
    Certain systems need to be initialized after disconnecting and reconnecting the cable from the negative (-) battery terminal.