STEREO COMPONENT AMPLIFIER > INSTALLATION |
| 1. INSTALL NO. 2 AMPLIFIER BRACKET |
 |
Install the bracket's aligning protrusions labeled A to the amplifier.
Install the 2 screws labeled B.
| 2. INSTALL NO. 1 AMPLIFIER BRACKET |
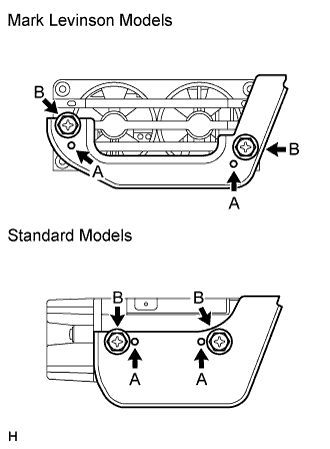 |
Install the bracket's aligning protrusions labeled A to the amplifier.
Install the 2 screws labeled B.
| 3. INSTALL STEREO COMPONENT AMPLIFIER ASSEMBLY WITH AMPLIFIER BRACKET |
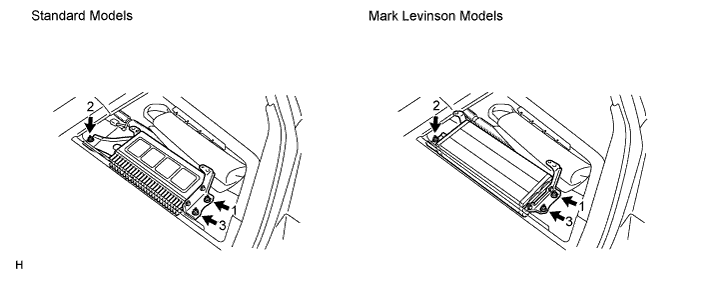
Install the amplifier with the 3 nuts.
| 4. INSTALL LUGGAGE COMPARTMENT COVER RH |
| 5. INSTALL LUGGAGE COMPARTMENT FLOOR MAT |
| 6. CONNECT CABLE TO NEGATIVE BATTERY TERMINAL |
| 7. PERFORM INITIALIZATION |
Perform initialization (Click here).
