ROOF SPEAKER > INSTALLATION |
| 1. INSTALL ROOF SPEAKER ASSEMBLY |
 |
Connect the connector.
Install the speaker and attach the clip.
Install the bolt.
| 2. INSTALL NO. 2 PACKAGE TRAY TRIM PANEL ASSEMBLY (w/ Rear Sunshade) |
 |
Connect the connector.
Attach the 5 claws and 3 clips to install the panel.
| 3. INSTALL PACKAGE TRAY TRIM PANEL ASSEMBLY |
 |
Attach the clip to install the package tray trim panel.
Attach the 4 claws to install the belt guide center.
 |
Attach the 4 claws to install the belt guide LH.
| 4. INSTALL AUTOMATIC LIGHT CONTROL SENSOR |
Connect the connector and install the sensor.
| 5. INSTALL HIGH MOUNTED STOP LIGHT ASSEMBLY |
Install the high mounted stop light.
| 6. INSTALL ROOF SIDE GARNISH INNER LH |
Attach the 2 claws and 4 clips, and install the garnish.
| 7. INSTALL ROOF SIDE GARNISH INNER RH |
| 8. INSTALL REAR SEAT SIDE GARNISH LH |
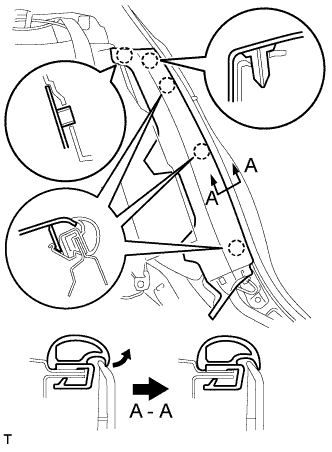 |
Attach the 5 claws and install the garnish.
Pull out the folded lip of the weatherstrip.
| 9. INSTALL REAR SEAT SIDE GARNISH RH |
| 10. INSTALL REAR DOOR SCUFF PLATE LH |
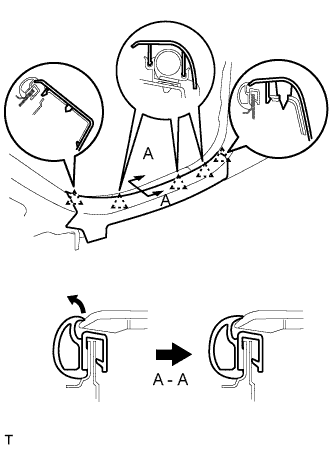 |
Attach the 5 claws to install the scuff plate.
Pull out the folded lip of the weatherstrip.
| 11. INSTALL REAR DOOR SCUFF PLATE RH |
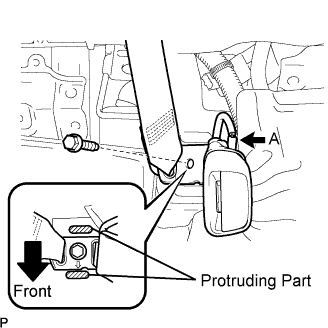
| 12. INSTALL REAR SEAT OUTER BELT ASSEMBLY |
 |
Install the anchor part of the rear seat outer belt assembly with the bolt.
| 13. INSTALL REAR SEAT INNER WITH CENTER BELT ASSEMBLY RH |
 |
Install the anchor part of the rear seat inner with center belt assembly RH seat belt with the bolt as shown in the illustration.
Connect the connector labeled A.
| 14. INSTALL REAR SEATBACK ASSEMBLY |
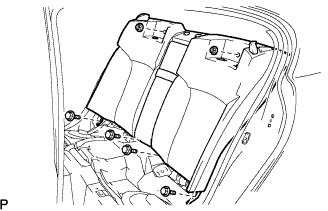 |
Place the seatback in the cabin.
Install the seatback with the 4 bolts and 2 nuts.
Install the 2 rear seat covers.
Pass the 3 seat belts through and close the cap of the 3 rear seat shoulder belt guides.
Install the floor anchor part with the bolt.
| 15. INSTALL REAR SEAT HEADREST ASSEMBLY LH AND RH |
| 16. REMOVE REAR SEAT HEADREST ASSEMBLY CENTER |
| 17. INSTALL REAR SEAT CUSHION ASSEMBLY |
 |
Attach the seat cushion's 2 rear hooks to the seatback.
Attach the seat cushion's 2 front hooks to the vehicle body.
Confirm that the seat cushion is firmly installed.
| 18. PERFORM INITIALIZATION |
Perform initialization (Click here).
