MICROPHONE AMPLIFIER > REMOVAL |
| 1. DISCONNECT CABLE FROM NEGATIVE BATTERY TERMINAL |
| 2. REMOVE INNER REAR VIEW MIRROR COVER |
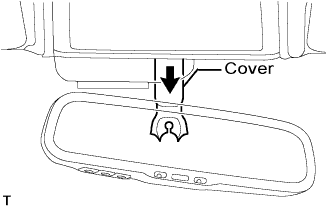 |
Pull the cover in the direction indicated by the arrow in the illustration. Then remove the cover.
| 3. REMOVE FRONT ROOFTOP GARNISH |
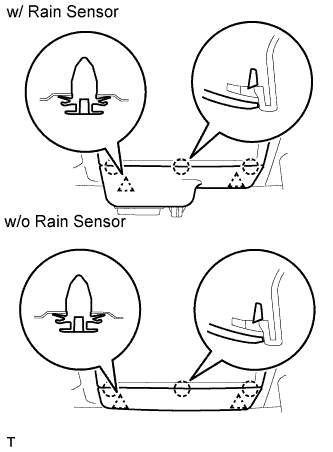 |
w/ Rain sensor:
Remove the top garnish.
Using a screwdriver, detach the 3 claws and 2 clips, and remove the top garnish.
w/o Rain sensor:
Remove the top garnish.
Using a screwdriver, detach the 3 claws and 2 clips, and remove the top garnish.
| 4. REMOVE PERSONAL LIGHT ASSEMBLY |
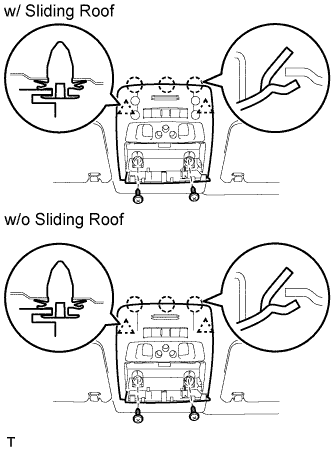 |
Using a screwdriver, remove the 2 covers and 2 screws.
Using a moulding remover, detach the 2 clips and 3 claws.
Disconnect the connector and remove the personal light.
| 5. REMOVE MICROPHONE AMPLIFIER ASSEMBLY |
 |
Remove the microphone amplifier cord from the cover labeled A.
Disconnect the connector labeled B.
Remove the 9 screws labeled C and cover.
Remove the microphone amplifier.
