ECM > INSTALLATION

for Preparation Click here


1. INSTALL ECM


    A103959E01
  1. Insert the ECM into the ECM box.

    NOTICE:
    1. Insert the ECM into the ECM box with the nameplate facing the inside of the vehicle.
    2. Make sure that there is no foreign matter on the gasket surface of the ECM box.
    3. Insert the stud bolt on the vehicle rear side to the ECM first.
    4. Make sure that the stud bolts are securely installed into the front and rear bolt holes.


    A105821
  1. Install the ECM to the ECM box with the 2 nuts.

    Torque:
    5.5 N*m{ 56 kgf*cm , 49 in.*lbf }

    NOTICE:
    Be sure to tighten the nut on the vehicle rear side first.


  1. Connect the wire harness.

    1. Connect the 5 ECM connectors.

      NOTICE:
      Be sure to securely connect the connectors.


    2. A105820E01
    3. Install the 2 connector holders.


2. INSTALL ECM COVER


    A105290
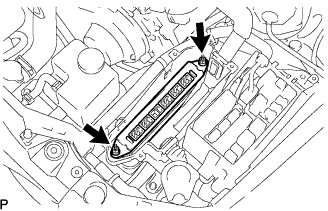
  1. Install the ECM cover with the 3 bolts.

    Torque:
    5.5 N*m{ 56 kgf*cm , 49 in.*lbf }

    NOTICE:
    Make sure that the wire harness does not get caught between other parts.


3. INSTALL ENGINE ROOM SIDE COVER LH


    A110867E01
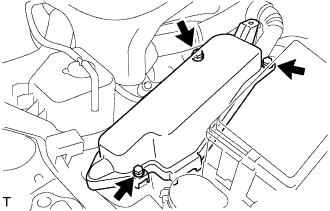
  1. Install the side cover with the 3 clips.


4. INSTALL COOL AIR INTAKE DUCT SEAL


    A110865E01
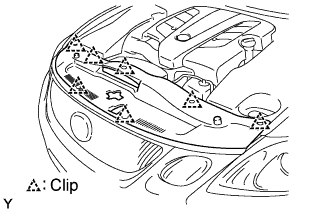
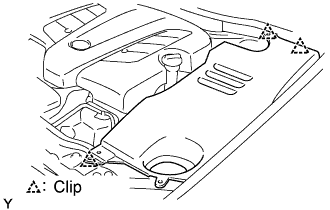
  1. Install the intake duct seal with the 7 clips.


5. CONNECT CABLE TO NEGATIVE BATTERY TERMINAL


6. PERFORM INITIALIZATION
  1. Perform initialization (Click here).

    NOTICE:
    Certain systems need to be initialized after disconnecting and reconnecting the cable from the negative (-) battery terminal.