CRANKSHAFT POSITION SENSOR > REMOVAL |
| 1. DISCONNECT CABLE FROM NEGATIVE BATTERY TERMINAL |
| 2. REMOVE COOL AIR INTAKE DUCT SEAL |
 |
Remove the 7 clips and duct seal.
| 3. REMOVE ENGINE ROOM SIDE COVER RH |
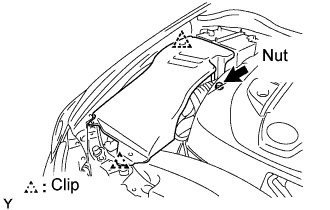 |
Loosen the nut and remove the 2 clips and side cover.
| 4. REMOVE ENGINE ROOM SIDE COVER LH |
 |
Remove the 3 clips and side cover.
| 5. REMOVE NO. 1 AIR CLEANER INLET |
Remove the bolt and air cleaner inlet.
| 6. REMOVE V-BANK COVER |
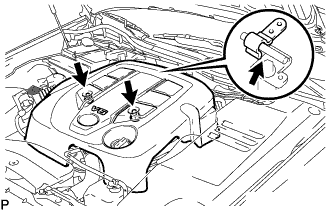 |
Remove the 2 nuts and V-bank cover.
| 7. REMOVE V-RIBBED BELT |
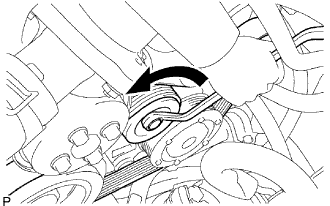 |
While releasing the belt tension by turning the belt tensioner counterclockwise, and remove the V-ribbed belt from the belt tensioner.
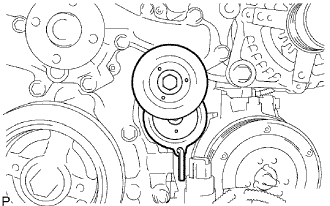 |
While turning the belt tensioner counterclockwise, align with its holes, and then insert the 5 mm bi-hexagon wrench into the holes to fix the V-ribbed belt tensioner.
| 8. REMOVE ENGINE UNDER COVER |
 |
Using a clip remover, remove the 3 clips.
Remove the 10 screws and under cover.
| 9. DISCONNECT COMPRESSOR ASSEMBLY |
 |
Disconnect the magnetic clutch connector.
Remove the 3 bolts and nut.
 |
Using an E8 "torx" socket, remove the stud bolt and compressor.
| 10. REMOVE CRANKSHAFT POSITION SENSOR |
 |
Disconnect the sensor connector.
Remove the bolt and sensor.
