FRONT DOOR > INSTALLATION |
| 1. INSTALL FRONT DOOR WIRE |
 |
Install the door wire with the 2 bolts.
Connect the wire clips.
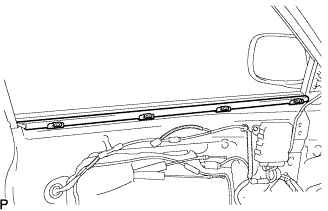
| 2. INSTALL FRONT DOOR WEATHERSTRIP |
Attach the clips to install the weatherstrip.
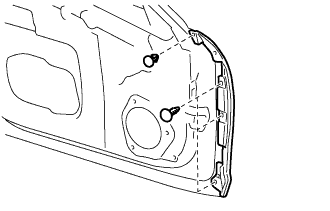
| 3. INSTALL FRONT DOOR CHECK ASSEMBLY |
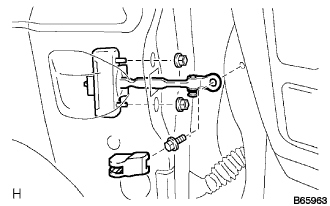 |
Apply MP grease to the sliding areas of the door check.
Install the door check to the door panel with the 2 nuts.
Apply adhesive to the threads of the bolt.
Install the door check to the body panel with the bolt.
Install the cover.
| 4. INSTALL FRONT DOOR NO. 1 STIFFENER CUSHION |
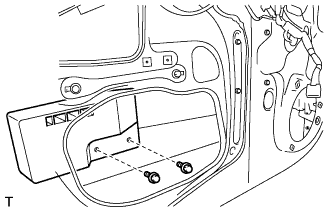 |
Install the cushion with the 2 bolts.
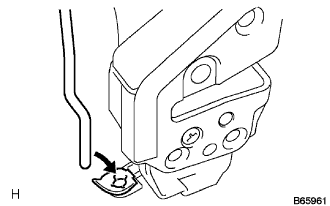
| 5. INSTALL FRONT DOOR OUTSIDE HANDLE FRAME SUB-ASSEMBLY |
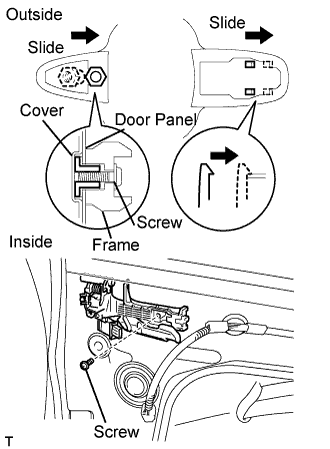 |
Install the lock open rod to the outside handle frame.
Slide the outside handle frame in the direction indicated by the arrow in the illustration.
Using a T30 "torx" socket, install the outside handle frame with the screw.
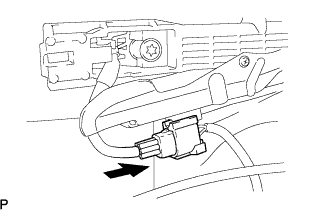 |
Connect the connector.
| 6. INSTALL FRONT DOOR WITH MOTOR LOCK ASSEMBLY |
Apply MP grease to sliding and rotaing areas of the door lock.
 |
Install a new door lock wire harness packing.
 |
Insert the control rod into the door lock, and then set it to the door panel.
Apply adhesive to the threads of the 3 screws.
 |
Using a T30 ''torx'' socket, install the door lock with the 3 screws.
Connect the door lock connector.
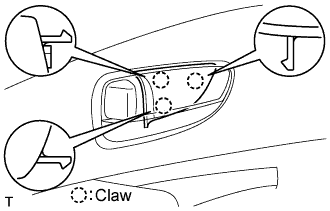
| 7. INSTALL FRONT DOOR REAR OUTSIDE HANDLE PAD |
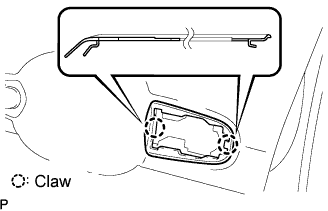 |
Attach the 2 claws to install the pad.
| 8. INSTALL FRONT DOOR FRONT OUTSIDE HANDLE PAD |
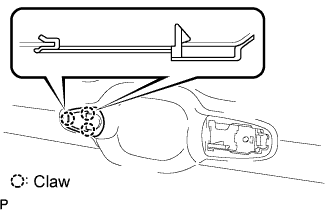 |
Attach the 2 claws to install the pad.
| 9. INSTALL FRONT DOOR HANDLE ASSEMBLY OUTSIDE |
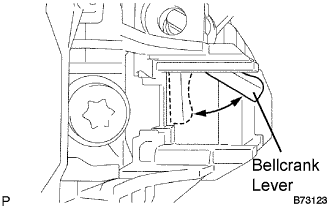 |
Pull and hold the bellcrank lever of the frame as shown in the illustration.
 |
Install the handle by pushing it in the direction of the arrows in the illustration.
| 10. INSTALL FRONT DOOR OUTSIDE HANDLE COVER |
 |
Using a T30 ''torx'' socket, install the cover (with the door key cylinder) with the screw.
Install the hole plug.
| 11. INSTALL FRONT DOOR FRONT LOWER FRAME SUB-ASSEMBLY |
 |
Install the frame with the 2 bolts.
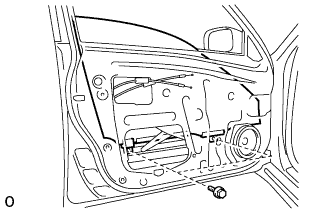
| 12. INSTALL FRONT POWER WINDOW REGULATOR MOTOR ASSEMBLY |
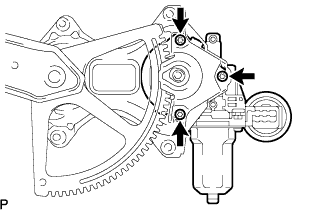 |
Apply MP grease to the sliding and rotating areas of the regulator motor.
Using a T25 ''torx'' driver, install the motor with the 3 screws.
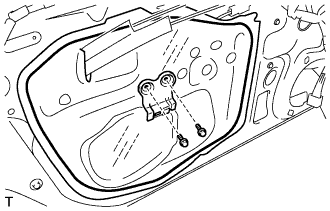
| 13. INSTALL FRONT DOOR WINDOW REGULATOR SUB-ASSEMBLY |
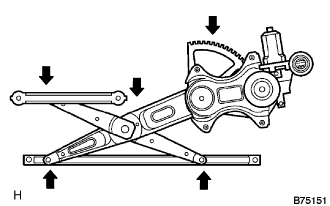 |
Apply MP grease to the sliding and rotating areas of the window regulator.
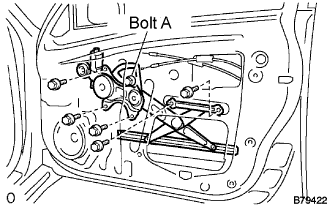 |
Loosely install the bolt labeled A onto the window regulator.
Insert the window regulator into the door panel. Use the bolt labeled A to hang the window regulator on the door panel.
Install the window regulator with the 5 bolts and tighten the bolt labeled A.
Connect the window regulator connector.
| 14. INSTALL FRONT DOOR WINDOW FRAME MOULDING UPPER |
 |
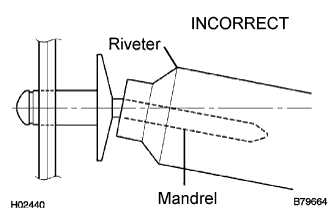
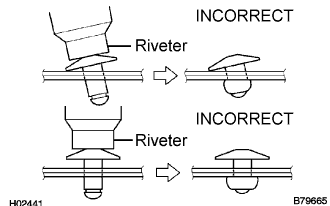
Using an air riveter or hand riveter with a nose piece, attach the door window frame moulding to the door frame.
 |
 |
 |
| 15. INSTALL FRONT DOOR WINDOW FRAME MOULDING REAR |
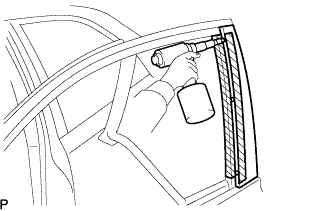 |
Put protective tape onto the door frame moulding and door frame.
Using an air riveter or hand riveter with a nose piece, attach the door window frame moulding to the door frame.
|
|
|
| 16. INSTALL FRONT DOOR BELT MOULDING ASSEMBLY |
 |
Attach the 7 claws to install the belt moulding.
| 17. INSTALL FRONT DOOR GLASS SUB-ASSEMBLY |
 |
Insert the door glass into the door panel along the glass run as indicated by the arrows in the illustration.
 |
Install the door glass to the window regulator with the 2 bolts.
| 18. INSTALL FRONT DOOR SERVICE HOLE COVER |
 |
Apply butyl tape to the door as shown in the illustration.
Install a new service hole cover.
Install the door armrest bracket with the 2 bolts.
| 19. INSTALL MULTIPLEX NETWORK DOOR ECU FRONT |
 |
Connect the 3 connectors.
Install the ECU with the 2 bolts.
| 20. INSTALL FRONT DOOR GLASS WEATHERSTRIP INNER |
 |
| 21. INSTALL OUTER REAR VIEW MIRROR ASSEMBLY |
 |
Connect the connector.
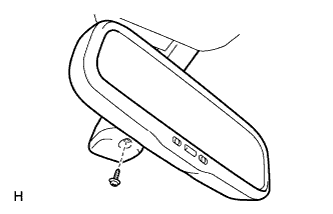 |
Install the mirror with the screw.
| 22. INSTALL DOOR FRAME GARNISH |
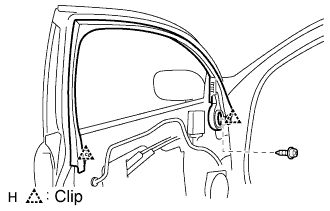 |
Install the garnish with the 2 clips.
| 23. INSTALL MULTIPLEX NETWORK SWITCH ASSEMBLY |
 |
Install the network switch with the 3 screws.
Connect the connector.
| 24. INSTALL FRONT DOOR TRIM COVER |
 |
Install the screw.
Attach the 6 clips to install the trim cover.
| 25. INSTALL FRONT DOOR NO. 3 WEATHERSTRIP |
 |
Install the weatherstrip with the 4 clips.
| 26. INSTALL SEAT MEMORY SWITCH |
 |
Connect the switch connector.
Install the switch with the 2 screws.
| 27. INSTALL FRONT DOOR COURTESY LIGHT ASSEMBLY |
 |
Attach the 2 claws to install the courtesy light.
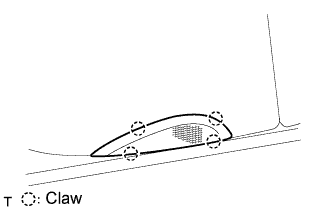 |
Attach the 4 claws to install the lens.
| 28. INSTALL INTERIOR NO. 1 ILLUMINATION LIGHT ASSEMBLY |
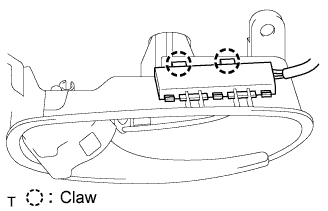 |
Connect the connector.
Attach the 2 claws to install the light.
| 29. INSTALL FRONT DOOR INSIDE HANDLE SUB-ASSEMBLY |
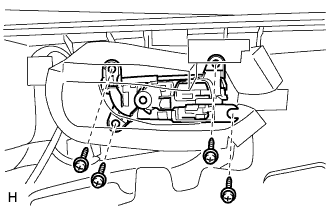 |
Install the inside handle with the 4 screws.
| 30. INSTALL FRONT DOOR TRIM PANEL ASSEMBLY |
 |
Connect the 2 cables to the inside handle as shown in the illustration.
 |
Install the weatherstrip to the trim by attaching the 4 clips labeled A.
Attach the 6 clips labeled B and 3 new clips labeled C to install the trim together with the weatherstrip.
Install the 2 screws.
 |
Connect the connector.
Attach the 2 claws to install the trim lower cover.
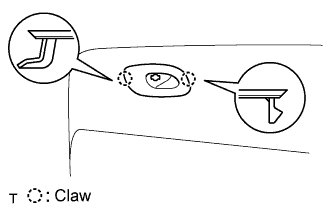
| 31. INSTALL DOOR INSIDE HANDLE BEZEL |
 |
Attach the 3 claws to install the bezel plug.
| 32. CONNECT CABLE TO NEGATIVE BATTERY TERMINAL |
| 33. PERFORM INITIALIZATION |
Perform initialization (Click here).
