REMOVAL
Removal / installation
| 1. REMOVE SHIFT LEVER KNOB SUB-ASSEMBLY |

Turn the shift lever knob counterclockwise and remove the shift lever knob sub-assembly.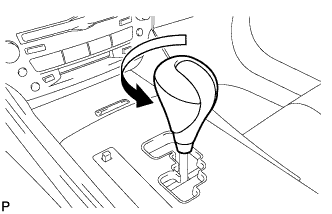

| 2. REMOVE UPPER NO. 1 CONSOLE PANEL GARNISH |
Using a moulding remover, disengage the claw.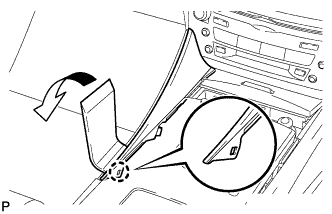
Pull the upper No. 1 console panel garnish in the direction indicated by the arrow to disengage the 2 clips and remove it.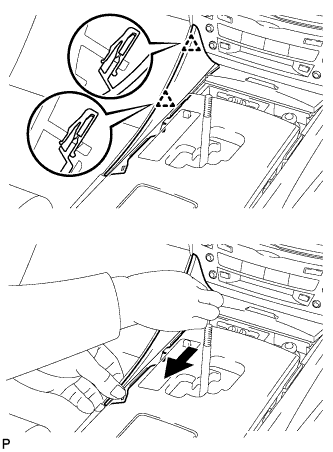
| 3. REMOVE UPPER NO. 2 CONSOLE PANEL GARNISH |
Using a moulding remover, disengage the claw.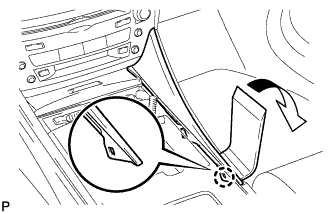
Pull the upper No. 2 console panel garnish in the direction indicated by the arrow to disengage the 2 clips and remove it.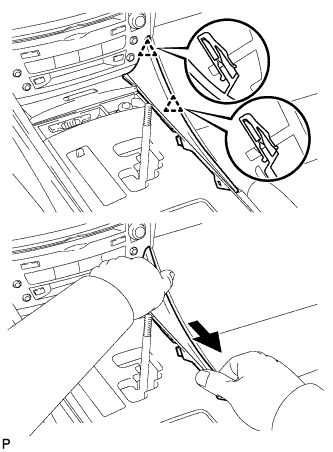
| 4. REMOVE CONSOLE PANEL SUB-ASSEMBLY |
Disengage the 8 clips.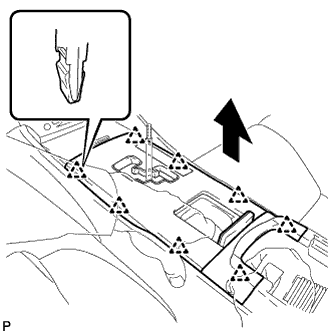
Disconnect the connectors and remove the console panel sub-assembly.
| 5. REMOVE FRONT ASH RECEPTACLE SUB-ASSEMBLY |
Remove the 2 screws <F>.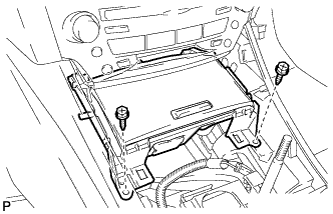
Pull the front ash receptacle sub-assembly in the direction indicated by the arrow to disconnect the connectors and remove it.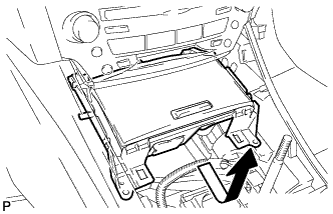
| 6. REMOVE CONSOLE BOX REGISTER ASSEMBLY |
Remove the rear ash receptacle assembly.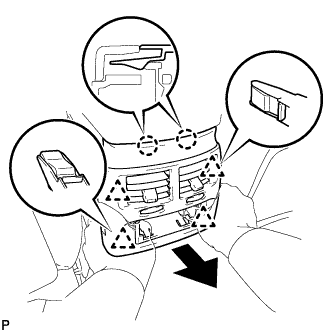
Disengage the 2 claws and 4 clips, and then remove the console box register assembly.
| 7. REMOVE CONSOLE BOX |
Remove the 2 bolts <C>.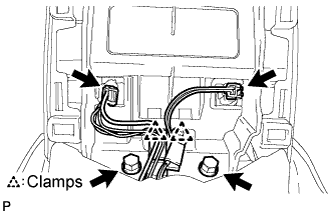
Disconnect the 2 connectors.
Disengage the 2 clamps.
Remove the 2 bolts <C>.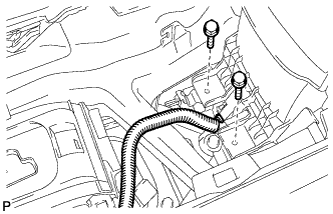
Disconnect the connector.
Remove the 2 bolts <C>.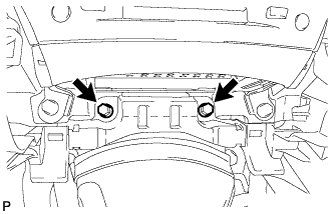
Disengage the 2 claws and 2 clips, and then remove the console box.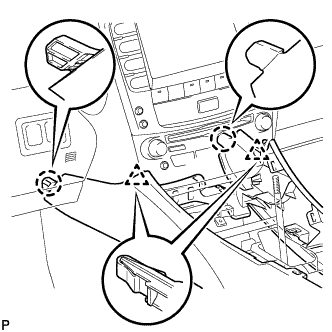
| 8. REMOVE NO. 2 CONSOLE BOX DUCT |
Remove the 2 clips and No. 2 console box duct.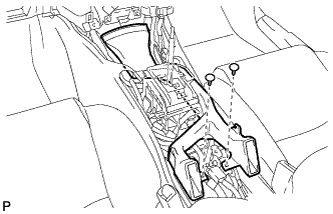
| 9. REMOVE REAR NO. 1 FLOOR PANEL BRACE |
Remove the 4 bolts and rear No. 1 floor panel brace.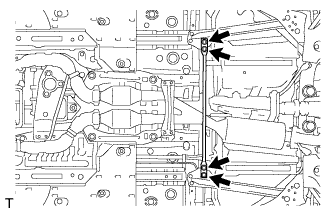
| 10. REMOVE FRONT CENTER FLOOR BRACE |
Remove the 4 bolts and front center floor brace .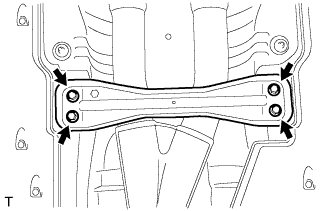
| 11. REMOVE OXYGEN SENSOR |
Remove the grommets of the heated oxygen sensors (BANK 1, BANK 2).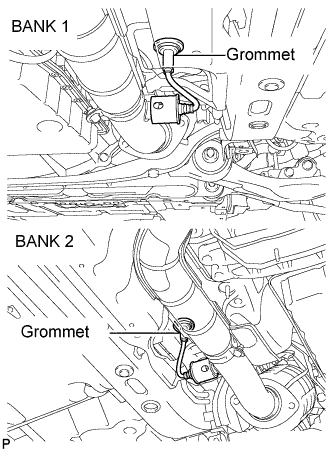
Using the SST, remove a oxygen sensors (BANK 1, BANK 2).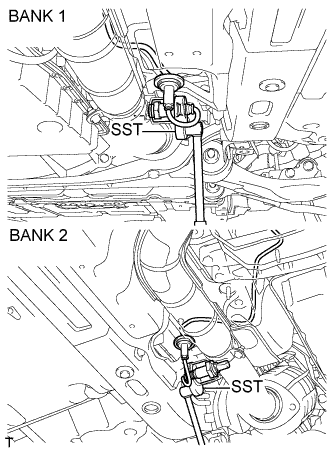
- SST
- 09224-00010
| 12. REMOVE FRONT EXHAUST PIPE ASSEMBLY |
Remove the 4 bolts and 4 nuts.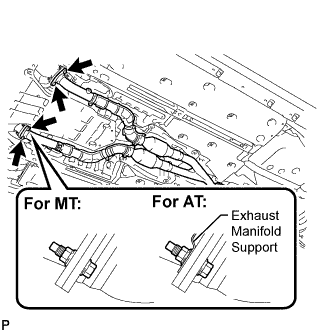
Remove the 2 bolts and 2 compression springs from the tail exhaust pipe assembly.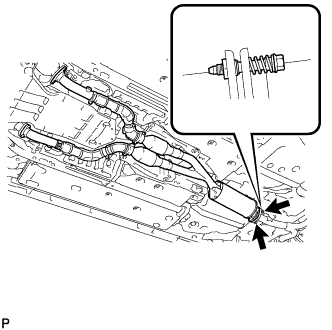
Remove the front exhaust pipe assembly and 3 gaskets.
| 13. REMOVE FRONT FLOOR NO. 1 HEAT INSULATOR |
Remove the 4 nuts and front No. 1 floor heat insulator.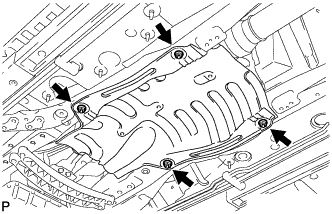
| 14. REMOVE FLOOR SHIFT GEAR SHIFTING ROD SUB-ASSEMBLY |
Remove the nut and separate the floor shift gear shifting rod sub-assembly.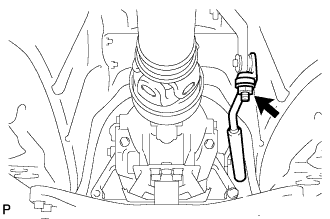
| 15. REMOVE TRANSMISSION FLOOR SHIFT ASSEMBLY |
Disconnect the 2 connectors.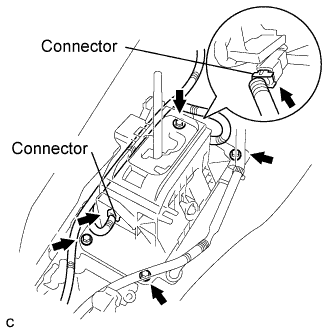
Remove the 4 bolts.
Remove the floor shift assembly.