INSTALLATION
Removal / installation
| 1. INSTALL YAW RATE AND ACCELERATION SENSOR |

Install the yaw rate and acceleration sensor with the 2 bolts.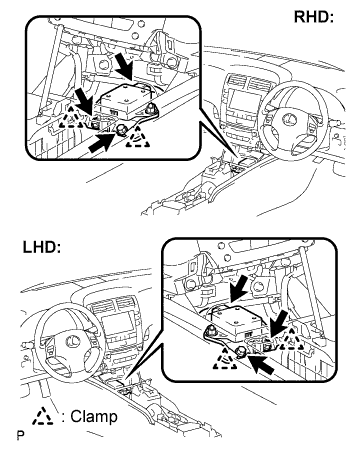

- Torque:
- 15 N*m{ 153 kgf*cm , 11 ft.*lbf }
- NOTICE:
- Do not damage the yaw rate and acceleration sensor.
- Make sure that the yaw rate and acceleration sensor is installed securely.
- Do not damage the yaw rate and acceleration sensor.
Install the 2 wire harness clamps.
Connect the yaw rate and acceleration sensor connector.
| 2. INSTALL NO. 2 REAR AIR DUCT (for Automatic Transmission) |
Install the No. 2 console box duct with the 2 clips.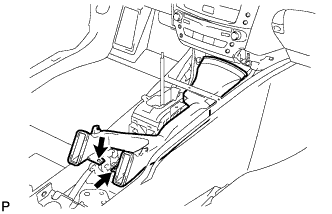
| 3. INSTALL NO. 2 REAR AIR DUCT (for Manual Transmission) |
Install the No. 2 console box duct with the clip.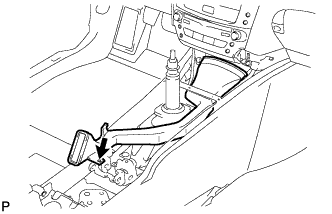
| 4. INSTALL CONSOLE BOX |
Engage the 2 claws and 2 clips.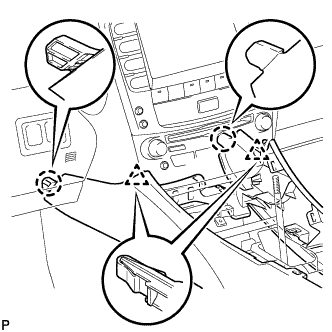
Install the 2 bolts <C>.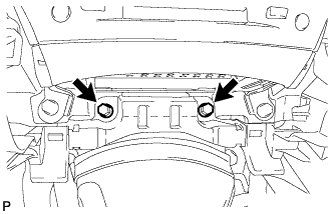
Install the 2 bolts <C>.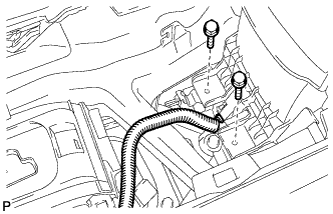
Connect the connector.
Connect the connectors.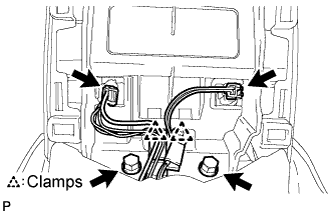
Engage the 2 clamps.
Install the 2 bolts <C>.
| 5. INSTALL CONSOLE BOX REGISTER ASSEMBLY |
Engage the 2 claws and 4 clips, and then install the console box register assembly.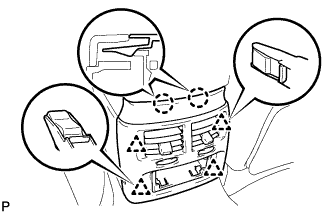
Install the rear ash receptacle assembly.
| 6. INSTALL FRONT ASH RECEPTACLE SUB-ASSEMBLY |
Connect the connectors.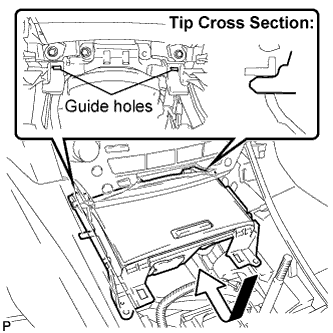
Insert the protruding parts of the front ash receptacle sub-assembly into the 2 guide holes as shown in the illustration.
Install the front ash receptacle sub-assembly with the 2 screws <F>.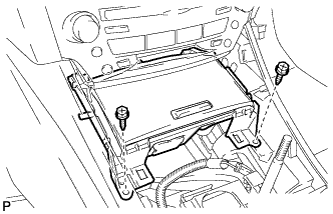
| 7. INSTALL REAR CONSOLE PANEL SUB-ASSEMBLY (for Manual Transmission) |
Engage the 7 claws and 2 clips.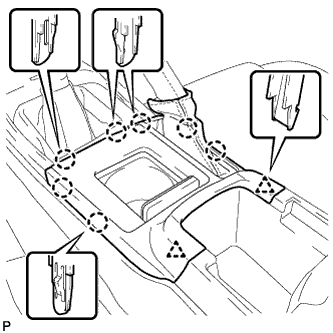
Close the snap.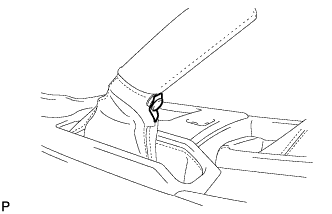
| 8. INSTALL FRONT CONSOLE PANEL SUB-ASSEMBLY (for Manual Transmission) |
Engage the 6 clips.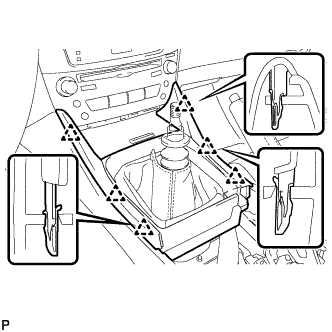
Close the snap.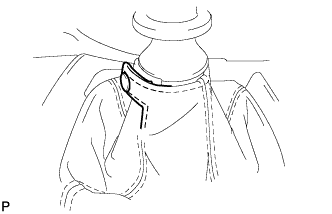
| 9. INSTALL CONSOLE PANEL SUB-ASSEMBLY (for Automatic Transmission) |
Connect the connectors.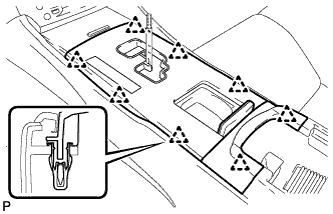
Engage the 8 clips and install the console panel sub-assembly.
| 10. INSTALL SHIFT LEVER KNOB SUB-ASSEMBLY (for Automatic Transmission) |
Turn the shift knob clockwise and install the shift lever knob sub-assembly.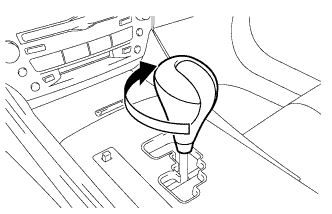
| 11. INSTALL SHIFT LEVER KNOB SUB-ASSEMBLY (for Manual Transmission) |
Turn the shift knob clockwise and install the shift lever knob sub-assembly.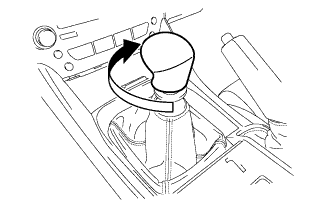
| 12. INSTALL NO. 1 UPPER CONSOLE PANEL GARNISH (for Automatic Transmission) |
Engage the claw and 2 clips, and then install the upper No. 1 console panel garnish.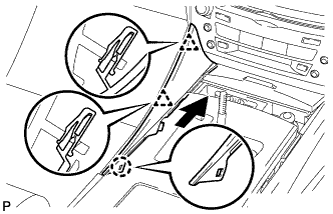
| 13. INSTALL NO. 2 UPPER CONSOLE PANEL GARNISH (for Automatic Transmission) |
Engage the claw and 2 clips, and then install the upper No. 2 console panel garnish.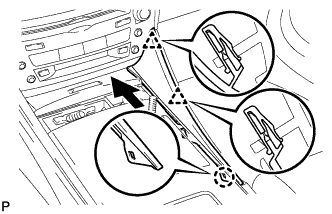
| 14. PERFORM YAW RATE SENSOR ZERO POINT CALIBRATION |
- HINT:
- (Click here).
| 15. INSPECT SENSOR SIGNAL |
- HINT:
- (Click here).