DISASSEMBLY
Removal / installation
| 1. ASSEMBLE SST |

- SST
- 09230-01010
Install the claw to the overhaul handle, inserting it in the hole in part A as shown in the illustration.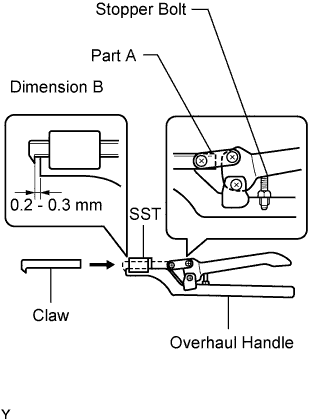

While gripping the handle, adjust the stopper bolt so that dimension B is as shown in the illustration.
- NOTICE:
- If this adjustment is not performed, the claw will be damaged.
- Dimension B:
- 0.2 to 0.3 mm (0.008 to 0.012 in.)
| 2. UNCAULK LOCK PLATE |
- SST
- 09230-01010
(09231-01010, 09231-01030)
Using SST to release the caulking, grip the handle until it is stopped by the stopper bolt.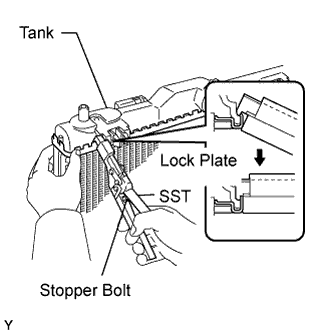
| 3. REMOVE RADIATOR UPPER TANK AND LOWER TANK |
Lightly tap the bracket of the radiator (or radiator hose inlet or outlet) with a plastic hammer and remove the tank.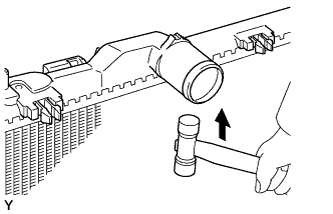
Remove the O-ring.
| 4. INSPECT LOCK PLATE FOR DAMAGE |
-
Inspect the lock plate for damage.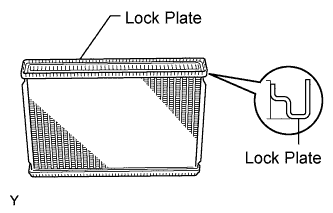
- HINT:
- If the sides of the lock plate groove are deformed, reassembly of the tank will be impossible. Correct any deformations with pliers.
- If the sides of the lock plate groove are deformed, reassembly of the tank will be impossible. Correct any deformations with pliers.
- Water leakage will result if the bottom of the lock plate groove is damaged or dented. Repair or replace if necessary.
- Water leakage will result if the bottom of the lock plate groove is damaged or dented. Repair or replace if necessary.
- NOTICE:
- The radiator assembly can be recaulked only twice. After the 2nd time, the radiator core must be replaced.