ADJUSTMENT
Removal / installation
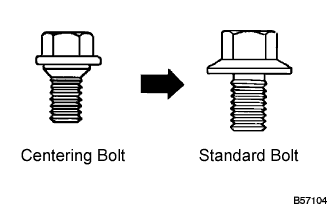

- HINT:
- Before adjusting the door position for vehicles equipped with side airbags and curtain shield airbags, be sure to disconnect the battery. After adjustment, inspect the SRS warning light, the side airbag system, and the curtain shield airbag system for normal operation. Then initialize both airbag systems.
- Use the same procedures for the RH side and LH side.
- The procedures listed below are for the LH side.
- Centering bolts are used to mount the door hinge to the vehicle body and door. The door cannot be adjusted with the centering bolts on. Substitute the centering bolts with standard bolts (with washers) when making adjustment.
- A bolt without a torque specification is shown in the standard bolt chart (Click here).
- Before adjusting the door position for vehicles equipped with side airbags and curtain shield airbags, be sure to disconnect the battery. After adjustment, inspect the SRS warning light, the side airbag system, and the curtain shield airbag system for normal operation. Then initialize both airbag systems.
| 1. DISCONNECT CABLE FROM NEGATIVE BATTERY TERMINAL |

- CAUTION:
- Wait for 90 seconds after disconnecting the cable to prevent airbag deployment (Click here).
| 2. ADJUST FRONT DOOR |
Using the clip remover, disengage the 4 clips and remove the front fender side panel protector.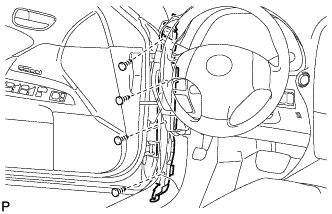
Using SST, loosen the body's hinge bolts and adjust the door position.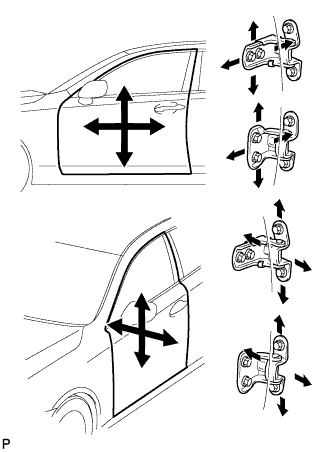
- SST
- 09812-00010
Tighten the body's hinge bolts after the adjustment.
- Torque:
- 26 N*m{ 265 kgf*cm , 19 ft.*lbf }
Loosen the door's hinge bolts and adjust the door position.
Tighten the door's hinge bolts after the adjustment.
- Torque:
- 43 N*m{ 439 kgf*cm , 32 ft.*lbf }
Using a screwdriver, detach the 4 claws and remove the cover.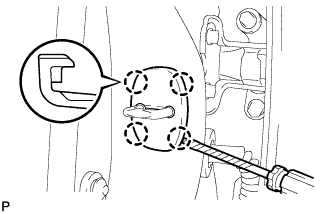
- HINT:
- Tape the screwdriver tip before use.
Using a "torx" socket wrench (T40), adjust the striker position by slightly loosening the striker mounting screws and hitting the striker with a plastic hammer.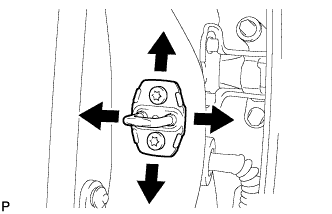
Using a "torx" socket wrench (T40), tighten the striker mounting screws after the adjustment.
- Torque:
- 23 N*m{ 235 kgf*cm , 17 ft.*lbf }
| 3. CONNECT CABLE TO NEGATIVE BATTERY TERMINAL |
| 4. PERFORM INITIALIZATION |
- NOTICE:
- Some systems need initialization after reconnecting the cable to the negative battery terminal (Click here).
| 5. INSPECT SRS WARNING LIGHT |