REMOVAL
Removal / installation
| 1. REMOVE COOL AIR INTAKE DUCT SEAL |

Remove the 11 clips and intake duct seal.

| 2. REMOVE ENGINE ROOM SIDE COVER LH |
Remove the 5 clips and side cover.
| 3. REMOVE ENGINE ROOM SIDE COVER RH |
Remove the 2 clips and side cover.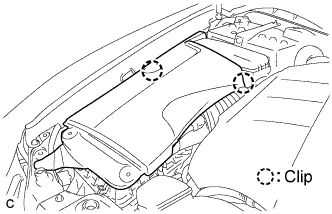
| 4. REMOVE FRONT UPPER FENDER PROTECTOR LH |
Using a clip remover, separate the clip on the rubber portion of the cowl top ventilator louver sub-assembly from the front upper fender protector LH.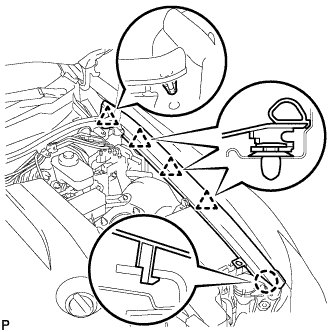
Disengage the 3 clips and the claw to remove the front fender protector upper LH.
| 5. REMOVE FRONT UPPER FENDER PROTECTOR RH |
- HINT:
- Use the same procedures for the RH side and the LH side.
| 6. REMOVE ROOF DRIP SIDE FINISH MOULDING LH |
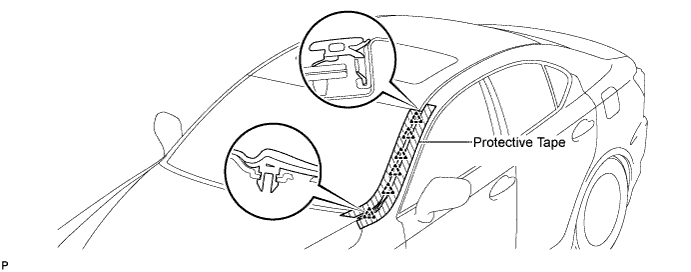
Put protective tape around the roof drip side finish moulding.
Using a moulding remover, disengage the 6 clips and remove the roof drip side finish moulding.
- NOTICE:
- Do not remove the clips.
- If the clips are damaged or fall off, replace them with new clips.
- Do not remove the clips.
| 7. REMOVE ROOF DRIP SIDE FINISH MOULDING RH |
- HINT:
- Use the same procedures for the RH side and the LH side.
| 8. REMOVE FRONT WIPER ARM HEAD CAP |
Using a screwdriver, remove the front wiper arm head cap.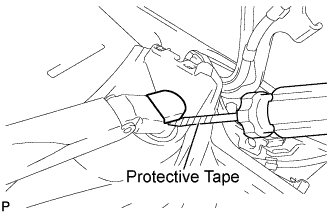
- HINT:
- Use the same procedures for the RH side and the LH side.
- Tape the screwdriver tip before use.
- Use the same procedures for the RH side and the LH side.
| 9. REMOVE FRONT WIPER ARM AND BLADE ASSEMBLY LH |
Remove the nut and the front wiper arm and blade assembly LH.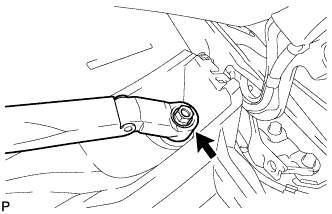
| 10. REMOVE FRONT WIPER ARM AND BLADE ASSEMBLY RH |
Remove the nut and the front wiper arm and blade assembly RH.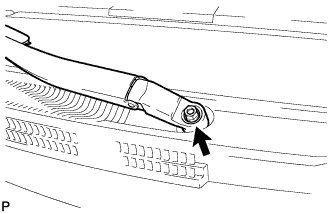
| 11. REMOVE COWL TOP VENTILATOR LOUVER SUB-ASSEMBLY |
Remove the 2 clips.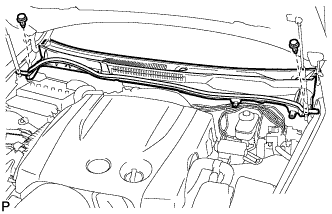
Disengage the 11 claws, and pull out the cowl top ventilator louver sub-assembly.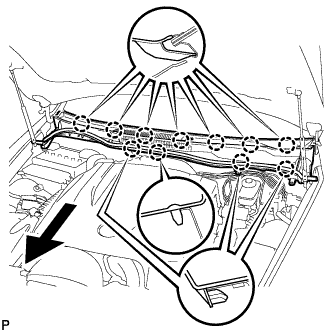
| 12. REMOVE WINDSHIELD WIPER MOTOR AND LINK ASSEMBLY |
Disconnect the 2 connectors.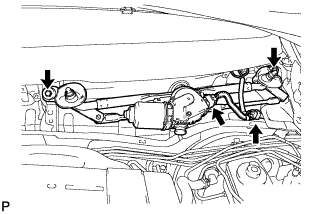
Remove the 2 bolts.
Disengage the rubber pin of the windshield wiper motor from the vehicle body as shown in the illustration. Remove the windshield wiper motor and link assembly.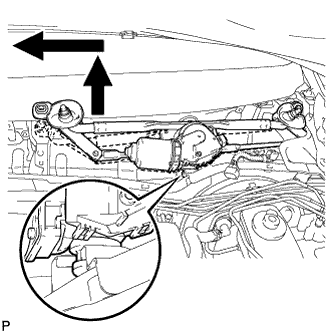
| 13. REMOVE WINDSHIELD WIPER MOTOR ASSEMBLY |
Using a screwdriver, separate the windshield wiper No. 2 link rod from the crank arm pivot of the front wiper motor assembly as shown in the illustration.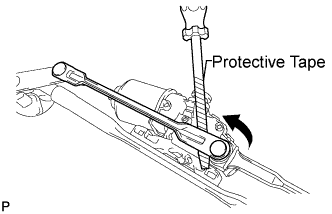
- HINT:
- Tape the screwdriver tip before use.
Using a screwdriver, separate the windshield wiper No. 1 link rod from the pivot of the front wiper link assembly as shown in the illustration.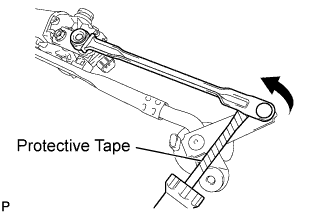
- HINT:
- Tape the screwdriver tip before use.
Position the windshield wiper No. 1 link rod as shown in the illustration. Using a screwdriver, remove the windshield wiper No. 1 link rod.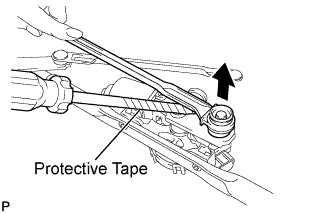
- HINT:
- Tape the screwdriver tip before use.
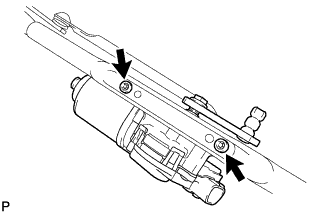
Using a "torx" socket wrench (T30), remove the 2 bolts and the windshield wiper motor assembly from the wind shield wiper link assembly.