REMOVAL
Removal / installation
| 1. REMOVE COOL AIR INTAKE DUCT SEAL |

Remove the 11 clips and intake duct seal.

| 2. REMOVE ENGINE ROOM SIDE COVER LH |
Remove the 5 clips and side cover.
| 3. REMOVE FRONT UPPER FENDER PROTECTOR LH |
Using a clip remover, separate the clip on the rubber portion of the cowl top ventilator louver sub-assembly from the front upper fender protector LH.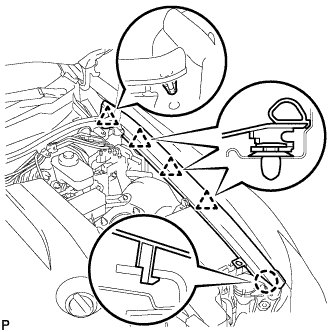
Disengage the 3 clips and the claw to remove the front fender protector upper LH.
| 4. REMOVE FRONT BUMPER ASSEMBLY |
Using a screwdriver, turn the pin 90 degrees and remove the 2 pin hold clips.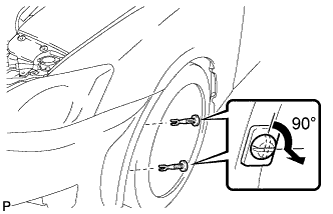
- HINT:
- Tape the screwdriver tip before use.
- Use the same procedures for the RH side and LH side.
- Tape the screwdriver tip before use.
Put protective tape around the front bumper assembly.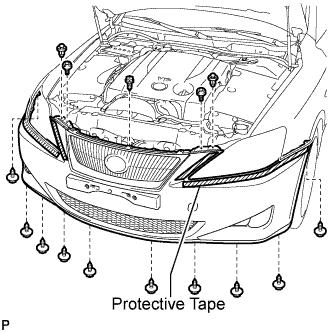
Using a clip remover, remove the 2 clips
Remove the 2 radiator grille protectors.
Remove the bolt and 10 screws.
Disengage the 5 claws and disconnect the front bumper assembly as shown in the illustration.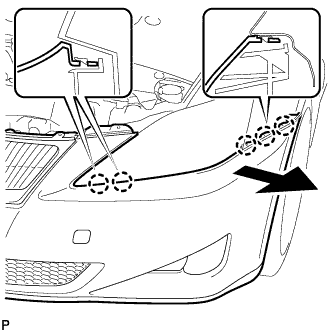
- HINT:
- Use the same procedures for the RH side and LH side.
Disconnect the headlight washer hose. (w/ headlight cleaner system)
Disconnect the connector and remove the front bumper assembly.
| 5. REMOVE HEADLIGHT ASSEMBLY LH |
Disconnect the connector as shown in the illustration.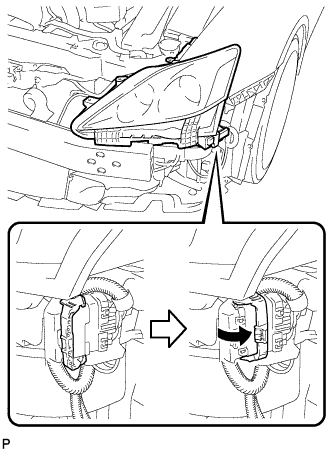
Remove the 3 bolts.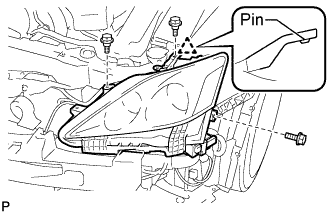
Disengage the headlight bracket pin and remove the headlight assembly.
| 6. REMOVE NO. 3 COOL AIR INTAKE DUCT SUB-ASSEMBLY |
Remove the 3 front fender liner LH screws.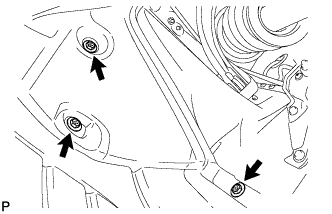
Disengage the engine under cover clip.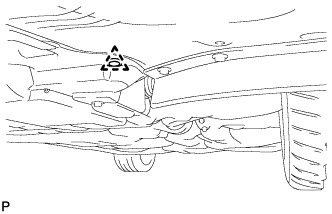
Remove the 2 bolts, the screw, and the No. 3 air intake duct sub-assembly.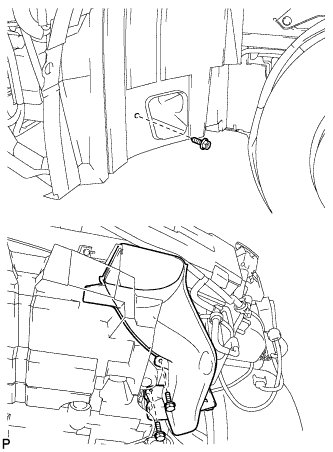
| 7. DRAIN WASHER FLUID |
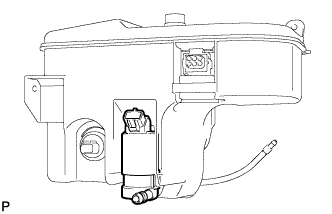
Remove the washer hose from the windshield washer motor and pump assembly, and drain the washer fluid.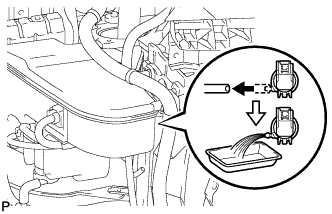
| 8. REMOVE WINDSHIELD WASHER JAR AND PUMP ASSEMBLY (w/o Headlight Cleaner System) |
Disconnect the 2 connectors.
Remove the bolt.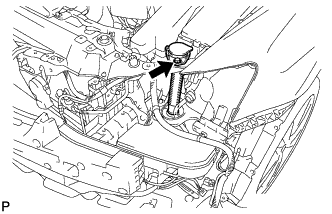
Pull the upper part of the washer jar and pump upward to remove it from the windshield washer jar and pump assembly.
Remove the 3 bolts and the windshield washer jar and pump assembly.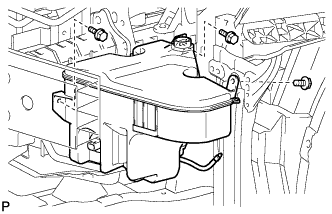
| 9. REMOVE WINDSHIELD WASHER JAR AND PUMP ASSEMBLY (w/ Headlight Cleaner System) |
Disconnect the 4 connectors.
Loosen the clip and disconnect the headlight cleaner hose.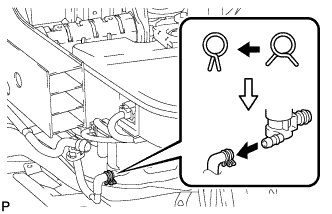
Remove the bolt.
Pull the upper part of the washer jar and pump upward to remove it from the windshield washer jar and pump assembly.
Remove the 3 bolts and the windshield washer jar and pump assembly.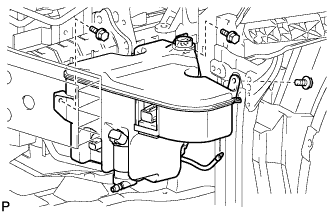
| 10. REMOVE WINDSHIELD WASHER MOTOR AND PUMP ASSEMBLY |
Remove the windshield washer motor and pump assembly.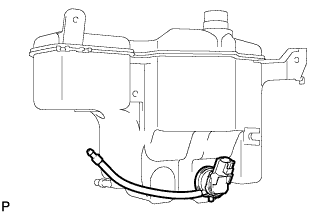
| 11. REMOVE HEADLIGHT CLEANER MOTOR AND PUMP ASSEMBLY (w/ Headlight Cleaner System) |
Remove the headlight cleaner motor and pump assembly.