INSTALLATION
Removal / installation
| 1. INSTALL FRONT DOOR LOCK ASSEMBLY |

- NOTICE:
- When reusing the removed front door lock assembly, replace the door lock wire harness seal on the connector with a new one.
- Do not allow grease or dust to adhere on the door lock wiring harness seal surface of the connector.
- Reusing the door lock wiring harness sealing and/ or using damaged door lock wiring harness seal may cause water intrusion to the connection, and result in a malfunction in the front door lock assembly.
- When reusing the removed front door lock assembly, replace the door lock wire harness seal on the connector with a new one.
Install the front door inside locking cable assembly.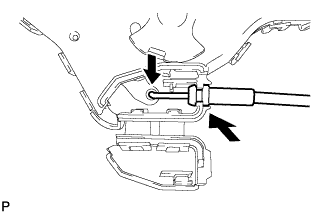

Engage the 3 claws.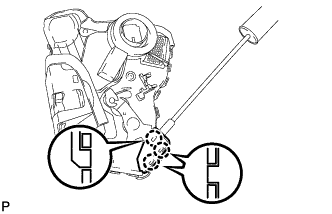
Install the front door lock remote control cable assembly.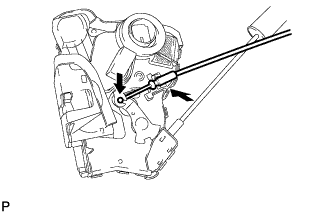
Apply MP grease to the sliding parts on the front door lock assembly.
Install a new door lock wiring harness seal to front door lock assembly.
Insert the front door lock open rod to the front door lock assembly, and set it to the front door outside handle frame.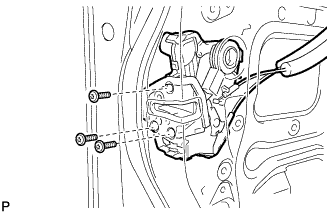
Make sure that the front door outside handle link is securely connected to the front door lock assembly.
Using a "torx" socket wrench (T30), install the front door lock assembly with the 3 screws.
- Torque:
- 5.5 N*m{ 56 kgf*cm , 49 in.*lbf }
Connect the connector.
| 2. INSTALL FRONT NO. 1 DOOR STIFFENER CUSHION |
Install a new front No. 1 door stiffener cushion with the 2 bolts and double-sided tape.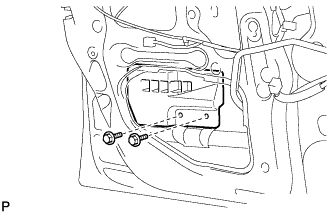
| 3. INSTALL FRONT DOOR WINDOW REGULATOR SUB-ASSEMBLY |
Apply MP grease to the sliding parts on the front door window regulator sub-assembly.
Install the temporary bolt to the front door window regulator sub-assembly.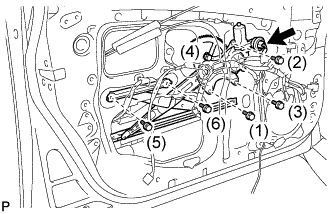
Temporarily install the window regulator.
Tighten the 6 bolts in the order shown in the illustration to install the front window regulator.
- Torque:
- 11 N*m{ 112 kgf*cm , 8.1 ft.*lbf }
Connect the connector.
| 4. INSTALL FRONT DOOR OUTSIDE HANDLE COVER |
Install the front door lock cylinder.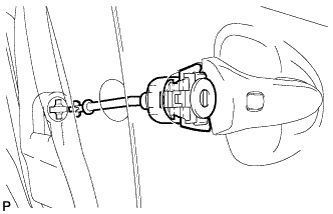
- HINT:
- Make sure that the front door lock cylinder rod is inserted into the front door lock assembly.
Using a "torx" socket wrench (T30), install the front door lock cylinder with the screw.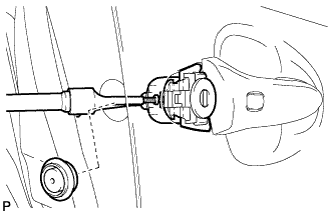
Install the hole plug.
Engage the 2 claws of the front door outside handle cover to the front door lock cylinder to install the cover.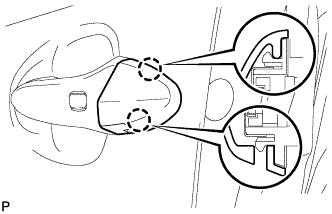
| 5. INSTALL FRONT DOOR REAR LOWER FRAME SUB-ASSEMBLY |
Install the front door rear lower frame sub-assembly with the bolt.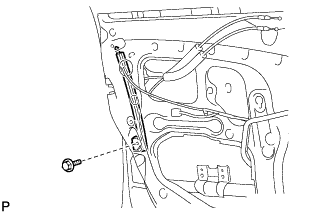
| 6. INSTALL FRONT DOOR GLASS SUB-ASSEMBLY |
Insert the front door glass sub-assembly into the front door panel along the front door glass run as indicated by the arrows in the illustration.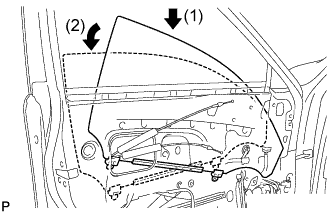
Install the front door glass sub-assembly with the 2 bolts.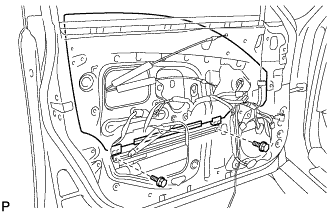
- Torque:
- 5.5 N*m{ 56 kgf*cm , 49 in.*lbf }
Install the hole plug.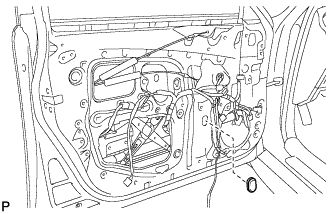
| 7. INSTALL FRONT DOOR SERVICE HOLE COVER |
Apply butyl tape to the front door panel.
Pass the front door lock remote control cable and rear door inside locking cable through a new front door service hole cover.
Install the service hole cover.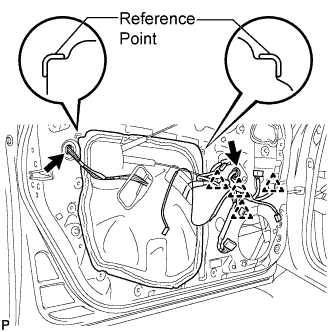
- NOTICE:
- Securely install the front door service hole cover avoiding wrinkles and air bubbles.
Connect each connector and each clamp.
| 8. INSTALL FRONT DOOR TRIM COVER |
Engage the 6 clips to install the front door trim cover.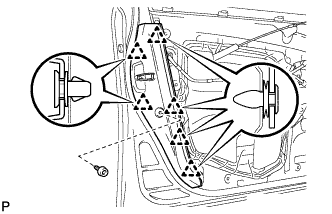
Install the screw.
| 9. INSTALL FRONT DOOR TRIM BOARD SUB-ASSEMBLY |
Connect the rear door lock remote control cable and rear door inside locking cable to the front inside handle.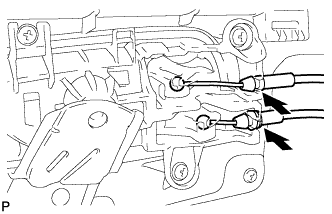
Connect each connector.
Engage the front door trim board with the 4 clips of the front door inner glass weatherstrip.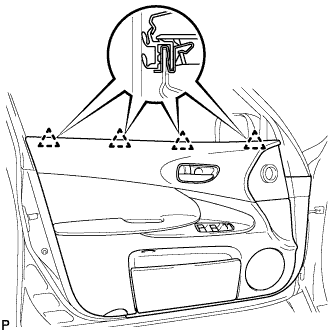
Engage the 9 clips and install the front door trim board to the front door panel.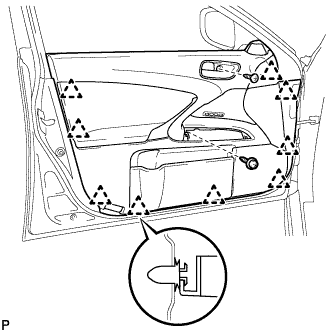
Install the 2 screws.
| 10. INSTALL COURTESY LIGHT ASSEMBLY |
Connect the connector.
Engage the claw and install the courtesy light assembly.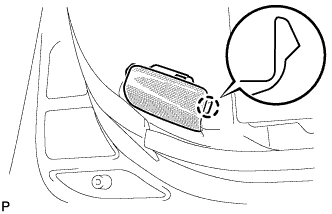
| 11. INSTALL POWER WINDOW REGULATOR MASTER SWITCH ASSEMBLY |
Connect each connector.
Engage the 4 claws and 2 clips, and install the power window regulator master switch assembly.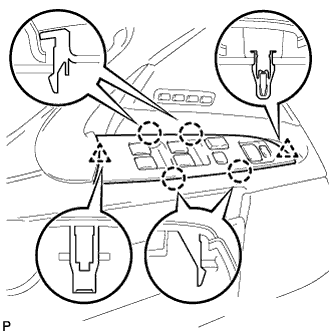
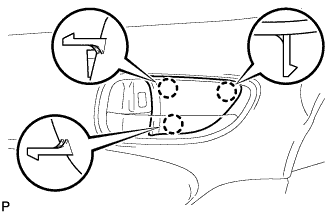
| 12. INSTALL FRONT DOOR INSIDE HANDLE BEZEL PLUG |
Engage the 3 claws and install the front door inside handle bezel plug.