REMOVAL
Removal / installation
| 1. REMOVE FRONT DOOR INSIDE HANDLE BEZEL PLUG |

Using a screwdriver wrapped with protective tape, disengage the 3 claws, and remove the front door inside handle bezel plug.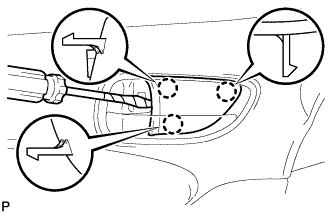

| 2. REMOVE POWER WINDOW REGULATOR MASTER SWITCH ASSEMBLY |
Using a screwdriver wrapped with protective tape, disengage the 4 claws and the 2 clips.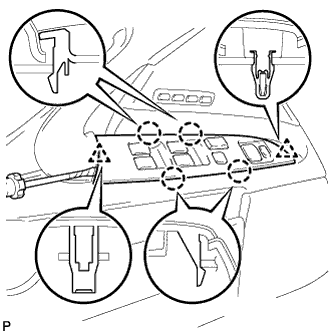
Disconnect the connector and remove the power window regulator master switch assembly.
| 3. REMOVE COURTESY LIGHT ASSEMBLY |
Disengage the claw and remove the courtesy light assembly.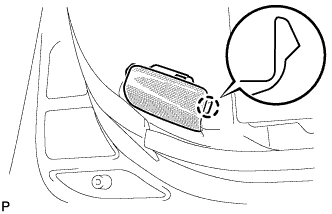
Disconnect the connector.
| 4. REMOVE FRONT DOOR TRIM BOARD SUB-ASSEMBLY |
Remove the 2 screws.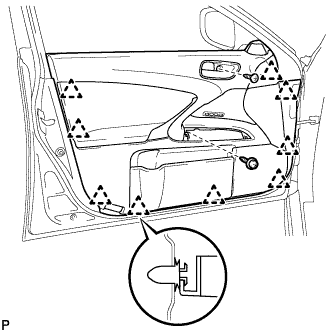
Using the clip remover, disengage the 9 clips.
Pull out the front door trim board in the direction indicated by the arrow.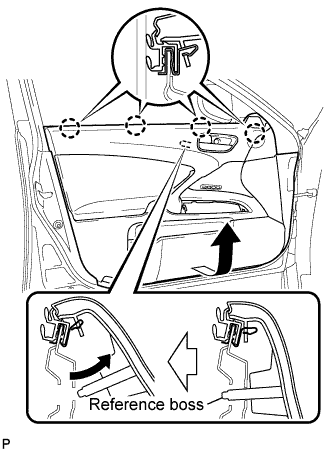
Remove the reference bosses from the front door panel.
Raise the front door trim board to disengage the 4 claws and remove the front door trim board together with the front door inner glass weatherstrip.
Disconnect the cables and each connector from the back side of the inside handle and remove the front door trim board sub-assembly.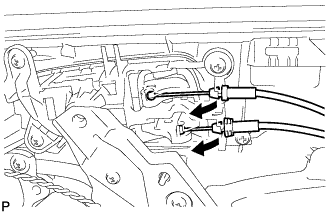
Remove the 2 front door trim board retainers (green) from the front door trim board.
| 5. REMOVE FRONT DOOR INNER GLASS WEATHERSTRIP |
Disengage the 4 clips as shown in the illustration and remove the front door inner glass weatherstrip from the front door trim board.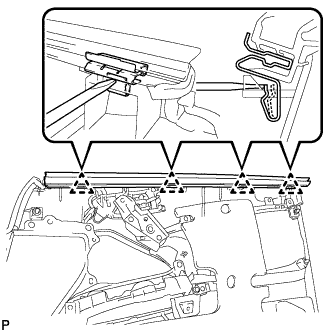
| 6. REMOVE FRONT DOOR FRAME COVER |
Remove the nut and front door frame cover.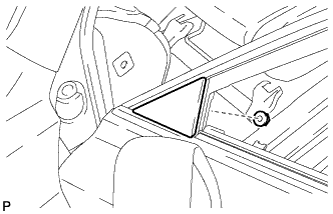
| 7. REMOVE FRONT DOOR BELT MOULDING ASSEMBLY |
Fully open the front door glass.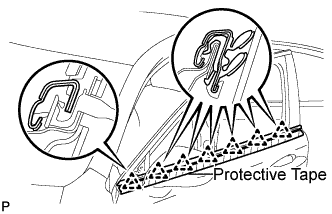
Put protective tape on the door below the front door belt moulding assembly.
Using a moulding remover, disengage the 7 clips and remove the front door belt moulding assembly.
| 8. REMOVE FRONT DOOR TRIM COVER |
Remove the screw.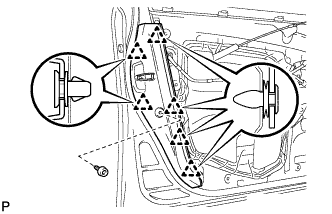
Using the clip remover, disengage the 6 clips and remove the front door trim cover.
| 9. REMOVE DOOR FRAME GARNISH |
Using the clip remover, remove the 2 clips and the door frame garnish.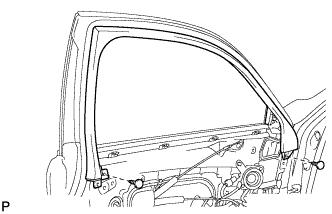
| 10. REMOVE FRONT DOOR WEATHERSTRIP |
Using the clip remover, disengage the 21 clips and remove the front door weatherstrip.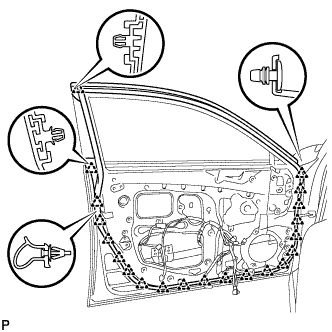
| 11. REMOVE FRONT DOOR REAR WINDOW FRAME MOULDING |
- HINT:
- When installing the front door rear window frame moulding, heat the vehicle body and front door rear window frame moulding using a heat light.
| Item |
Temperature |
| Vehicle Body |
40 to 60°C (104 to 140°F) |
| Moulding |
20 to 30°C (68 to 86°F) |
- NOTICE:
- Do not heat the vehicle body and moulding excessively.
Fully open the front door glass.
Using a heat light, heat the front door rear window frame moulding.
Using a moulding remover, remove the clip and front door rear window frame moulding.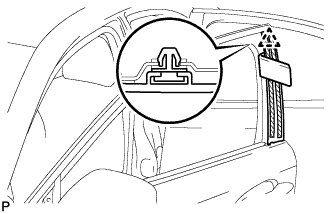
| 12. REMOVE FRONT DOOR UPPER WINDOW FRAME MOULDING |
Put a 4 mm (0.16 in.) drill bit into a drill.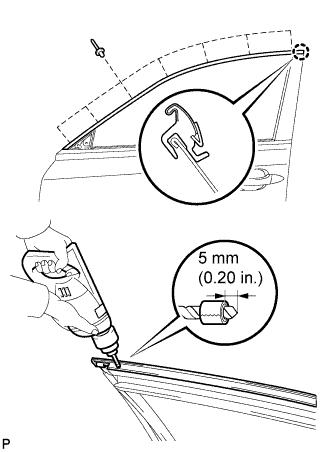
Tape the 4 mm (0.16 in.) drill bit without the portion of 5 mm (0.20 in.) from the tip covered.
- HINT:
- Tape the 4 mm (0.16 in.) drill bit to prevent the drill bit from going too deep.
Lightly press the drill against the rivets, drill off the flanges of the rivets, and remove the 7 rivets.
- NOTICE:
- Pressing the drill too firmly will cause the rivet to turn and result in the rivet not being drilled through.
- Do not pry the rivets with the drill, because this may cause damage to the installation holes of the rivets or the drill bit.
- Be careful of the drilled rivets as they may become hot.
- Pressing the drill too firmly will cause the rivet to turn and result in the rivet not being drilled through.
Using a vacuum cleaner, remove the rivet fragments and shavings from the drilled areas.
Remove the front door upper window frame moulding from the door frame.