INSTALLATION
Removal / installation
| 1. INSTALL REAR DOOR UPPER WINDOW FRAME MOULDING |

Engage the 2 clips and install the rear door upper window frame moulding to the door frame.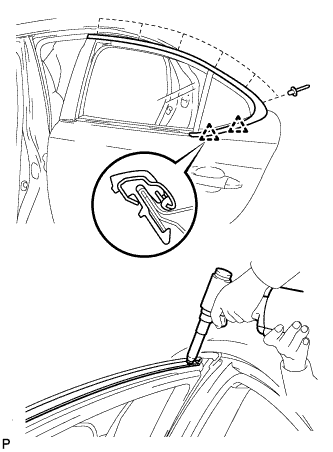

Using an air riveter or hand riveter with a nose piece, install the rear door upper window frame moulding with 6 new rivets.
- HINT:
- If the rivet cannot be cut, pull it once and cut it.
- NOTICE:
-
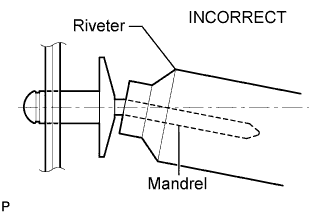
- Do not pry the rivet with the riveter, as this will cause damage to the riveter and mandrel.
-
Confirm that the rivets are seated properly against the moulding. Do not tilt the riveter when installing the rivet to the moulding. Do not leave any space between the rivet head and moulding.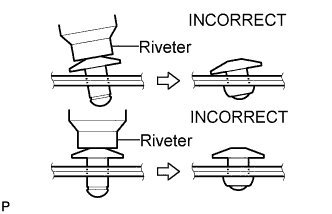
-
Do not leave any space between the moulding and door frame. Firmly hold together the 2 items while installing the rivet.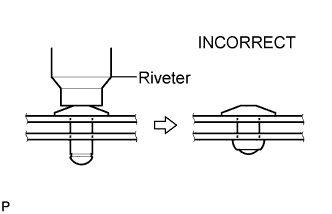
- Do not pry the rivet with the riveter, as this will cause damage to the riveter and mandrel.
| 2. INSTALL REAR DOOR WEATHERSTRIP |
Engage the 23 clips and install a new rear door weatherstrip.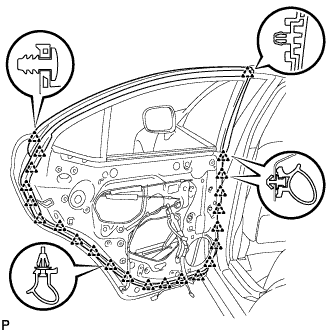
| 3. INSTALL REAR DOOR FRAME GARNISH |
Install the door frame garnish with the 2 clips.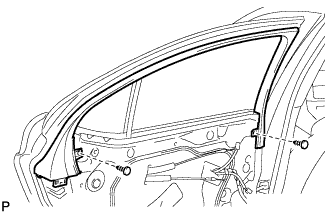
| 4. INSTALL REAR DOOR TRIM COVER |
Engage the 5 clips to install the rear door trim cover.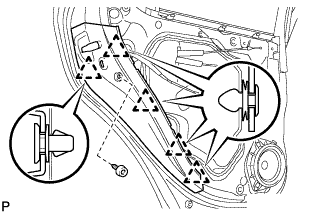
Install the screw.
| 5. INSTALL REAR DOOR INNER GLASS WEATHERSTRIP |
Engage the 3 claws to install the rear door inner glass weatherstrip.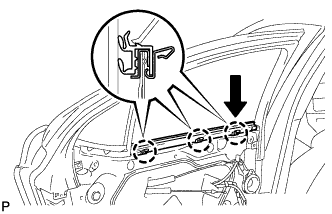
| 6. INSTALL REAR DOOR TRIM BOARD SUB-ASSEMBLY |
Connect the rear door lock remote control cable and rear door inside locking cable to the rear inside handle.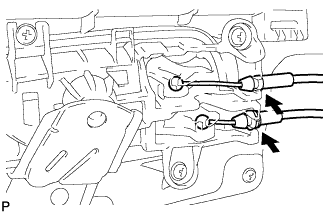
Connect each connector.
Engage the rear door trim board with the 3 clips of the rear door inner glass weatherstrip.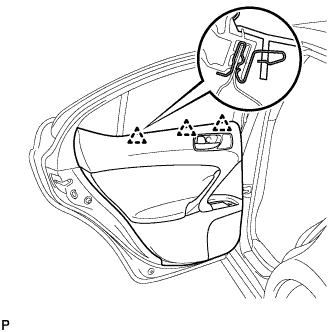
Engage the 8 clips to install the rear door trim board to the rear door panel.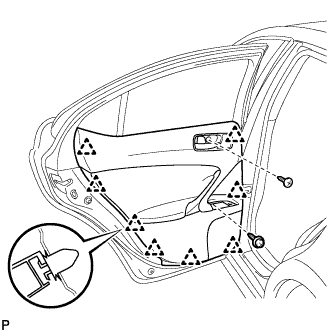
Install the 2 screws.
| 7. INSTALL REAR POWER WINDOW REGULATOR SWITCH ASSEMBLY |
Connect the connector.
Engage the 2 claws and 2 clips, and install the rear power window regulator switch assembly.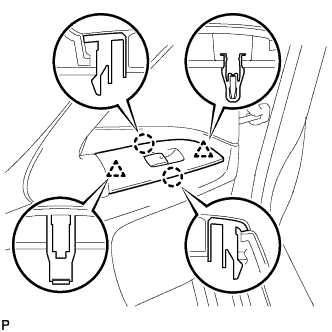
| 8. INSTALL REAR DOOR INSIDE HANDLE BEZEL PLUG |
Engage the 3 claws to install the rear door inside handle bezel plug.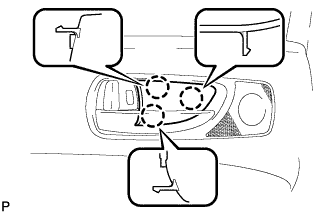
| 9. POWER WINDOW CONTROL SYSTEM INITIALIZATION |
| 10. INSTALL REAR DOOR FRONT WINDOW FRAME MOULDING |
- HINT:
- When installing the rear door front window frame moulding, heat the vehicle body and rear door front window frame moulding using a heat light.
| Item |
Temperature |
| Vehicle Body |
40 to 60°C (104 to 140°F) |
| Moulding |
20 to 30°C (68 to 86°F) |
- NOTICE:
- Do not heat the vehicle body and rear door window frame moulding front excessively.
Clean the vehicle body surface.
Using a heat light, heat the vehicle body surface.
Remove the double-sided tape from the vehicle body.
Wipe off any tape adhesive residue with cleaner.
Clean the rear door front window frame moulding. (If reusing the rear door front window frame moulding)
Using a heat light, heat the rear door front window frame moulding.
Remove the double-sided tape from the rear door front window frame moulding.
Wipe off any tape adhesive residue with cleaner.
Apply new double-sided tape to the rear door front window frame moulding.
Install the rear door front window frame moulding.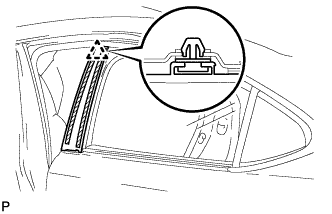
Using a heat light, heat the vehicle body and rear door front window frame moulding.
Remove the peeling paper from the face of the rear door front window frame moulding.
- HINT:
- After removing the peeling paper, keep the exposed adhesive free from foreign matter.
Install the rear door front window frame moulding with the clip.
| 11. INSTALL REAR DOOR BELT MOULDING ASSEMBLY |