INSTALLATION
Removal / installation
| 1. INSTALL SEPARATE TYPE FRONT SEAT CUSHION PAD |

Using hog ring pliers, install the separate type front seat cushion cover to the seat cushion pad with new hog rings.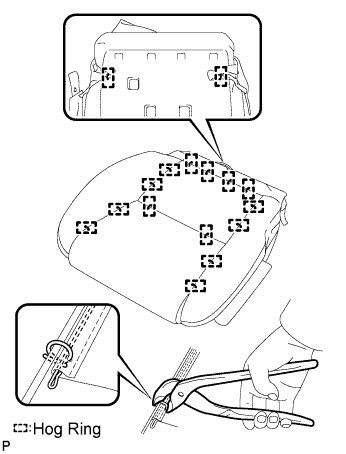

- NOTICE:
- Be careful not to damage the cover.
- When installing the hog rings, take care to minimize wrinkles as much as possible.
- Be careful not to damage the cover.
| 2. INSTALL SEPARATE TYPE FRONT SEAT CUSHION COVER WITH PAD |
Connect the hooks to install the separate type front seat cushion cover with pad.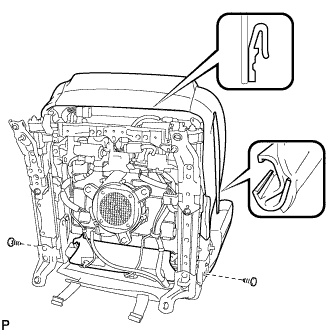
Install the 2 clips.
Engage the clamp to install the occupant detection sensor connector.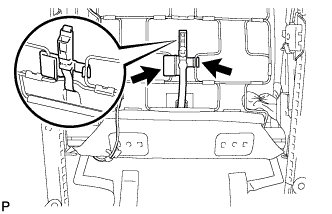
Connect the connectors and clamps.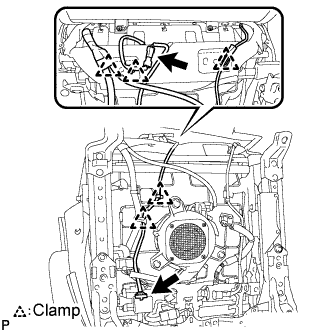
| 3. INSTALL FRONT POWER SEAT SWITCH (w/ Seat Position Memory System) |
Connect the 2 connectors.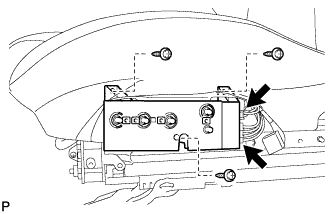
Install the switch with the 3 screws.
| 4. REMOVE FRONT POWER SEAT SWITCH (w/o Seat Position Memory System) |
Connect the connector.
Install the switch with the 3 screws.
| 5. INSTALL FRONT SEAT INNER CUSHION SHIELD |
Attach the clip and 2 claws to install the cushion shield inner.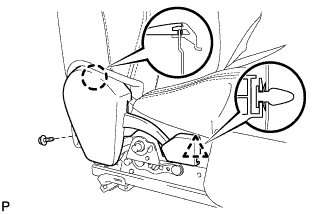
Install the screw.
| 6. INSTALL FRONT SEAT CUSHION SHIELD WITH NO. 1 CUSHION SHIELD INNER |
Connect the connector to the lumbar front power seat switch.
Attach the claw and install the cushion shield with cushion shield inner.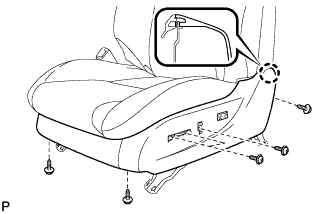
Install the 5 screws.
Install the 2 rubber bands of the front seatback board to the seat frame.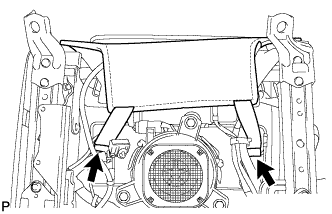
Connect the connector to the No. 1 interior illumination light.
| 7. INSTALL SLIDE AND VERTICAL POWER SEAT SWITCH KNOB |
| 8. INSTALL RECLINING POWER SEAT SWITCH KNOB |
| 9. INSTALL FRONT SEAT INNER BELT ASSEMBLY |
Install the front seat inner belt assembly with the nut.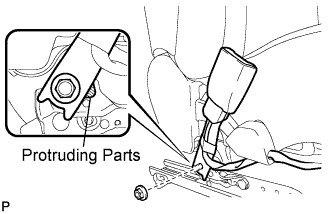
- Torque:
- 42 N*m{ 428 kgf*cm , 31 ft.*lbf }
- NOTICE:
- Do not allow the anchor part of the front seat inner belt assembly to overlap the protruding parts of the front seat adjuster.
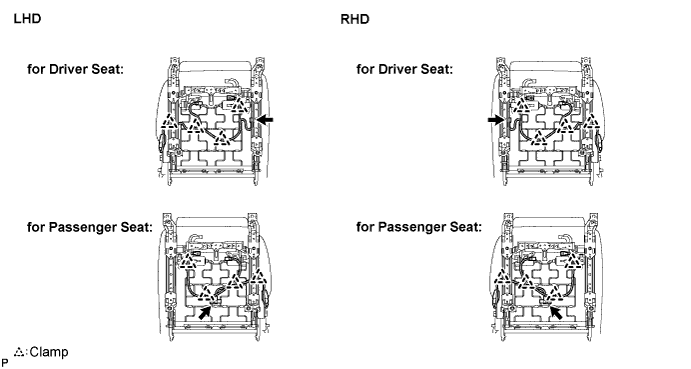
Connect the connector and attach the 4 clamps.
| 10. INSTALL FRONT SEAT ASSEMBLY |
Place the seat in the cabin.
Connect the connectors under the seat.
Connect the cable to the negative (-) battery terminal.
Operate the power seat switch knob and move the seat to the position farthest forward.
Tighten the 2 bolts on the rear seat track bracket.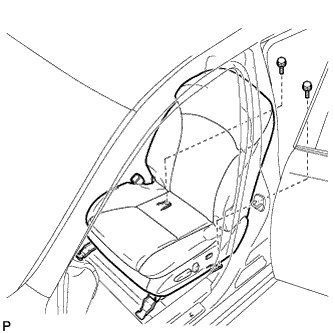
- Torque:
- 37 N*m{ 377 kgf*cm , 27 ft.*lbf }
- HINT:
- Tighten the 2 bolts in the order indicated in the illustration.
Operate the power seat switch knob and move the seat to the rearmost position.
Tighten the 2 bolts on the rear seat track bracket.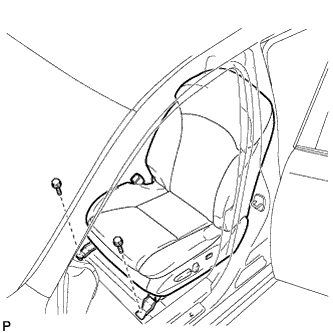
- Torque:
- 37 N*m{ 377 kgf*cm , 27 ft.*lbf }
| 11. INSTALL REAR OUTER SEAT TRACK COVER |
| 12. INSTALL REAR INNER SEAT TRACK COVER |
| 13. INSTALL FRONT OUTER SEAT TRACK BRACKET COVER |
| 14. INSTALL FRONT INNER SEAT TRACK BRACKET COVER |
| 15. INSTALL FRONT SEAT HEADREST ASSEMBLY |
| 16. PERFORM INITIALIZATION |
- HINT:
- Some systems need initialization after reconnecting the cable to the negative battery terminal. (Click here)
| 17. INSPECT SRS WARNING LIGHT |
| 18. INSPECT FRONT SEAT ASSEMBLY |