REMOVAL
Removal / installation
| 1. DISCONNECT CABLE FROM NEGATIVE BATTERY TERMINAL |

- CAUTION:
- Wait for 90 seconds after disconnecting the cable to prevent airbag deployment. (Click here)
| 2. REMOVE FRONT SEAT HEADREST ASSEMBLY |
| 3. REMOVE FRONT OUTER SEAT TRACK BRACKET COVER |
Using a screwdriver, disengage the 2 claws and remove the front outer seat track bracket cover.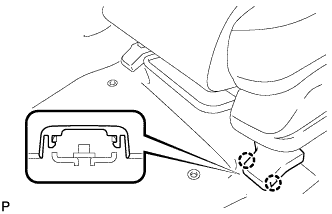

- HINT:
- Tape the screwdriver tip before use.
| 4. REMOVE FRONT INNER SEAT TRACK BRACKET COVER |
Move the front seat assembly to the rearmost position by operating the slide handle.
Using a screwdriver, disengage the 2 claws and remove the front inner seat track bracket cover.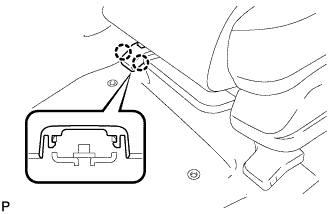
- HINT:
- Tape the screwdriver tip before use.
| 5. REMOVE REAR OUTER SEAT TRACK COVER |
Move the front seat assembly fully forward by operating the slide handle.
Using a screwdriver, disengage the 2 claws and remove the rear seat outer track bracket cover.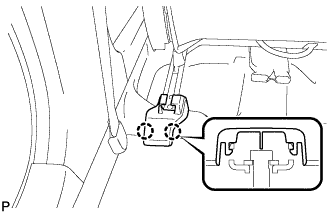
- HINT:
- Tape the screwdriver tip before use.
| 6. REMOVE REAR INNER SEAT TRACK COVER |
Using a screwdriver, disengage the 2 claws and remove the rear inner seat track bracket cover.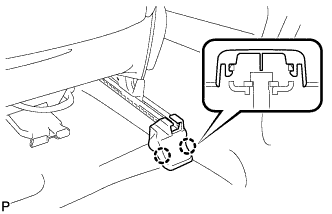
- HINT:
- Tape the screwdriver tip before use.
| 7. REMOVE FRONT SEAT ASSEMBLY |
Move the front seat assembly to the rearmost position by operating the slide handle.
Remove the 2 bolts on the front seat track bracket.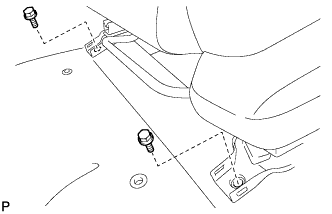
Move the front seat assembly fully forward by operating the slide handle.
Remove the 2 bolts on the rear seat track bracket.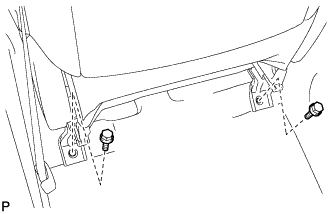
Move the front seat assembly to the center position and adjust the seatback to the vertical position by operating the slide and reclining adjuster release handle.
Disconnect the connectors and clamp.
Remove the front seat assembly.
- NOTICE:
- When removing the passenger side front seat assembly, be careful not to step on the yaw rate sensor mounted on the floor under the seat.
| 8. REMOVE FRONT SEAT INNER BELT ASSEMBLY |
Disconnect the connector and detach the 3 clamps.
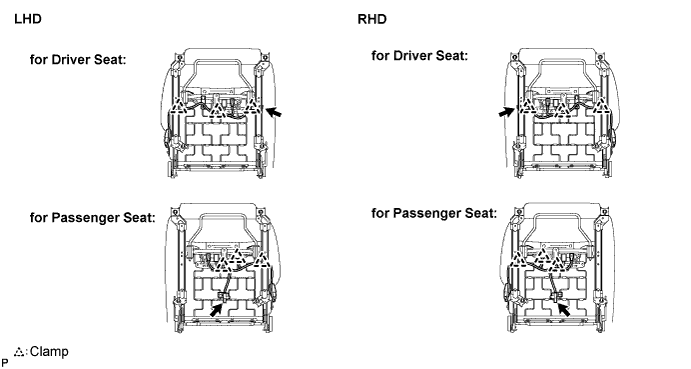
Remove the nut and front seat inner belt assembly.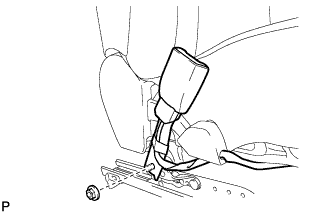
| 9. REMOVE VERTICAL SEAT ADJUSTER KNOB |
Remove the snap ring and the vertical seat adjuster knob.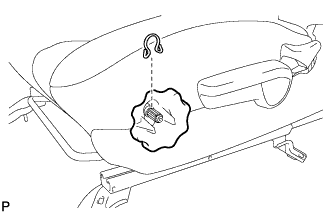
| 10. REMOVE VERTICAL ADJUSTER COVER |
Using a screwdriver, disengage the 3 claws and remove the vertical seat adjuster knob cap.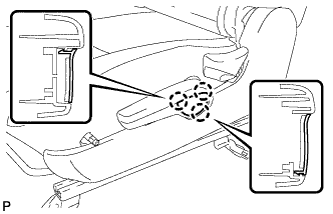
- HINT:
- Tape the screwdriver tip before use.
| 11. REMOVE VERTICAL ADJUSTING HANDLE |
Remove the 2 screws and vertical adjusting handle.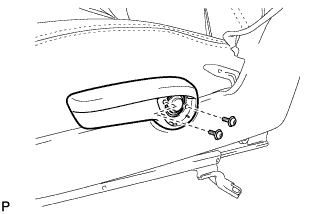
| 12. REMOVE RECLINING ADJUSTER RELEASE HANDLE |
Lift the reclining adjuster release handle.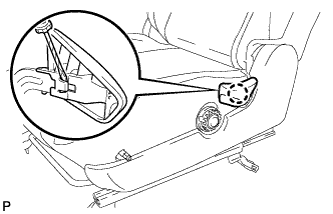
Using a screwdriver, disengage the claw and remove the reclining adjuster release handle.
- HINT:
- Tape the screwdriver tip before use.
| 13. REMOVE FRONT SEAT CUSHION SHIELD |
Remove the screw.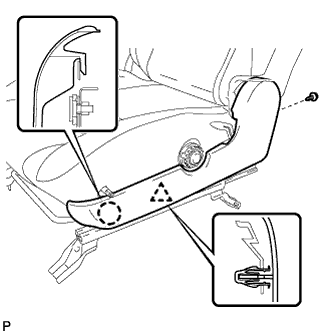
Disengage the claw and clamp and remove the seat cushion shield.
| 14. REMOVE FRONT SEAT INNER CUSHION SHIELD |
Remove the screw.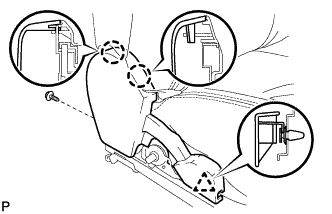
Disengage the 2 claws and clip then remove the front inner seat cushion shield.
| 15. REMOVE SEPARATE TYPE FRONT SEAT CUSHION COVER WITH PAD |
Passenger seat only: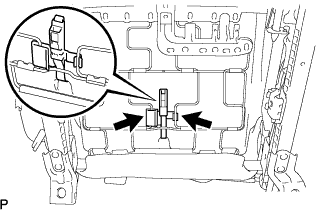
Separate the belt warning occupant detection sensor.
Disengage the 2 hooks.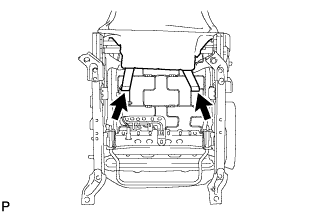
Disengage the hooks and remove the front seat cushion cover with pad.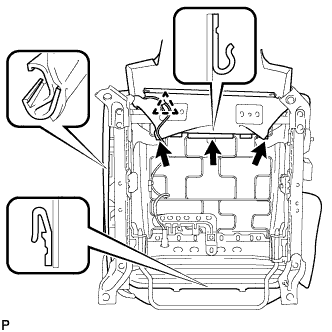
| 16. REMOVE SEPARATE TYPE FRONT SEAT CUSHION PAD |
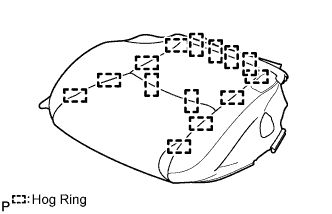
Remove the hog rings.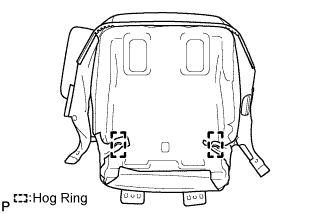
Remove the separate type front seat cushion pad.