REMOVAL
Removal / installation
| 1. REMOVE FRONT DOOR SCUFF PLATE (w/o Illumination) |

Put protective tape around the front door scuff plate.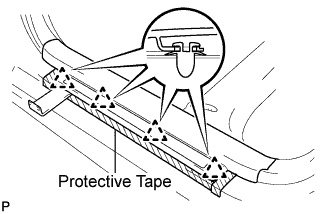

Using a moulding remover, disengage the 4 clips.
Disengage the 7 claws and remove the front door scuff plate LH.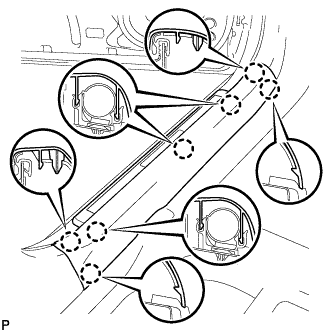
| 2. REMOVE FRONT DOOR SCUFF PLATE (w/ Illumination) |
Put protective tape around the front door scuff plate.
Using a moulding remover, disengage the 4 clips.
Disengage the 7 claws and remove the front door scuff plate LH.
Disconnect the connector.
| 3. REMOVE FRONT DOOR OPENING TRIM COVER |
Disengage the 6 claws and remove the front door opening trim cover LH.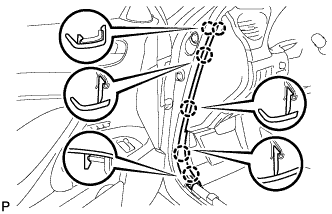
| 4. REMOVE SIDE INSTRUMENT PANEL |
Using a moulding remover, disengage the 5 claws and 3 clips, and then remove the side instrument panel LH.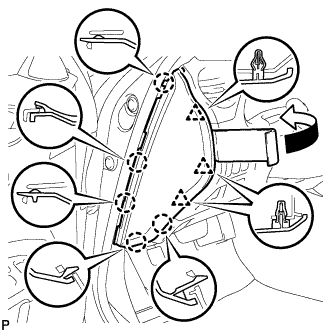
| 5. REMOVE NO. 2 INSTRUMENT PANEL UNDER COVER SUB-ASSEMBLY |
Using a moulding remover, disengage the 4 clips and remove the No. 2 instrument panel under cover sub-assembly.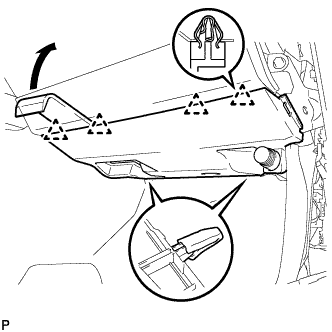
| 6. REMOVE FRONT PASSENGER SIDE KNEE AIRBAG ASSEMBLY |
| 7. REMOVE GLOVE COMPARTMENT DOOR ASSEMBLY |
Remove the 5 screws <E>.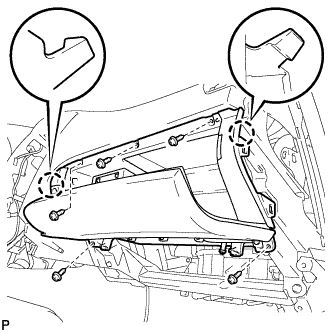
Disengage the 2 claws.
Disconnect the connectors and remove the glove compartment door assembly.
| 8. REMOVE TELEVISION CAMERA CONTROLLER (for LHD) |
Disconnect each connector.
Remove the nut, bolt and television camera controller.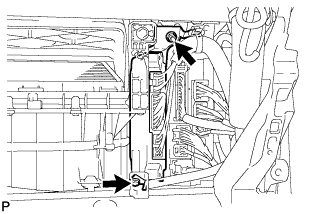
| 9. REMOVE TELEVISION CAMERA CONTROLLER (for RHD) |
Disconnect each connector.
Remove the nut, bolt and television camera controller with power source control ECU.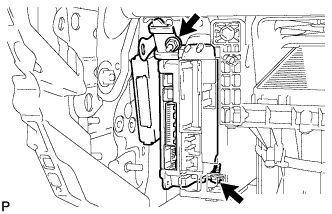
Remove the 2 nuts and television camera controller.