ТОПЛИВНАЯ ФОРСУНКА > УСТАНОВКА |
| 1. INSTALL FUEL INJECTOR ASSEMBLY |
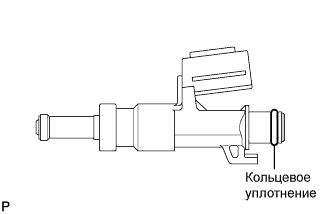 |
Apply gasoline to a new O-ring and install it to the injector.
 |
Connect the connector to the injector.
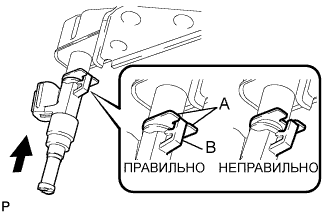 |
Install the injector to the delivery pipe as shown in the illustration.
| 2. INSTALL FUEL DELIVERY PIPE SUB-ASSEMBLY |
 |
Connect the 4 wire harness clamps.
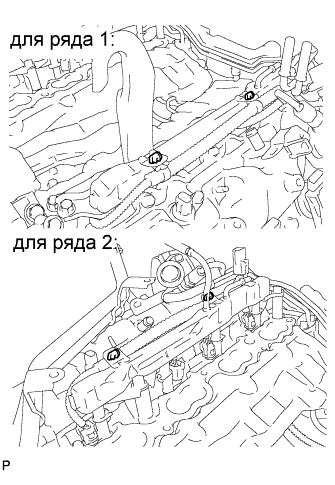
Install the 4 delivery pipe spacers and 8 insulators to the intake manifold.
Install the 2 delivery pipes (with injector) to the intake manifold.
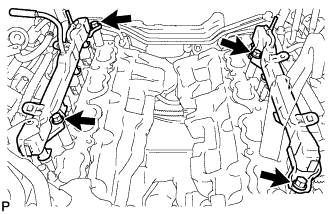 |
Install the 4 bolts.
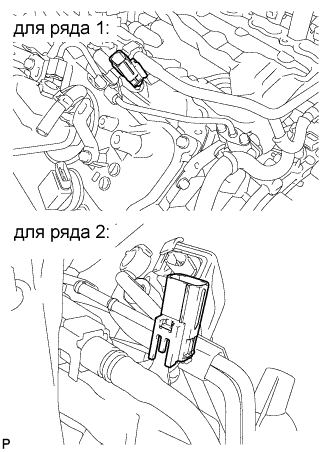 |
Connect the 2 connectors.
| 3. CONNECT FUEL TUBE SUB-ASSEMBLY |
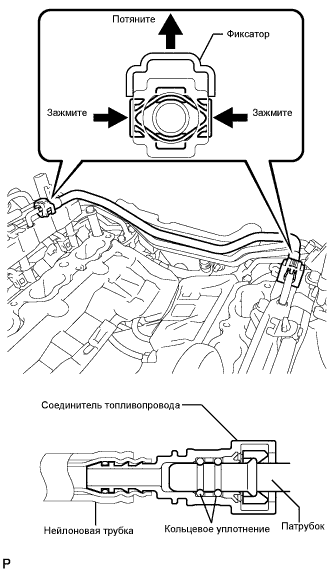 |
Push in the tube connector to the pipe until the tube connector makes a "click" sound.
Push down on the retainer to lock it in place.
| 4. CONNECT NO. 3 FUEL HOSE |
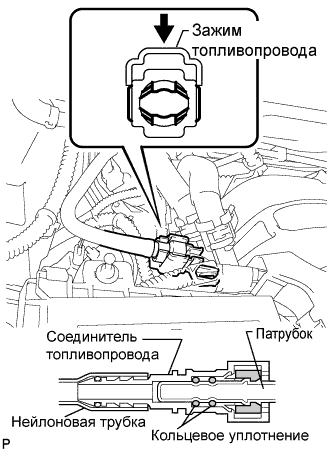 |
Push in the tube connector to the pipe until the tube connector makes a "click" sound.
Install the fuel pipe clamp.
| 5. INSTALL INTAKE MANIFOLD |
Install the intake manifold (see page Нажмите здесь).
| 6. CONNECT CABLE TO NEGATIVE BATTERY TERMINAL |
| 7. PERFORM INITIALIZATION |
Perform initialization (see page Нажмите здесь).
| 8. ADD ENGINE COOLANT |
Tighten the radiator drain cock plug and 2 cylinder block drain cock plugs.
Add TOYOTA Super Long Life Coolant (SLLC) into the radiator reservoir.
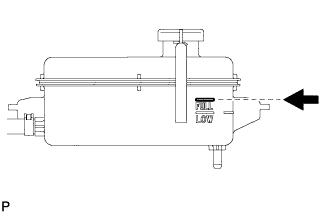 |
Further add coolant into the reservoir until it reaches the FULL line.
Press the No. 1 and No. 2 radiator hoses several times by hand, and then check the coolant level.
If the coolant level is low, add coolant.
 |
Using a 6 mm hexagon wrench, install the vent plug.
Bleed air from the cooling system.
While idling the engine for approximately 10 minutes, make sure the coolant remains at the FULL line by adding coolant as necessary.
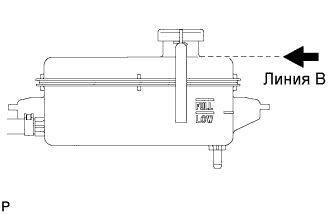 |
After idling the engine for 10 minutes, add coolant until it reaches the B line at the base of the reservoir's filler neck.
Close the radiator reservoir cap, and run the engine at 1500 to 2000 rpm for 5 minutes.
Stop the engine and wait until the coolant cools down to ambient temperature.
|
Check the coolant level.
If the coolant level is below the FULL line, add coolant until it reaches the FULL line.
| 9. CHECK FOR ENGINE COOLANT LEAKS |
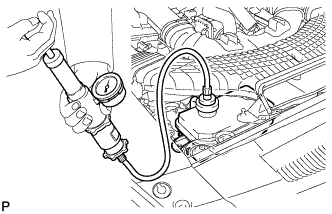 |
Fill the radiator with coolant and attach a radiator cap tester.
Warm up the engine.
Using the radiator cap tester, increase the pressure inside the radiator to 118 kPa (1.2 kgf/cm2, 17 psi), and check that the pressure does not drop.
If the pressure drops, check the hoses, radiator and water pump for leaks. If no external leaks are found, check the heater core, cylinder block and head.
| 10. CHECK FOR FUEL LEAKS |
Подсоедините портативный диагностический прибор к DLC3.
Включите зажигание (IG).
Включите главный выключатель портативного диагностического прибора.
Выберите следующие элементы меню: Powertrain / Engine / Active Test / Control the Fuel Pump/Speed.
Проверьте работу топливного насоса.
Проверьте давление топлива во впускном патрубке топливопровода. Убедитесь, что слышно, как топливо поступает в топливный бак.
Если звук не слышен, проверьте интегрированное реле, топливный насос, ЕСМ и разъем жгута проводов.
Убедитесь в отсутствии утечек.
Убедитесь в отсутствии утечек топлива из системы после проведения технического обслуживания.
При обнаружении утечки топлива при необходимости отремонтируйте или замените детали.
