РАСПРЕДВАЛ (для ряда 1) > УСТАНОВКА |
| 1. INSTALL CAMSHAFT BEARING CAP (for Bank 1) |
Apply a light coat of engine oil to the camshaft journals, camshaft housings and bearing caps.
Install the No. 3 and No. 4 camshaft to the camshaft housing.
 |
Confirm the marks and numbers on the camshaft bearing caps and place them each in their proper positions and directions.
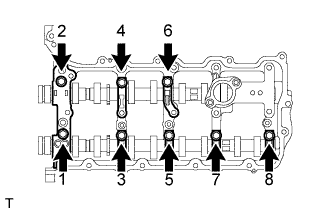 |
Temporarily install the 8 bolts in the order shown in the illustration.
| 2. INSTALL CAMSHAFT HOUSING SUB-ASSEMBLY (for Bank 1) |
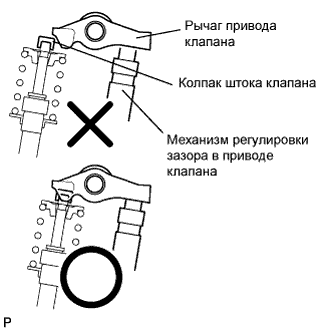 |
Make sure that the valve rocker arms are installed as shown in the illustration.
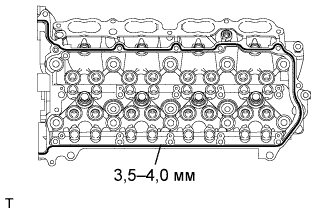 |
Apply seal packing in a continuous line as shown in the illustration.
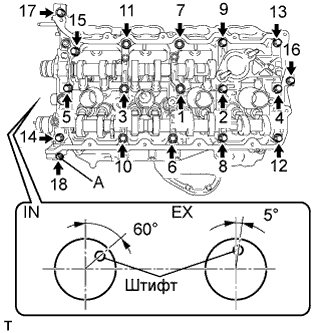 |
Install the camshaft housing, and install the 12 bolts in the order shown in the illustration.
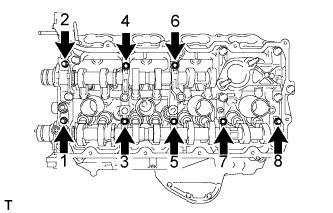 |
Tighten the 8 bolts in the order shown in the illustration.
| 3. INSTALL NO. 3 CHAIN TENSIONER ASSEMBLY |
 |
Install the chain tensioner with the 2 bolts.
While pushing down the No. 2 chain tensioner, insert a pin of φ1.0 mm (0.039 in.) into the hole to fix it in place.
| 4. INSTALL CHAIN SUB-ASSEMBLY (for Bank 1) |
 |
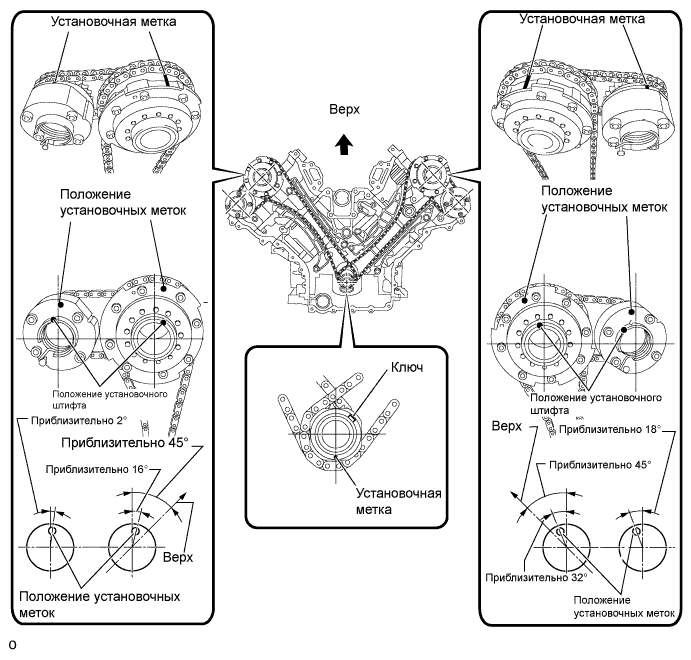
Align the No. 1 chain's orange mark plates with the camshaft timing gear's timing mark, and attach the chain to the gear as shown in the illustration.
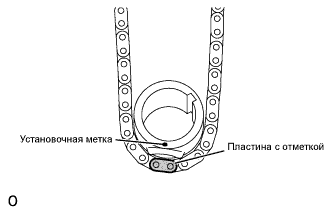 |
Align the No. 1 chain's orange mark plate with the crankshaft timing gear's timing mark, and attach the chain to the gear as shown in the illustration.
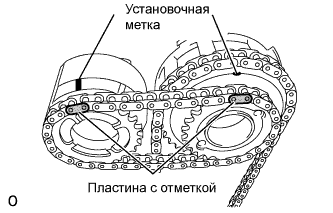 |
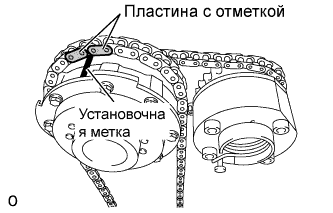
Align the No. 2 chain's mark plates (yellow) with the timing marks of the camshaft timing gear assembly and camshaft timing exhaust gear assembly, and attach the No. 2 chain to the gears as shown in the illustration.
Install the crankshaft timing gear to the crankshaft.
Align and attach the knock pin of the No. 3 camshaft with the pin hole of the camshaft timing gear assembly.
Using the hexagonal portion of the No. 4 camshaft, align and attach the knock pin of the No. 4 camshaft with the pin hole of the camshaft timing exhaust gear assembly.
Remove the pin from the No. 2 chain tensioner.
| 5. INSTALL CHAIN TENSIONER SLIPPER (for Bank 1) |
| 6. INSTALL NO. 1 CHAIN TENSIONER ASSEMBLY (for Bank 1) |
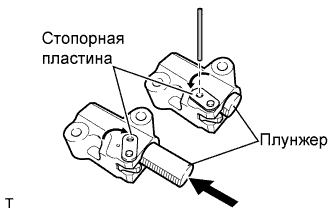 |
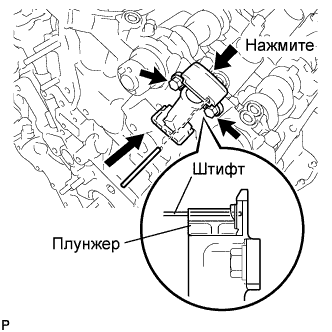
Move the stopper plate upward to release the lock, and push the plunger deep into the tensioner.
Move the stopper plate downward to set the lock, and insert a hexagon wrench into the hole of the stopper plate.
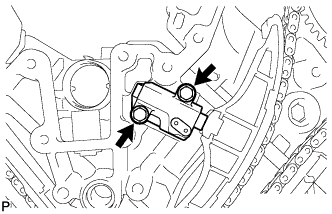 |
Install a new gasket and chain tensioner with the 2 bolts.
| 7. INSTALL NO. 1 CHAIN VIBRATION DAMPER (for Bank 1) |
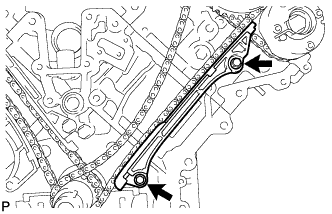 |
Install the vibration damper with the 2 bolts.
Remove the hexagon wrench from the No. 1 chain tensioner.
| 8. TIGHTEN CAMSHAFT TIMING GEAR ASSEMBLY |
for Bank 1:
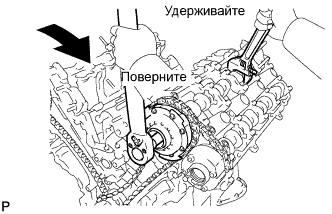 |
Using a wrench, hold the hexagonal portion of the No. 3 camshaft.
Using a 12 mm socket hexagon wrench, tighten the camshaft timing gear assembly with a new bolt.
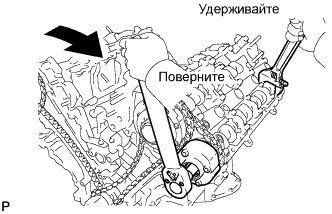 |
Using a wrench to hold the hexagonal portion of the No. 4 camshaft, tighten the camshaft timing exhaust gear assembly with the bolt.
for Bank 2:
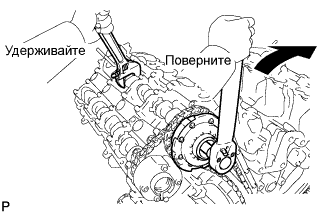 |
Using a wrench, hold the hexagonal portion of the No. 1 camshaft.
Using a 12 mm socket hexagon wrench, tighten the camshaft timing gear assembly with a new bolt.
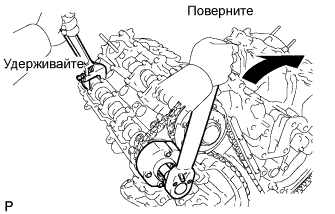 |
Using a wrench to hold the hexagonal portion of the No. 2 camshaft, tighten the camshaft timing exhaust gear assembly with the bolt.
| 9. CHECK NO. 1 CYLINDER TO TDC / COMPRESSION |
Temporarily install the crankshaft pulley bolt.
Rotate the crankshaft clockwise, and check that the timing marks on the crankshaft timing gear and camshaft timing gears are as shown in the illustration.
Remove the crankshaft pulley bolt.
| 10. INSTALL TIMING CHAIN COVER SUB-ASSEMBLY |
Install the timing chain cover (see page Нажмите здесь).
