ГЕНЕРАТОР > ПОВТОРНАЯ СБОРКА |
| 1. INSTALL GENERATOR ROTOR BEARING |
 |
Using SST and a press, press a new generator rotor bearing into the drive end frame.
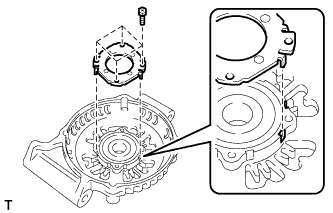 |
Align the protrusions of the retainer with the drive end frame's cutouts, and then install the retainer with the 4 screws.
| 2. INSTALL GENERATOR ROTOR ASSEMBLY |
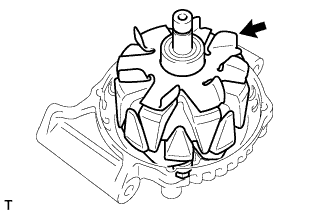 |
Install the generator rotor assembly.
 |
Install the generator washer.
| 3. INSTALL GENERATOR COIL ASSEMBLY |
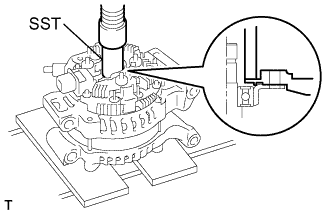 |
Using SST and a press, press the generator coil into the drive end frame.
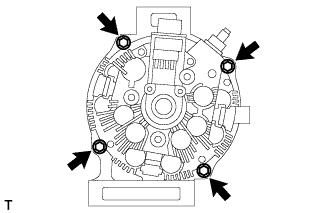 |
Tighten the 4 through bolts.
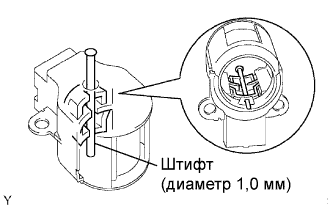
| 4. INSTALL GENERATOR BRUSH HOLDER ASSEMBLY |
 |
 |
Insert a pin (diameter 1.0 mm (0.039 in.)) into the generator brush holder assembly to fix the 2 brushes in place.
Install the generator brush holder to the generator coil with the 2 screws.
Remove the pin (diameter 1.0 mm (0.039 in.)).
| 5. INSTALL GENERATOR TERMINAL INSULATOR |
 |
Install the generator terminal insulator to the generator coil.
| 6. INSTALL GENERATOR REAR END COVER |
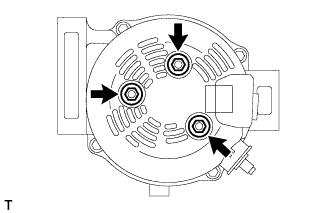 |
Install the generator rear end cover to the generator coil with the 3 nuts.
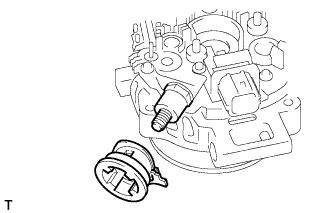
| 7. INSTALL GENERATOR PULLEY |
 |
Install the generator pulley, and temporarily install the pulley lock nut.
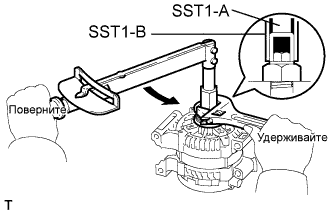
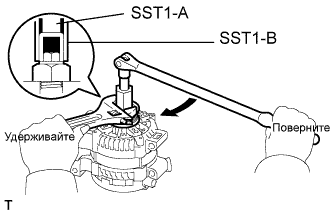
Install SST1-A to the pulley shaft.
Install SST1-B to SST1-A.
Hold SST 1-A on the pulley shaft area, and tighten SST 1-B to the specified torque.
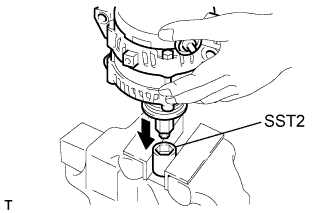 |
Mount 2 faces of SST2 in a vise.
With SST1-A and B attached to the generator, insert the pulley lock nut into the hexagon portion of SST2.
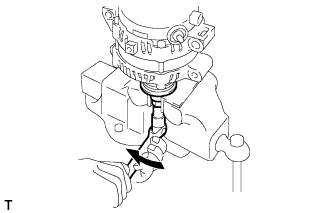 |
To tighten the pulley nut, rotate SST1-A in the generator's reverse rotation direction.
Remove the generator from SST2.
 |
Fix SST1-B in place, and rotate SST1-A to the right to loosen it. Then remove SST1-A and B from the generator.
Check that the pulley rotates smoothly.
