ЗАДНИЙ САЛЬНИК КОЛЕНЧАТОГО ВАЛА > ЗАМЕНА |
| 1. DISCONNECT CABLE FROM NEGATIVE BATTERY TERMINAL |
| 2. REMOVE AUTOMATIC TRANSMISSION ASSEMBLY |
Remove the automatic transmission (see page Нажмите здесь).
| 3. REMOVE DRIVE PLATE AND RING GEAR SUB-ASSEMBLY |
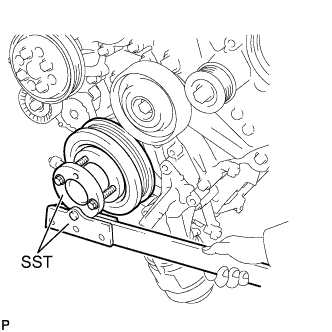 |
Using SST, hold the crankshaft.
 |
Remove the 10 bolts, spacer plate, ring gear and sensor rotor.
| 4. REMOVE ENGINE REAR OIL SEAL |
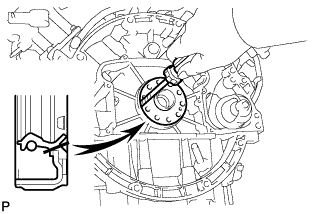 |
Remove the oil seal with a screwdriver.
| 5. INSTALL ENGINE REAR OIL SEAL |
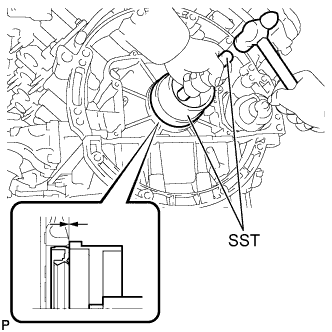 |
Using SST, tap in a new oil seal until its surface is flush with the oil seal retainer edge.
| 6. INSTALL DRIVE PLATE AND RING GEAR SUB-ASSEMBLY |
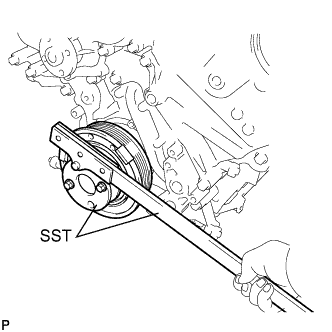 |
Using SST, hold the crankshaft.
Install the sensor rotor, ring gear and spacer plate on the crankshaft.
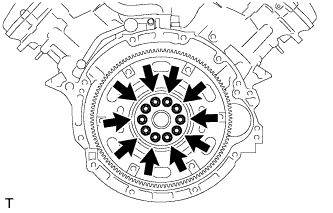
 |
Uniformly install and tighten 10 new bolts in the sequence shown in the illustration.
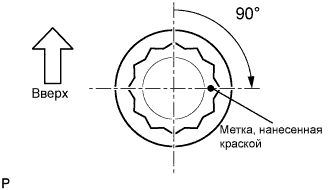 |
Mark the upside of each flywheel installation bolt with paint.
Retighten the flywheel installation bolts by 90° as shown.
Check that the painted marks are now at a 90° angle to the upside.
| 7. INSTALL AUTOMATIC TRANSMISSION ASSEMBLY |
Install the automatic transmission (see page Нажмите здесь).
