| Last Modified: 4-30-2014 | 6.6 A | Doc ID: RM0000018PU001X |
| Model Year: 2006 | Model: LX470 | Prod Date Range: [05/2005 - ] |
| Title: AIR CONDITIONING: REAR COOLING UNIT: DISASSEMBLY; 2006 MY LX470 [05/2005 - ] | ||
DISASSEMBLY
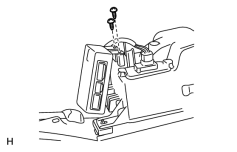
1. REMOVE AIR CONDITIONING AMPLIFIER
|
(a) Remove the 2 screws and amplifier. |
|
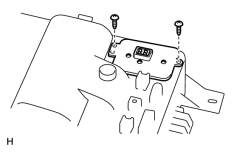
2. REMOVE POWER TRANSISTOR
|
(a) Disconnect the connector. |
|
(b) Remove the 2 screws and power transistor.
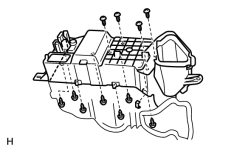
3. REMOVE COOLING UNIT CASE
|
(a) Remove the wire harness. |
|
(b) Remove the 11 screws, 3 holding springs and separate the cooling unit cases.
(c) Disconnect the connector.
(d) Remove the blower case.
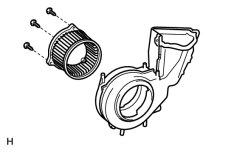
4. REMOVE BLOWER MOTOR
|
(a) Remove the 3 screws and blower motor. |
|
5. REMOVE EVAPORATOR
|
(a) Disconnect the 2 connector clamps. |
|
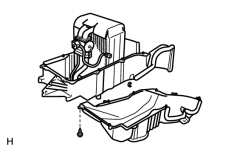
(b) Remove the 10 screws and 2 holding springs, and separate the cooling unit cases.
|
(c) Remove the screw and piping clamp. |
|
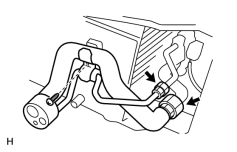
(d) Loosen the 2 nuts and remove the tube and accessory.
Torque:
Liquid line -
14 N·m {140 kgf·cm, 10ft·lbf}
Suction line -
32 N·m {330 kgf·cm, 24ft·lbf}
NOTICE:
Seal the openings of the disconnected parts using vinyl tape to prevent moisture and foreign matter from entering them.
HINT:
At the time of reassembly, lubricate 2 new O-rings with compressor oil and install them to the tubes.
|
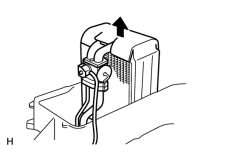
(e) Remove the evaporator. HINT: At the time of reassembly, if the evaporator was replaced, add compressor oil to the new evaporator. Add oil amount: 40 cc (1.4 fl.oz.) Compressor oil: ND-OIL 8 or equivalent |
|
6. REMOVE COOLER THERMISTOR
|
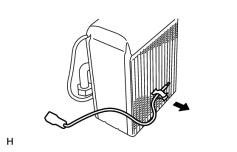
(a) Remove the cooler thermistor from the evaporator. |
|
7. REMOVE EXPANSION VALVE
|
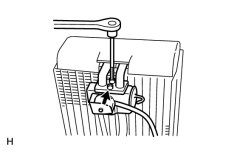
(a) Using a 5 mm hexagon wrench, remove the 2 hexagon bolts and separate the expansion valve and evaporator. Torque: 5.4 N·m {55 kgf·cm, 48in·lbf} HINT: At the time of reassembly, lubricate 4 new O-rings with compressor oil and install them to the tubes. |
|

|

|