| Last Modified: 7-3-2017 | 6.8:8.0.40 | Doc ID: RM0000018DE003X |
| Model Year Start: 2007 | Model: LX470 | Prod Date Range: [08/2006 - ] |
| Title: HF2A TRANSFER: REAR EXTENSION HOUSING: REASSEMBLY; 2007 MY LX470 [08/2006 - ] | ||
REASSEMBLY
HINT:
Coat all of the sliding and rotating surfaces with gear oil before reassembly.
1. INSTALL BALL BEARING
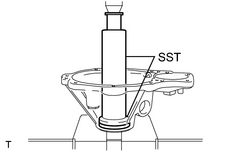
(a) Using SST and a press, press in the ball bearing.
SST: 09316-60011
09316-00011
09316-00031
|
(b) Select a snap ring that will allow the minimum axial play. Standard snap ring thickness:
|
|
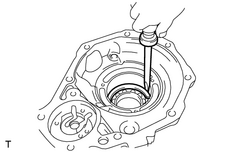
(c) Using a screwdriver, install a new snap ring.
|
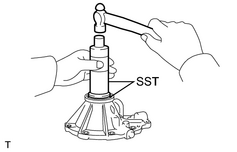
2. INSTALL OIL SEAL (a) Apply MP grease to the lip of a new oil seal. (b) Using SST and a hammer, tap in the oil seal. SST: 09316-60011 09316-00011 09316-00031 |
|
3. INSTALL DUST DEFLECTOR
(a) Using SST and a hammer, tap in a new rear extension housing dust deflector.
SST: 09316-60011
09316-00011
09316-00041
|
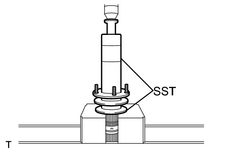
(b) Using SST and a press, press in a new rear output shaft dust deflector. SST: 09316-20011 SST: 09316-60011 09316-00011 |
|
4. INSTALL REAR OUTPUT SHAFT
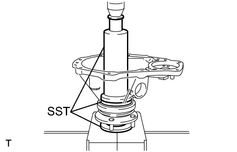
(a) Using SST and a press, press in the output shaft.
SST: 09316-20011
SST: 09316-60011
09316-00011
09316-00031
(b) Install the 2 seal rings to the output shaft.
|
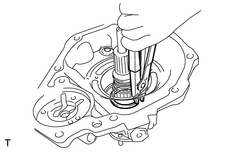
(c) Select a snap ring that will allow the minimum axial play. Standard snap ring thickness:
|
|
(d) Using a snap ring expander, install a new snap ring.
5. INSTALL SPEEDOMETER DRIVE GEAR
(a) Install the drive gear.
(b) Using a snap ring expander, install the snap ring.
|
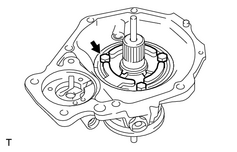
6. INSTALL OIL PUMP PLATE (a) Install the oil pump plate. (b) Install the 3 bolts. Torque: 4.9 N·m {50 kgf·cm, 43in·lbf} |
|
|
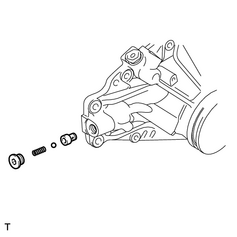
7. INSTALL VALVE SEAT, BALL, SPRING AND SCREW PLUG (a) Apply gear oil to the ball. (b) Install the valve seat, ball and spring. (c) Apply liquid sealer to the screw plug threads. Sealant: Toyota Genuine Adhesive 1344, Three Bond 1344 or Equivalent (d) Using a hexagon wrench, install the screw plug. Torque: 29 N·m {300 kgf·cm, 22ft·lbf} |
|
|
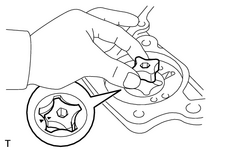
8. INSTALL OIL PUMP DRIVEN ROTOR (a) Apply gear oil to the driven rotor. (b) Install the drive rotor to the rear extension housing. |
|
9. INSTALL OIL PUMP DRIVE ROTOR
(a) Apply gear oil to the drive rotor.
(b) Install the drive rotor.
HINT:
Align the alignment marks to the driven rotor.
|
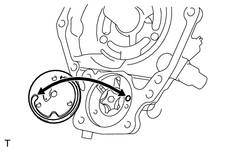
10. INSTALL OIL PUMP COVER (a) Install the oil pump cover. (b) Using a T30 "torx" socket, install the 3 screws. Torque: 4.9 N·m {50 kgf·cm, 43in·lbf} NOTICE: Align the oil hole of the rear extension housing and oil groove end of the oil pump cover. |
|
11. INSTALL OIL PUMP DRIVE SHAFT

|

|