| Last Modified: 11-27-2007 | 1.6 A | |
| Service Category: Vehicle Interior | Section: Heating/Air Conditioning | |
| Model Year: 2008 | Model: LX570 | Doc ID: RM000001JR300CX |
| Title: HEATING / AIR CONDITIONING: REAR AIR CONDITIONING UNIT: DISASSEMBLY (2008 LX570) | ||
DISASSEMBLY
1. REMOVE REAR SIDE NO. 2 AIR DUCT
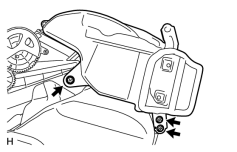
(a) Remove the 3 screws and duct.
2. REMOVE REAR SIDE NO. 3 AIR DUCT
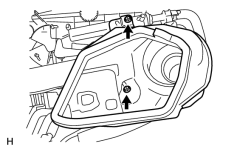
(a) Remove the 2 screws and duct.
3. REMOVE DRAIN COOLER HOSE
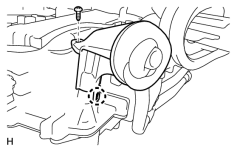
(a) Remove the screw.
(b) Detach the claw and remove the drain hose.
4. REMOVE REAR AIR MIX DAMPER SERVO SUB-ASSEMBLY
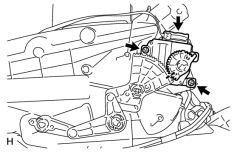
(a) Disconnect the connector.
(b) Remove the 2 screws and damper servo.
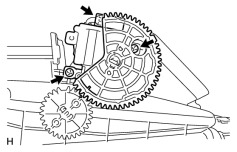
5. REMOVE REAR MODE DAMPER SERVO SUB-ASSEMBLY
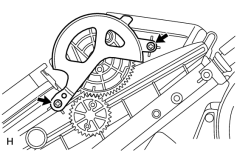
(a) Remove the 2 screws and plate cover.
|
(b) Disconnect the connector. |
(c) Remove the 2 screws and damper servo.
6. REMOVE NO. 2 AIR MIX DAMPER SERVO SUB-ASSEMBLY
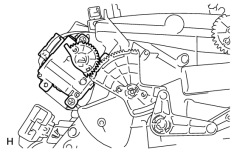
(a) Disconnect the connector.
(b) Remove the 2 screws and damper servo.
7. REMOVE AIR CONDITIONER ACCESSORY ASSEMBLY
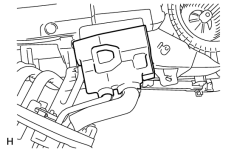
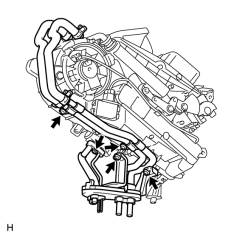
(a) Remove the packing.
|
(b) Remove the bolt and 4 screws. |
(c) Using pliers, grip the claws of the clips and slide the 2 clips.
(d) Remove the air conditioner accessory assembly.
(e) Remove the 2 O-rings from the air conditioner accessory assembly.
8. REMOVE REAR COOLING UNIT EXPANSION VALVE
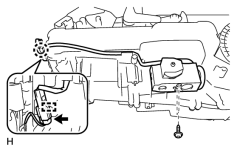
(a) Disconnect the connector.
(b) Detach the clamp.
(c) Using a 4 mm hexagon wrench, remove the 2 hexagon bolts and expansion valve.
9. REMOVE HEATER RADIATOR UNIT SUB-ASSEMBLY
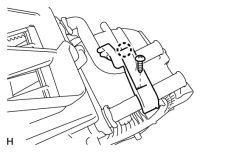
(a) Remove the screw and detach the claw.
(b) Remove the heater clamp.
|
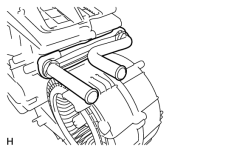
(c) Remove the heater radiator unit. |
10. REMOVE BLOWER WITH FAN (REAR) MOTOR SUB-ASSEMBLY
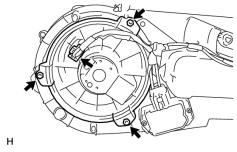
(a) Disconnect the connector.
(b) Remove the 3 screws and blower motor.
11. REMOVE BLOWER MOTOR CONTROL
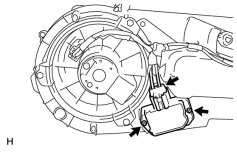
(a) Disconnect the connector.
(b) Remove the 2 screws and blower motor control.
12. REMOVE EVAPORATOR SUB-ASSEMBLY
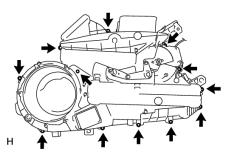
(a) Remove the 12 screws and rear cooling unit case LH.
(b) Remove the evaporator.
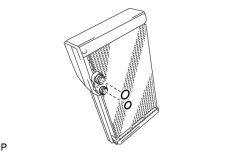
|
(c) Remove the 2 O-rings from the evaporator. |
13. REMOVE REAR EVAPORATOR TEMPERATURE SENSOR
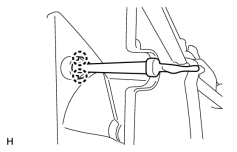
(a) Detach the 2 claws and remove the sensor.
14. REMOVE AIR CONDITIONING WIRING HARNESS SUB-ASSEMBLY

|

|