| Last Modified: 11-27-2007 | 1.6 A | |
| Service Category: Suspension | Section: Suspension Control System | |
| Model Year: 2008 | Model: LX570 | Doc ID: RM000003A02002X |
| Title: SUSPENSION CONTROL: DAMPING FORCE CONTROL ACTUATOR (for Front Side): REMOVAL (2008 LX570) | ||
REMOVAL
HINT:
- Use the same procedures for the RH side and LH side.
- The procedures listed below are for the LH side.
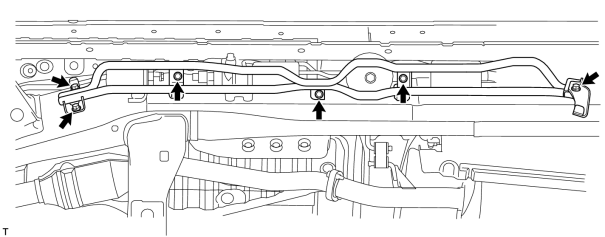
1. REMOVE HEIGHT CONTROL PROTECTOR PIPE
(a) Remove the 6 bolts and protector pipe.
2. REMOVE FRONT FENDER MUDGUARD LH

3. REMOVE SIDE STEP ASSEMBLY
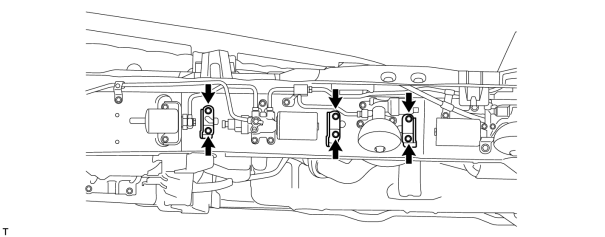
4. REMOVE HEIGHT CONTROL PROTECTOR PIPE BRACKET
(a) Remove the 6 bolts and 3 brackets from the frame.
5. DISCHARGE SUSPENSION FLUID PRESSURE
(a) Connect a hose to the bleeder plug for the shock absorber control valve and loosen the bleeder plug.
(b) Discharge the suspension fluid pressure.
HINT:
Make sure to discharge the suspension fluid pressure from the front and rear damping force control actuators on the left and right sides.
(c) After the fluid pressure has dropped and oil has drained out, tighten the bleeder plug and remove the hose.
Torque: 8.3 N·m (85 kgf·cm, 73 in·lbf)
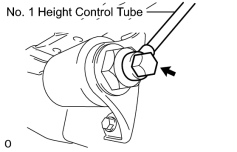
6. REMOVE NO. 1 HEIGHT CONTROL TUBE LH
|
(a) Remove the union bolt and gasket from the front No. 1 suspension control accumulator. |
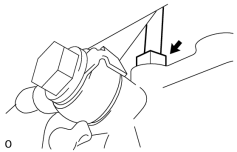
|
(b) Using a union nut wrench, remove the No. 1 control tube from the shock absorber control valve. |
7. REMOVE FRONT NO. 1 SUSPENSION CONTROL ACCUMULATOR ASSEMBLY LH
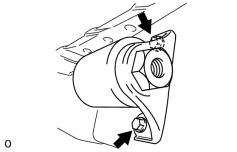
(a) Remove the 2 bolts and No. 1 suspension control accumulator from the vehicle.
8. REMOVE FRONT NO. 2 SUSPENSION CONTROL ACCUMULATOR LH
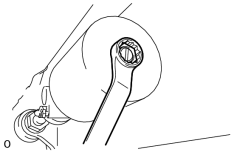
|
(a) Remove the No. 2 suspension control accumulator and O-ring from the front shock absorber control valve. |
9. REMOVE NO. 2 HEIGHT CONTROL TUBE LH
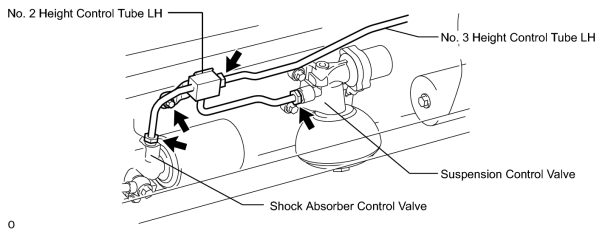
(a) Using a union nut wrench, disconnect the No. 2 height control tube from the No. 3 height control tube, shock absorber control valve and control valve.
(b) Remove the bolt and No. 2 height control tube.
10. DISCONNECT NO. 2 SUSPENSION CONTROL PRESSURE HOSE
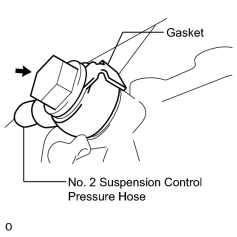
|
(a) Remove the union bolt and gasket, then disconnect the No. 2 suspension control pressure hose from the shock absorber control valve. |
11. REMOVE FRONT SHOCK ABSORBER CONTROL VALVE ASSEMBLY LH
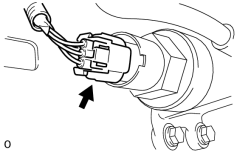
|
(a) Disconnect the connector. |
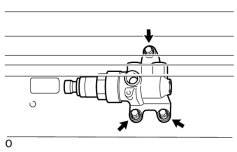
|
(b) Remove the 3 bolts and control valve. |
(c) Remove the cap and bleeder plug.
12. REMOVE FRONT NO. 3 SUSPENSION CONTROL ACCUMULATOR LH
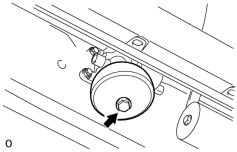
|
(a) Remove the control accumulator from the control valve. |
(b) Remove the O-ring and back-up ring from the accumulator.
13. REMOVE FRONT SUSPENSION CONTROL VALVE ASSEMBLY LH
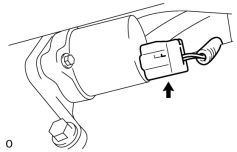
|
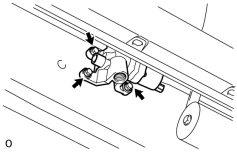
(a) Disconnect the control valve connector. |
|
(b) Remove the 3 bolts and control valve. |

|

|