COOLANT > REPLACEMENT |
| 1. REMOVE ENGINE UNDER COVER NO.1 |
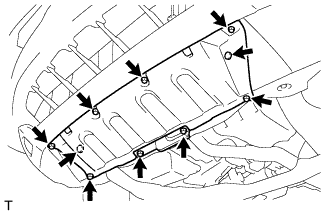 |
Remove the 6 bolts, 2 screws, 2 clips and engine under cover.
| 2. REMOVE ENGINE UNDER COVER NO.2 |
Remove the 2 bolts and engine under cover No.2.
| 3. REMOVE ENGINE ROOM SIDE LH COVER |
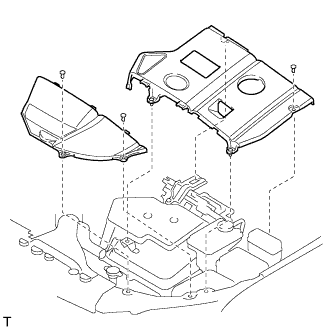 |
Using a clip remover, remove the engine room side cover.
| 4. DRAIN COOLANT |
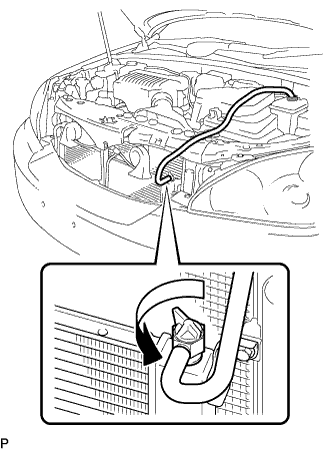
Remove the transaxle side reserve tank.
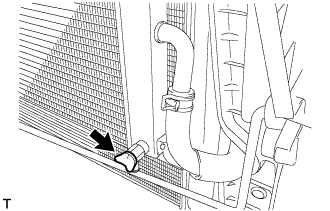 |
Loosen the bleeder plug shown in the illustration and drain the coolant.
Close the bleeder plug.
 |
Remove the plug and gasket shown in the illustration and drain the coolant.
Install the plug with a new gasket.
| 5. ADD COOLANT |
 |
Loosen the bleeder plug shown in the illustration and connect a hose.
Add coolant from the reserve tank.
 |
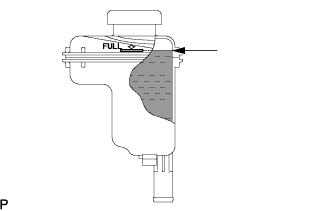
Add coolant until the level of coolant in the hose attached to the bleeder plug reaches the same level as the FULL line of the reserve tank.
When using the intelligent tester:
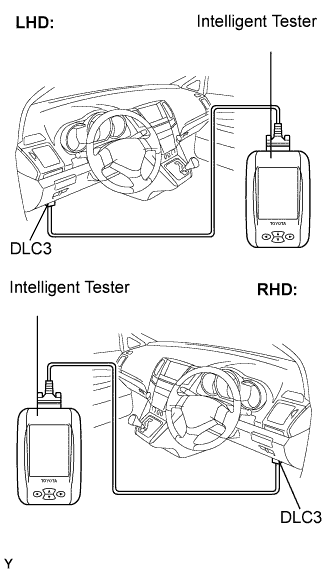 |
Connect the intelligent tester to the DLC3.
Turn the ignition switch to the ON position.
Select the inspection mode (Click here).
On the tester, enter the following menus: Powertrain / Hybrid Control / Active test / Water Pump.
Keep the coolant at the FULL level in the reserve tank to compensate for the drop in coolant level when the air bleeds.
When not using the intelligent tester:
Put the vehicle into the READY-on state. [*1]
Turn the ignition switch off and add coolant to the FULL level because the coolant level drops as the air bleeds. [*2]
Repeat steps [*1] and [*2] until air bleeding from the coolant system is completed.
When the air is completely bled from the coolant system, tighten the plug.
 |
Add coolant to the FULL mark of the reserve tank.
| 6. CHECK FOR ENGINE COOLANT LEAKS |
| 7. INSTALL ENGINE ROOM SIDE LH COVER |
|
Fit the clips and install the engine room side LH cover.
| 8. INSTALL ENGINE UNDER COVER NO.2 |
Install the 2 bolts and engine under cover No.2.
| 9. INSTALL ENGINE UNDER COVER NO.1 |
|
Install the 6 bolts, 2 screws, 2 clips and engine under cover.
