SEAT POSITION SENSOR > REMOVAL |
| 1. PRECAUTION |
| 2. DISCONNECT CABLE FROM NEGATIVE BATTERY TERMINAL |
| 3. REMOVE FRONT SEAT ASSEMBLY |
Move the front seat assembly to the rearmost position by operating the slide and vertical power seat switch knob.
Remove the 2 bolts on the front side.
Move the front seat assembly fully forward by operating the slide and vertical power seat switch knob.
Remove the 2 bolts on the rear side.
Move the front seat assembly to the center position and adjust the seatback to the vertical position by operating the slide and vertical power seat switch knob and the reclining power seat switch knob.
Turn the ignition switch to the LOCK position.
Disconnect the negative battery cable from the battery, and wait 90 seconds or more.
Disconnect the connectors and clamp.
Remove the front seat assembly.
| 4. REMOVE RECLINING POWER SEAT SWITCH KNOB |
Using a screwdriver, remove the reclining power seat switch knob.
| 5. REMOVE SLIDE AND VERTICAL POWER SEAT SWITCH KNOB |
Using a screwdriver, remove the slide and vertical power seat switch knob.
| 6. REMOVE FRONT SEAT CUSHION SHIELD ASSEMBLY |
Release the 2 rubber bands on the backside of the front seatback board sub-assembly.
Remove the 7 screws.
Disengage the 4 claws and clip, and remove the front seat cushion shield assembly as shown in the illustration.
Driver seat only:
Disconnect the power seat switch assembly connector.
Remove the front seat cushion shield assembly.

| 7. REMOVE SEAT SLIDE POSITION SENSOR PROTECTOR |
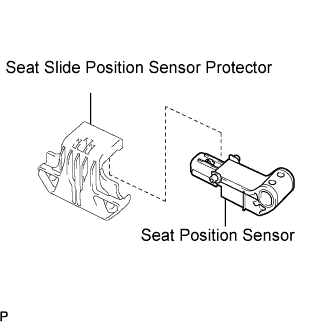 |
Remove the seat slide position sensor protector from the seat position sensor.
| 8. REMOVE SEAT POSITION SENSOR |
Disconnect the connector from the seat position sensor.
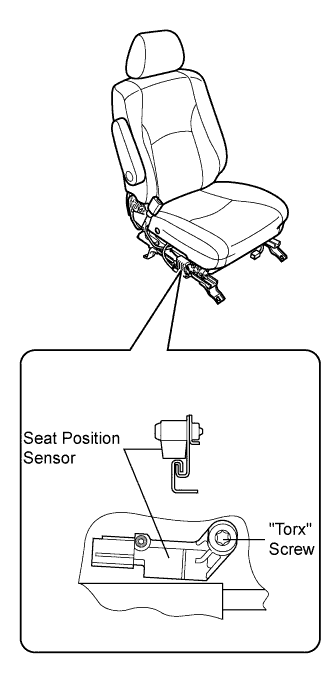 |
Using a "torx" socket wrench (T30), remove the "torx" screw and the seat position sensor.
