SIDE AIRBAG SENSOR > INSTALLATION |
| 1. INSTALL SIDE AIRBAG SENSOR LH |
Check that the ignition switch is off.
Check that the battery negative (-) terminal is disconnected.
 |
Install the side airbag sensor LH with the 2 bolts.
Check that there is no looseness in the installation parts of the side airbag sensor LH.
Connect the connetor to the side airbag sensor LH.
| 2. INSTALL FRONT SEAT OUTER BELT ASSEMBLY |
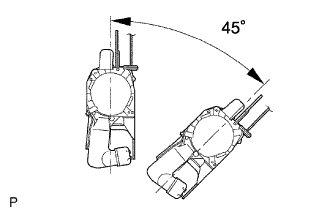 |
Check the degree of tilt when the ELR begins to lock.
Check that the belt does not lock at less than 15 degrees of tilt in any direction but locks at over 45 degrees of tilt when gently moving the installed retractor.
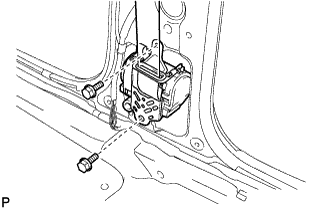 |
Temporarily install the front seat outer belt assembly with the 2 bolts.
Fully tighten the upper side bolt first, then the lower side bolt to install the front seat outer belt assembly.
 |
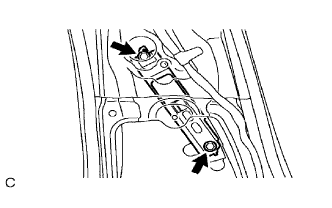
Connect the tension reducer connector.
Connect the pretensioner connector and lock the locking button.
Connect the shoulder side of the front seat outer belt assembly with the nut.
| 3. INSTALL CENTER PILLAR LH GARNISH LOWER |
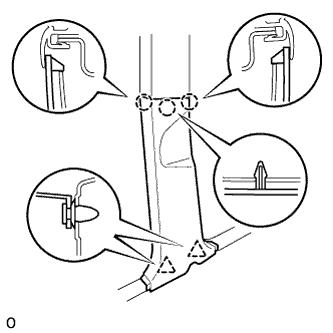 |
Engage the 2 clips and 3 claws, install the center pillar garnish lower.
| 4. INSTALL LAP BELT OUTER ANCHOR COVER |
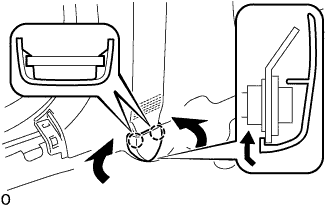 |
Engage the 2 claws and install the lap belt outer anchor cover as shown in the illustration.
| 5. INSTALL REAR DOOR OPENING TRIM LH WEATHERSTRIP |
| 6. INSTALL FRONT DOOR OPENING TRIM LH WEATHERSTRIP |
| 7. INSTALL REAR DOOR SCUFF LH PLATE |
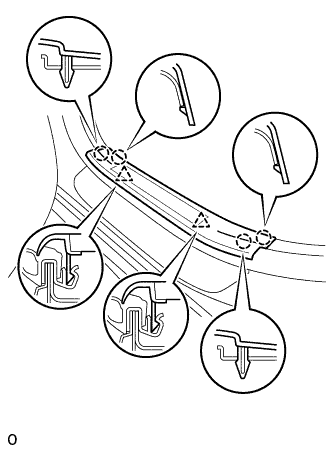 |
Connect the connector. (w/ illumination scuff plate)
Engage the 4 claws and 2 clips, and install the rear door scuff plate.
| 8. INSTALL FRONT DOOR SCUFF LH PLATE |
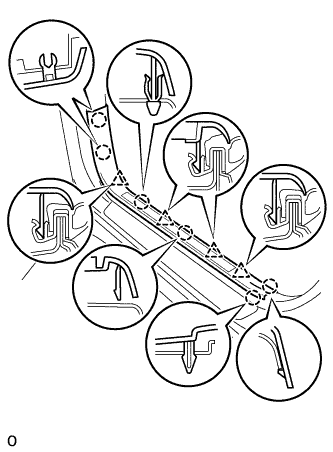 |
Connect the connector. (w/ illumination scuff plate)
Engage the 6 claws and 4 clips, and install the front door scuff plate.
| 9. CONNECT CABLE TO NEGATIVE BATTERY TERMINAL |
| 10. PERFORM INITIALIZATION |
Perform initialization (Click here).
| 11. INSPECT SRS WARNING LIGHT |
Inspect the SRS warning light (Click here).
