REAR AIRBAG SENSOR > INSTALLATION |
| 1. INSTALL REAR AIRBAG SENSOR LH |
Check that the ignition switch is off.
Check that the battery negative (-) terminal is disconnected.
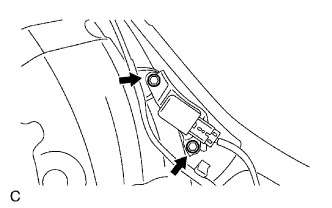 |
Install the rear airbag sensor LH with the 2 bolts.
Check that there is no looseness in the installation parts of the rear airbag sensor LH.
Connect the connector to the rear airbag sensor LH.
| 2. INSTALL REAR SEAT SIDE LH COVER |
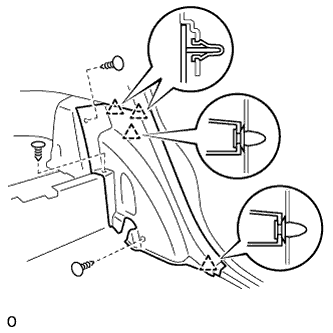 |
Engage the 4 clips and install the rear seat side cover.
Install the 3 clips.
| 3. INSTALL DECK SIDE TRIM LH COVER |
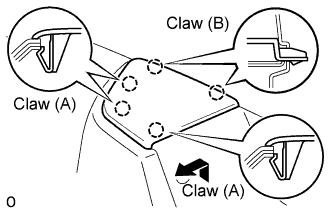 |
Using a moulding remover, disengage 3 claws (A).
Disengage 2 claws (B) and remove the deck side trim cover by pulling it to inside the vehicle.
| 4. INSTALL REAR SEAT ASSEMBLY LH |
Place the rear seat assembly LH in the vehicle and align the adjuster pin with the hole on the vehicle side.
Move the rear seat assembly LH to the rearmost position by operating the rear seat track adjusting handle.
Temporarily install the front side of the rear seat assembly LH with the 2 bolts.
Recline the separate rear seatback forward by operating the rear seat lock control lever sub-assembly.
Move the rear seat assembly LH fully forward.
Temporarily install the rear side of the rear seat assembly LH with the 3 bolts.
Return the separate rear seatback to the upright position.
Move the rear seat assembly LH to the rearmost position by operating the rear seat track adjusting handle.
Fully tighten the 2 bolts on the front side of the rear seat assembly LH in the order of the inner side bolt and then the outer side bolt.
Recline the separate rear seatback forward by operating the rear seat lock control lever sub-assembly.
Move the rear seat assembly LH fully forward.
Fully tighten the 3 bolts on the rear side of the rear seat assembly LH in the order of the inner rear side bolt, the inner front side bolt, and then the outer side bolt.
Return the separate rear seatback to the upright position.
Move the rear seat assembly LH to the rearmost position by operating the rear seat track adjusting handle.
Install the floor anchor side of the fold seat stopper band assembly No.2 with the bolt.
Install the 3 clips.
| 5. INSPECT SLIDE ADJUSTER LOCK |
| 6. INSTALL REAR DOOR OPENING TRIM LH WEATHERSTRIP |
| 7. INSTALL REAR DOOR SCUFF LH PLATE |
 |
Connect the connector. (w/ illumination scuff plate)
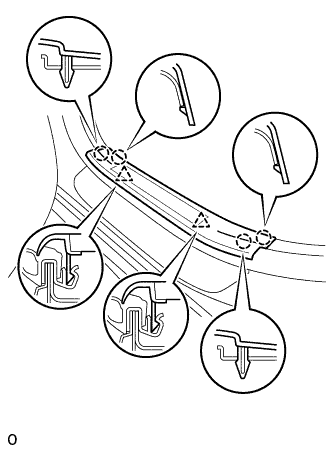
Engage the 4 claws and 2 clips, and install the rear door scuff plate.
| 8. CONNECT CABLE TO NEGATIVE BATTERY TERMINAL |
| 9. PERFORM INITIALIZATION |
Perform initialization (Click here).
| 10. INSPECT SRS WARNING LIGHT |
Inspect the SRS warning light (Click here).
