HV RELAY ASSEMBLY > REMOVAL |
| 1. PRECAUTION |
| 2. READ OUTPUT DTC |
Check the DTC.
| 3. DISCONNECT CABLE FROM NEGATIVE BATTERY TERMINAL |
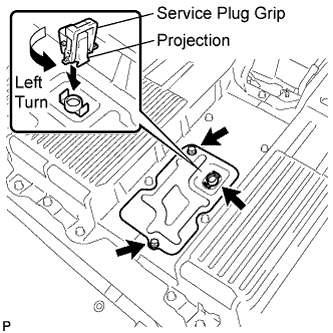
| 4. REMOVE SERVICE PLUG GRIP |
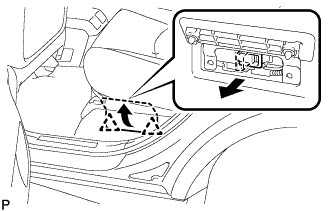 |
Remove the 2 clips, then open the battery service hole cover.
Wear insulation glove, and remove the service plug grip, after sliding up the lever of the service plug grip.
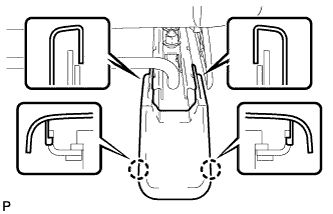
| 5. REMOVE REAR SEAT TRACK BRACKET COVER |
 |
Move the rear seat assembly LH to the rearmost position by operating the rear seat track adjusting handle.
Using a screwdriver, disengage the 4 claws.
Pull the 2 rear seat track bracket covers toward the rear of the vehicle and remove them.
| 6. REMOVE REAR SEAT ASSEMBLY LH |
Using a clip remover, remove the 3 clips.
Remove the bolt and disconnect the floor anchor side of the fold seat stopper band assembly No.2.
Move the rear seat assembly LH to the rearmost position by operating the rear seat track adjusting handle.
Remove the 2 bolts on the front side.
Move the rear seat assembly LH fully forward by operating the rear seat track adjusting handle.
Remove the 3 bolts on the rear side.
Move the rear seat assembly LH to the center position and adjust the seatback to the vertical position.
Remove the rear seat assembly LH.
| 7. REMOVE REAR SEAT TRACK BRACKET COVER |
|
Move the rear seat assembly RH to the rearmost position by operating the rear seat track adjusting handle.
Using a screwdriver, disengage the 4 claws.
Pull the 2 rear seat track bracket covers toward the rear of the vehicle and remove them.
| 8. REMOVE REAR SEAT ASSEMBLY RH |
Using a clip remover, remove the 5 clips.
Remove the bolt and disconnect the floor anchor side of the fold seat stopper band assembly No.1.
Move the rear seat assembly RH to the rearmost position by operating the rear seat track adjusting handle.
Remove the 2 bolts on the front side.
Move the rear seat assembly RH fully forward by operating the rear seat track adjusting handle.
Remove the 3 bolts on the rear side.
Move the rear seat assembly RH to the center position and adjust the seatback to the vertical position.
Remove the rear seat assembly RH.
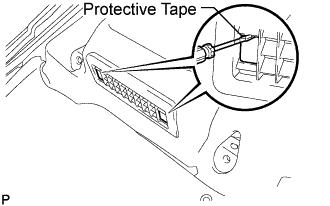
| 9. REMOVE AIR INTAKE COVER |
Remove the air intake cover LH.
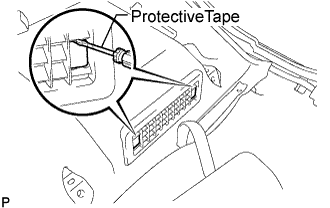 |
Release the claw by using the screwdriver with the tip taped, and remove the 2 hole covers.
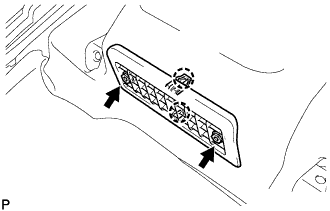
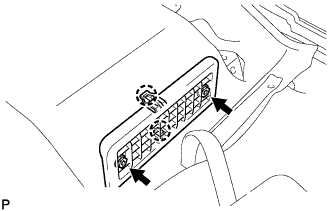 |
Remove the 2 screws, then release the 2 claws and remove air intake cover LH.
Remove the air intake cover RH.
 |
Release the claw by using the screwdriver with the tip taped, and remove the 2 hole covers.
 |
Remove the 2 screws, then release the 2 claws and remove air intake cover RH.
| 10. REMOVE AIR INTAKE COVER CENTER |
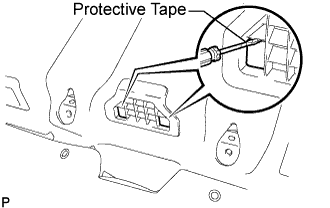 |
Release the claw by using the screwdriver with the tip taped, and remove the 2 hole covers.
 |
Remove the 2 screws, then release the 2 claws and remove air intake cover center.
| 11. SEPARATE FLOOR CARPET ASSEMBLY FRONT |
Turn back the front floor carpet assembly.
| 12. REMOVE REAR CENTER SEAT INNER BELT |
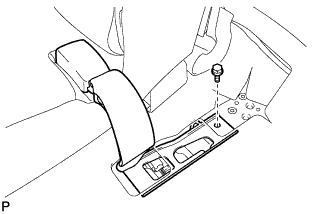 |
Remove the bolt and rear center seat inner belt assembly.
| 13. REMOVE BATTERY CARRIER BRACKET |
 |
Remove the 2 bolts and battery carrier bracket.
| 14. REMOVE BATTERY CARRIER DUCT |
 |
Remove the 2 bolts and battery carrier duct (LH).
 |
Remove the 2 bolts and battery carrier duct (CTR).
 |
Remove the 2 bolts and battery carrier duct (RH).
| 15. REMOVE HV BATTERY SERVICE HOLE COVER |
 |
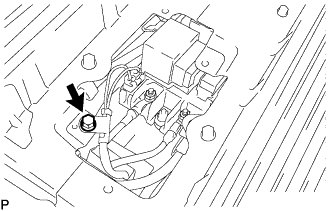
Using the service plug grip, remove the battery cover lock striker.
Remove the 2 bolts and battery service hole cover.
| 16. REMOVE BATTERY COVER SUB-ASSEMBLY |
 |
Remove the bolt, then disconnect the No.3 wire frame.
Using the service plug grip, remove the battery cover lock striker.
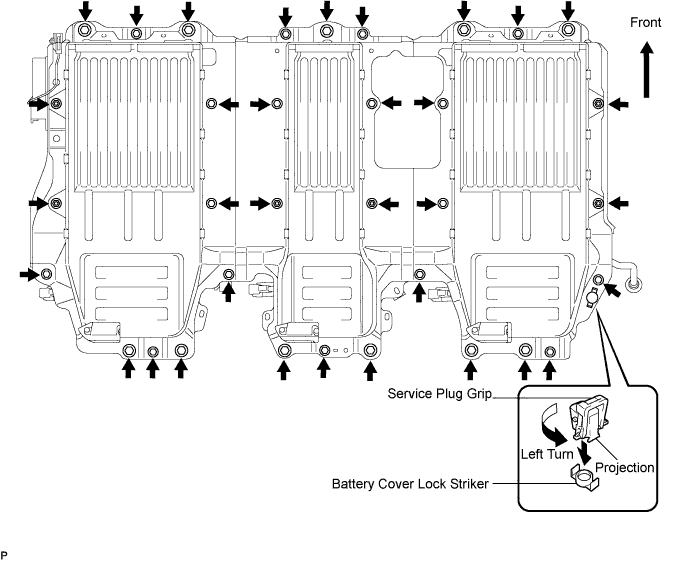
Remove the 28 bolts, 6 nuts and battery cover.
| 17. REMOVE HYBRID VEHICLE RELAY ASSEMBLY |
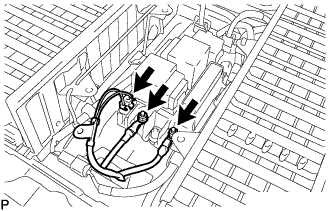 |
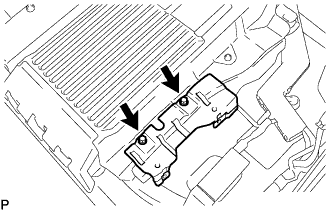
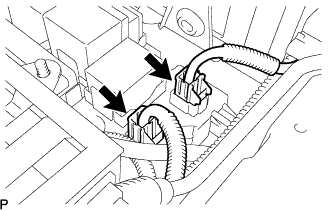
Disconnect the No.3 wire frame connector from the HV relay assembly.
Remove the 2 nuts, then disconnect the No.3 wire frame from the HV relay assembly.
 |
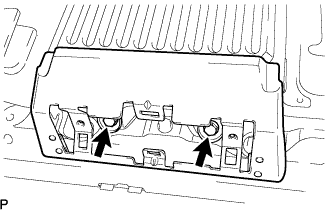
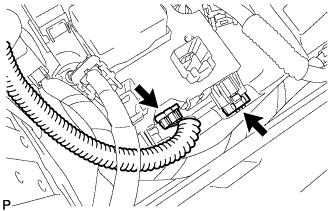
Disconnect the 2 main battery cable connectors from the HV relay assembly.
 |
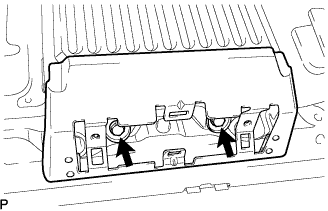
Disconnect the 2 connectors from the HV relay assembly.
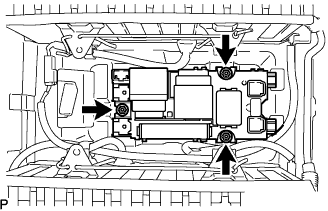 |
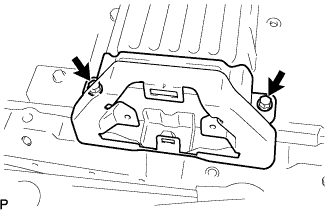
Remove the 3 nuts and HV relay assembly.
