RADIATOR > ON-VEHICLE INSPECTION |
| 1. INSPECT RADIATOR CAP SUB-ASSEMBLY |
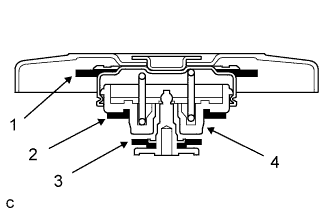 |
If there are water stains or foreign matter on portion 1, 2 or 3, clean the part(s) by: 1) washing with water, and 2) rubbing with your hand(s), a nylon brush, or equivalent.
Check that portion 1, 2 or 3 is not deformed or swollen.
Check that portions 3 and 4 are not stuck together.
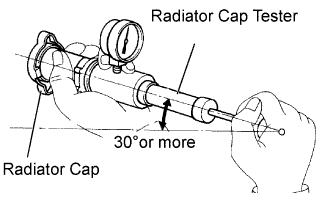 |
Apply engine coolant to portions 2 and 3 before using the radiator cap tester.
Pump the tester several times and read the maximum pressure. (*1)
| Opening valve pressure 88 kPa (0.9 kgf/cm2) |
| Standard: 74.0 to 103.0 kPa (0.75 to 1.05 kgf/cm2) |
