WINDSHIELD GLASS > REMOVAL |
| 1. DISCONNECT CABLE FROM NEGATIVE BATTERY TERMINAL |
| 2. REMOVE FRONT WIPER ARM LH |
Remove the nut and the front wiper arm and blade assembly LH.
| 3. REMOVE FRONT WIPER ARM RH |
Remove the 2 nuts and the front wiper arm and blade assembly RH.
| 4. REMOVE FRONT FENDER TO COWL SIDE SEAL LH |
| 5. REMOVE FRONT FENDER TO COWL SIDE SEAL RH |
| 6. REMOVE COWL TOP VENTILATOR LOUVER SUB-ASSEMBLY |
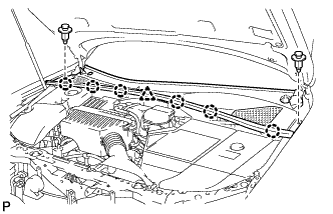 |
Remove the 2 clips.
Disengage the 6 claws and the clamp, and remove the cowl top ventilator louver sub-assembly.
| 7. REMOVE INNER REAR VIEW MIRROR ASSEMBLY |
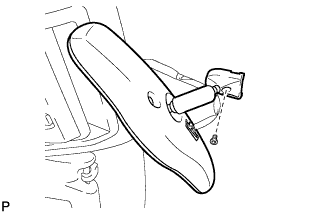 |
Disconnect the connector.
Using a "torx" socket wrench (T20), remove the screw and the inner rear view mirror.
| 8. REMOVE FRONT DOOR OPENING TRIM WEATHERSTRIP LH |
| 9. REMOVE FRONT DOOR OPENING TRIM WEATHERSTRIP RH |
| 10. REMOVE FRONT PILLAR GARNISH LH |
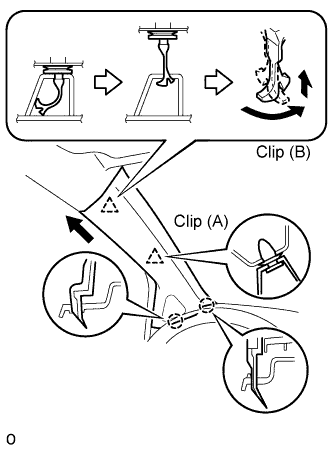 |
Detach clip (A) from the vehicle body. Pull the pillar garnish so that the tip of clip (B) locks in the pillar garnish hole.
Using needle-nose pliers, rotate clip (B) 90°.
Disengage the 2 claws and remove the front pillar garnish.
Remove clip (B).
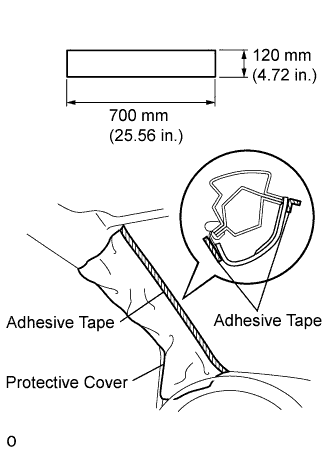 |
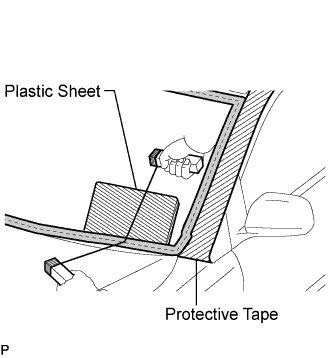
Protect the curtain shield airbag assembly.
Thoroughly cover the airbag with a cloth or nylon sheet that is 700 mm (27.56 in.) x 120 mm (4.72 in.) and fix the ends of the cover with adhesive tape, as shown in the illustration.
| 11. REMOVE FRONT PILLAR GARNISH RH |
| 12. REMOVE MAP LIGHT ASSEMBLY |
 |
w/o Sliding roof:
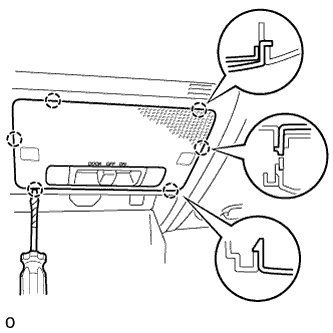
Using a screwdriver, disengage the 6 claws and remove the lens cover.
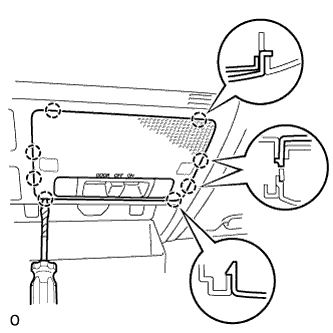 |
w/ Sliding roof:
Using a screwdriver, disengage the 8 claws and remove the lens cover.
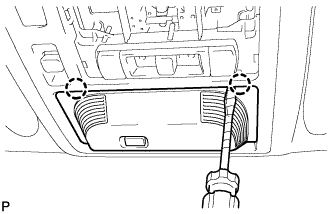 |
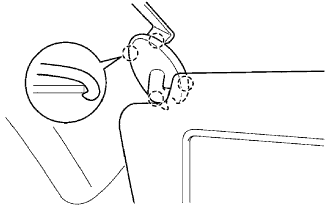
Using a screwdriver, disengage the claws and open the cover.
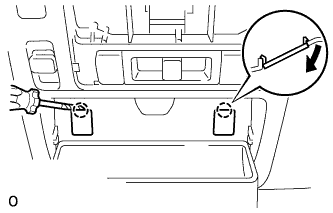 |
Using a screwdriver, disengage the claws and open the 2 caps, as shown in the illustration.
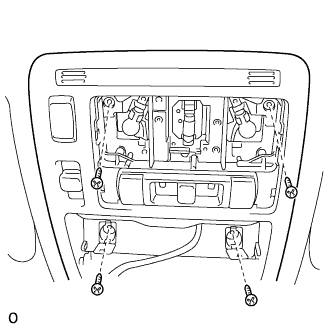 |
Remove the 4 screws and map light.
Disconnect the connector.
| 13. REMOVE VISOR ASSEMBLY LH |
 |
Using a moulding remover, disengage the 4 claws and remove the visor bracket cover.
Remove the 2 screws and visor assembly.
Disconnect the connector.
| 14. REMOVE VISOR ASSEMBLY RH |
| 15. REMOVE VISOR HOLDER |
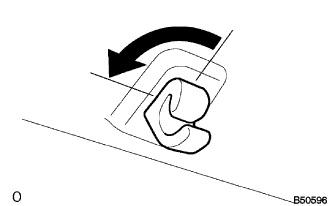 |
Remove the visor holder by turning it counterclockwise.
| 16. REMOVE ASSIST GRIP SUB-ASSEMBLY |
 |
Using a screwdriver, disengage the 3 claws and remove the 2 assist grip covers.
Remove the 2 screws and assist grip sub-assembly.
| 17. REMOVE ROOF HEADLINING ASSEMBLY |
Disconnect the roof wire connector and disengage the clamps from the front pillar LH.
Disconnect the washer hose. Remove the bolt and disconnect the radio antenna cord connector and disengage the clamps from the front pillar RH.
Disconnect the washer hose. Disconnect the radio antenna cord connector and disengage the clamps from the rear quarter pillar RH.
Disconnect the sliding roof drive gear connector. (w/ sliding roof)
Remove the sunroof opening trim moulding. (w/ sliding roof)
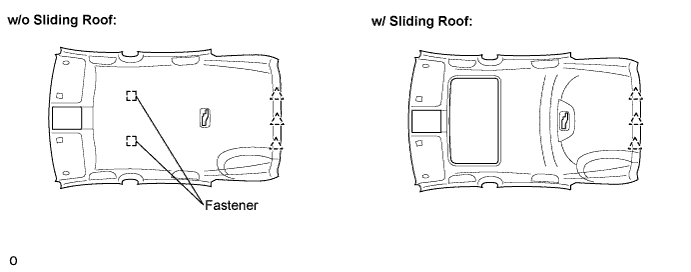
Disengage the 2 fasteners and 3 clips. (w/o sliding roof)
Disengage the 3 clips. (w/ sliding roof)
Remove the roof headlining from the vehicle through the back door side.
| 18. REMOVE RAIN SENSOR (w/ Auto Wiper) |
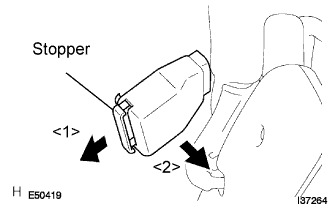 |
Release the stopper by pulling it down, and separate the rain sensor.
Disconnect the connector and remove the rain sensor.
| 19. REMOVE WINDSHIELD MOULDING OUTSIDE |
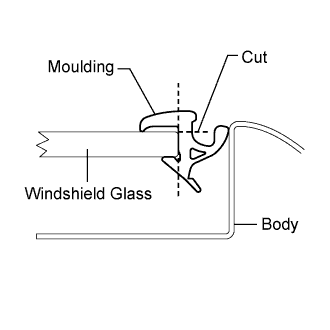 |
Using a knife, cut off the moulding, as shown in the illustration.
Remove the remaining moulding from the vehicle body.
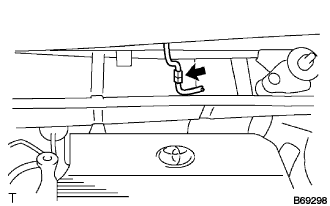 |
Disconnect the connector as shown in the illustration (w/ Deicer).
| 20. REMOVE WINDSHIELD GLASS |
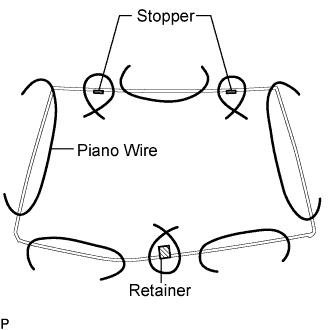 |
Pass a piano wire between the vehicle body and glass from the interior.
 |
Tie both wire ends to wooden blocks or similar objects.
Cut off the adhesive by pulling the piano wire around the glass.
Disengage the stoppers.
Using a suction cup, remove the glass.
| 21. REMOVE WINDSHIELD GLASS RETAINER |
Remove the windshield glass retainer.
| 22. REMOVE WINDSHIELD GLASS NO.2 STOPPER |
Using a scraper, remove the windshield glass No.2 stoppers.
| 23. REMOVE WINDSHIELD GLASS NO.1 STOPPER |
Remove the windshield glass No.1 stoppers.
| 24. CLEAN WINDSHIELD GLASS |
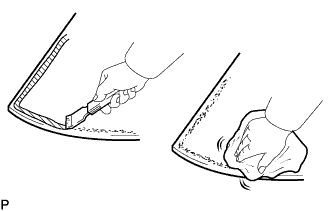 |
Using a scraper, remove the damaged stoppers, dam and adhesive sticking to the glass.
Clean the outer circumference of the glass with white gasoline.
