CANISTER > REMOVAL |
| 1. REMOVE CHARCOAL CANISTER PROTECTOR |
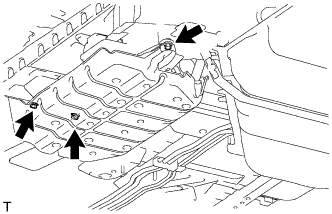 |
Remove the 3 bolts and charcoal canister protector.
| 2. DISCONNECT FUEL TANK TO CANISTER TUBE SUB-ASSEMBLY |
 |
Disconnect the fuel tank to canister tube sub-assembly from the charcoal canister assembly.
Pinch the tube connector and then pull out the fuel tank to canister tube sub-assembly.
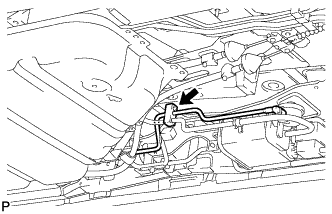 |
Separate the fuel tank to canister tube from the clamp.
| 3. REMOVE CHARCOAL CANISTER ASSEMBLY |
 |
Disconnect the charcoal canister hose (A).
Disconnect the charcoal canister outlet hose No.1 from the charcoal canister assembly (B).
Separate the tube from the tube clamp (C).
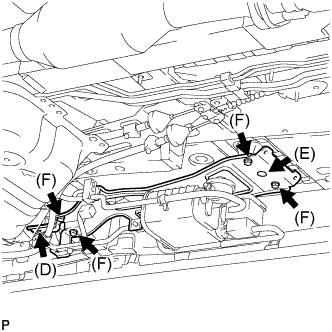 |
Disconnect the clamp from the charcoal canister bracket (D).
Remove the bracket clip (E).
Remove the 4 bolts and charcoal canister assembly (F).
