REAR POWER POINT SOCKET > REMOVAL |
| 1. REMOVE REAR DOOR SCUFF PLATE LH |
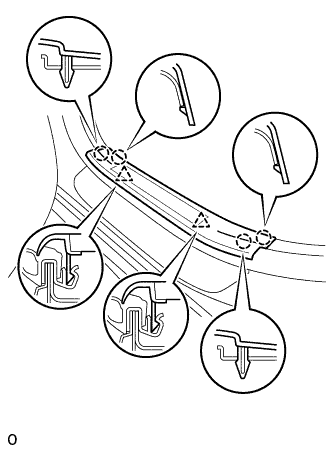 |
Disengage the 4 claws and 2 clips, and remove the rear door scuff plate.
Disconnect the connector. (w/ illumination scuff plate)
| 2. REMOVE REAR DOOR OPENING TRIM WEATHERSTRIP LH |
| 3. REMOVE TONNEAU COVER ASSEMBLY |
| 4. REMOVE DECK BOARD SUB-ASSEMBLY |
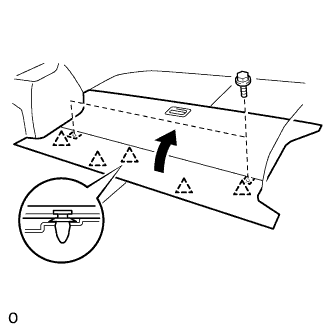 |
Disengage the 5 clips and turn up the front side of the deck board.
Remove the 2 bolts and deck board sub-assembly.
| 5. REMOVE DECK FLOOR BOX FRONT |
 |
Using a clip remover, remove the 2 clips and deck floor box front.
| 6. REMOVE DECK FLOOR BOX REAR |
 |
Using a clip remover, remove the 2 clips and deck floor box rear.
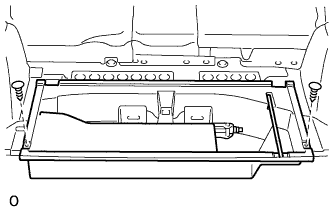
| 7. REMOVE NO.3 DECK BOARD SUB-ASSEMBLY |
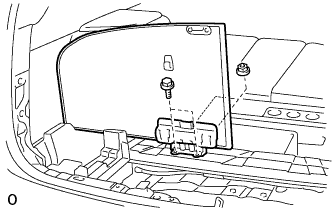 |
Remove the 2 bolts, 2 nuts and deck No.3 board sub-assembly.
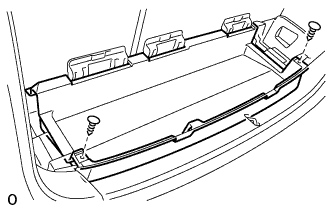
| 8. REMOVE NO.2 DECK BOARD SUB-ASSEMBLY |
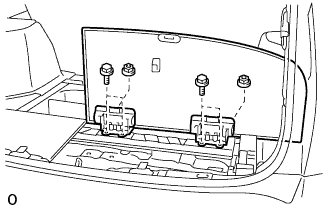 |
Remove the 4 blots, 2 nuts and deck No.2 board sub-assembly.
| 9. REMOVE BACK DOOR WEATHERSTRIP |
| 10. REMOVE JACK CARRIER ASSEMBLY |
Remove the jack carrier support, jack assembly and jack carrier assembly.
| 11. REMOVE DECK SIDE TRIM BOX LH |
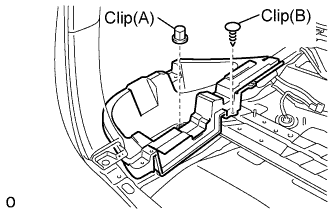 |
Remove the clip (A).
Using a clip remover, remove the clip (B) and deck side trim box.
| 12. REMOVE DECK SIDE TRIM BOX RH |
| 13. REMOVE REAR FLOOR FINISH PLATE |
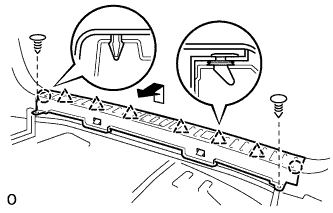 |
Using a clip remover, remove the 2 clips.
Disengage the 2 claws and 6 clips, and remove the rear floor finish plate.
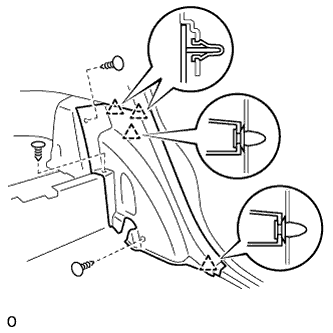
| 14. REMOVE REAR FLOOR FINISH SIDE PLATE LH |
 |
Using a clip remover, remove the clip.
Disengage the 2 clips and remove the rear floor finish side plate.
| 15. REMOVE DECK SIDE TRIM COVER LH |
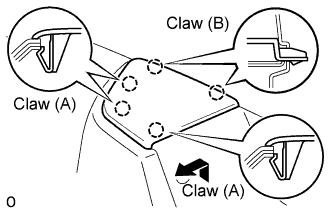 |
Using a moulding remover, disengage 3 claws (A).
Disengage 2 claws (B) and remove the deck side trim cover by pulling it to inside the vehicle.
| 16. SEPARATE REAR NO.1 SEAT BELT ASSEMBLY OUTER LH |
Remove the bolt and separate the rear No.1 seat outer belt assembly.
| 17. REMOVE REAR SEAT SIDE COVER LH |
 |
Using a clip remover, remove the 3 clips.
Disengage the 4 clips and remove the rear seat side cover.
| 18. REMOVE ROPE HOOK |
Remove the 2 bolts and 2 rope hooks.
| 19. REMOVE DECK TRIM SIDE PANEL ASSEMBLY LH |
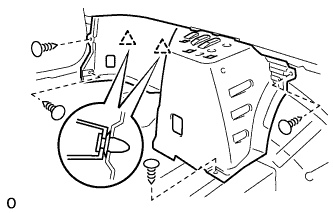 |
Using a clip remover, remove the 4 clips.
Disengage the 2 clips and remove the deck trim side panel assembly.
| 20. REMOVE NO.2 ROOM LIGHT ASSEMBLY |
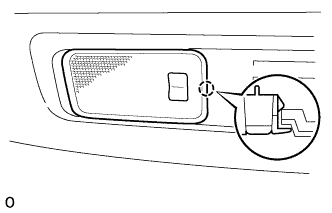 |
Using a screwdriver, disengage the claw and remove the room light assembly No.2.
Disconnect the connector.
| 21. REMOVE NO.1 TONNEAU COVER HOLDER CAP |
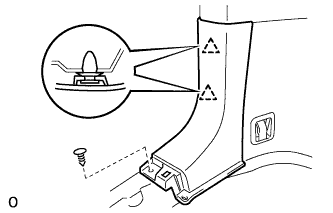
| 22. REMOVE ROOF SIDE GARNISH ASSEMBLY INNER LH |
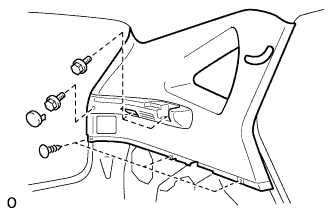 |
Using a screwdriver, remove the tonneau cover holder cap.
Remove the 3 bolts.
Using a clip remover, remove the 3 clips.
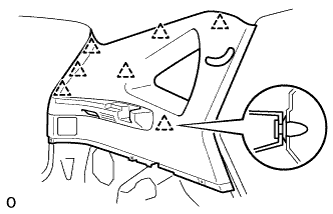 |
Disengage the 7 clips and remove the roof side garnish assembly inner.
 |
Disengage the 4 claws and separate the seat belt bezel.
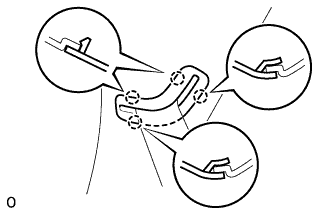
| 23. REMOVE REAR POWER POINT SOCKET |
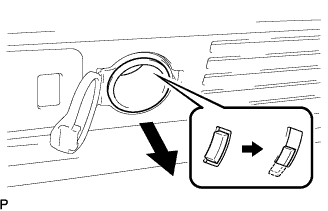 |
Turn the rear power point socket in counterclockwise as shown in illustration and disengage the claw between the rear power point socket and the rear power outlet socket cover.
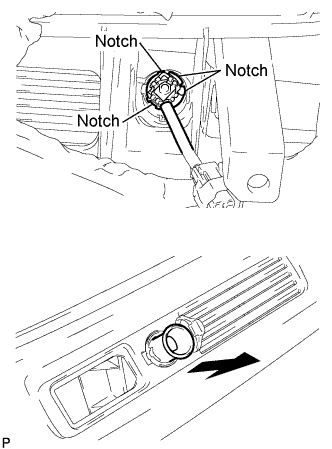 |
Align the rear power point socket with the notch on the rear power outlet socket cover, and remove the rear power point socket.
| 24. REMOVE REAR POWER OUTLET SOCKET COVER |
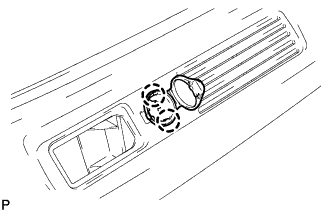 |
Disengage the 2 claws and remove the rear power outlet socket cover.
