DC-DC CONVERTER > INSTALLATION |
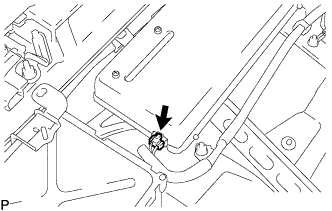
| 1. INSTALL EARTH WIRE |
 |
Install the earth wire to the DC-DC converter assembly with the nut.
Connect the earth wire clamp to the DC-DC converter assembly.
Connect the earth wire connector to the DC-DC converter assembly.
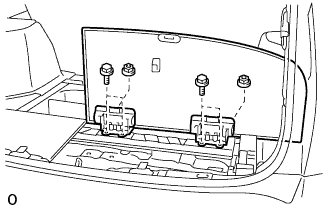
| 2. INSTALL DC-DC CONVERTER ASSEMBLY |
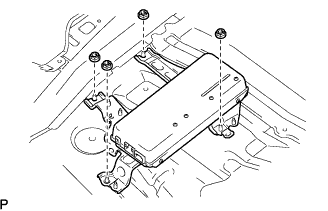 |
Install the DC-DC converter assembly with the 4 nuts.
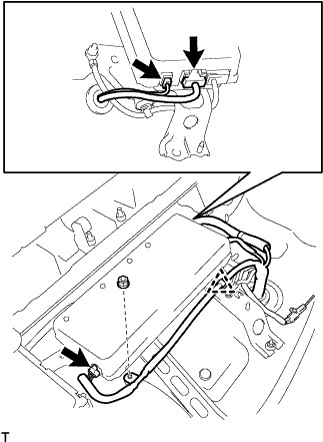 |
Connect the 3 connectors to the DC-DC converter assembly.
Connect the wire harness clamp to the DC-DC converter assembly.
Install the nut.
| 3. CHECK HIGH VOLTAGE CABLE CONNECTION |
 |
Check that the high voltage cable connector is securely connected to the DC-DC converter assembly.
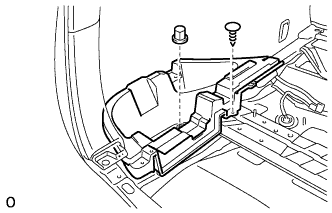
| 4. INSTALL POWER STEERING CONVERTER COVER |
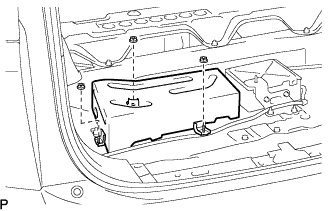 |
Install the power steering converter cover with the 3 nuts.
Install the wire harness clamp to the power steering converter cover.
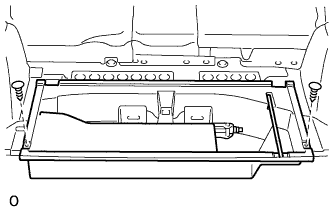
| 5. INSTALL DECK BOARD CHECK NO.1 |
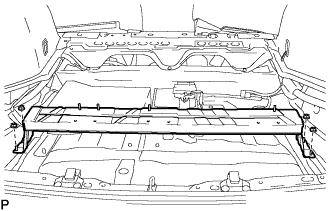 |
Install the deck board check No.1 with the 4 nuts.
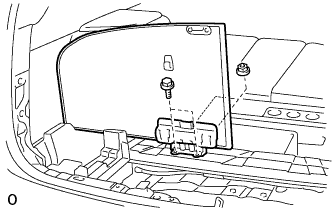
| 6. INSTALL DECK SIDE TRIM BOX LH |
 |
Install the deck side trim box with the 2 clips.
| 7. INSTALL DECK SIDE TRIM BOX RH |
| 8. INSTALL JACK CARRIER ASSEMBLY |
| 9. INSTALL JACK ASSEMBLY |
| 10. INSTALL JACK CARRIER SUPPORT |
| 11. INSTALL DECK BOARD SUB-ASSEMBLY NO.3 |
 |
Install the deck No.3 board sub-assembly with the 2 bolts and 2 nuts.
| 12. INSTALL DECK BOARD SUB-ASSEMBLY NO.2 |
 |
Install the deck No.2 board sub-assembly with the 4 bolts and 2 nuts.
| 13. INSTALL DECK FLOOR BOX FRONT |
 |
Install the deck floor box front with the 2 clips.
| 14. INSTALL REAR FLOOR FINISH PLATE |
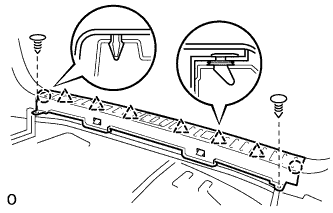 |
Engage the 2 claws and 6 clips, and install the rear floor finish plate.
Install the 2 clips.
| 15. INSTALL DECK FLOOR BOX REAR |
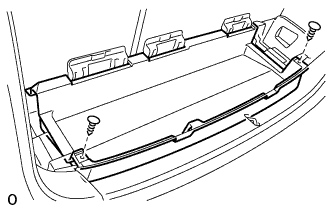 |
Install the deck floor box rear with the 2 clips.
| 16. INSTALL DECK BOARD SUB-ASSEMBLY |
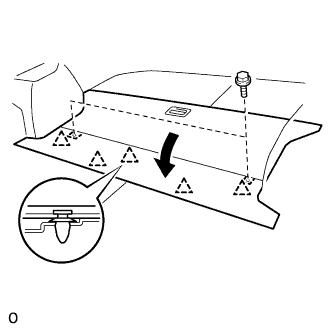 |
Install the deck board sub-assembly with the 2 bolt.
Engage the 5 clips.
| 17. INSTALL SERVICE PLUG GRIP |
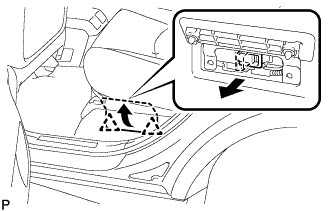 |
Wear insulation gloves, then insert the service plug.
Push down on the grip to lock.
Close the battery service hole cover.
| 18. CONNECT CABLE TO NEGATIVE BATTERY TERMINAL |
| 19. PERFORM INITIALIZATION |
Some systems need initialization when disconnecting the cable from the negative battery terminal (Click here).
