SKID CONTROL ECU > REMOVAL |
| 1. PRECAUTION |
| 2. DISCONNECT CABLE FROM NEGATIVE BATTERY TERMINAL |
| 3. REMOVE FRONT DOOR SCUFF PLATE RH |
| 4. REMOVE COWL SIDE TRIM SUB-ASSEMBLY RH |
| 5. REMOVE INSTRUMENT PANEL NO.2 UNDER COVER SUB-ASSEMBLY (for LHD) |
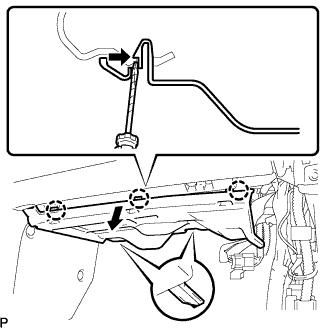 |
Using a screwdriver, push the 3 claws in the direction indicated by the arrow to disengage and remove the guide on the front of the vehicle.
Disconnect the connectors and remove the instrument panel No.2 under cover sub-assembly.
| 6. REMOVE GLOVE COMPARTMENT DOOR ASSEMBLY (for LHD) |
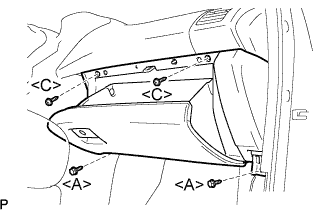 |
Remove the 2 bolts <A> and the 2 screws <C>.
Pull the glove compartment door assembly to the rear to remove it.
Disconnect the connector.
| 7. REMOVE INSTRUMENT PANEL FINISH PANEL SUB-ASSEMBLY LOWER (for RHD) |
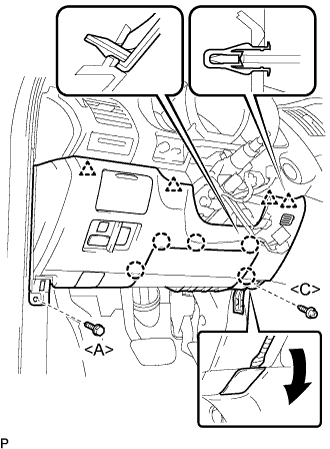 |
Using a screwdriver, open the instrument panel finish panel sub-assembly lower cover.
Remove the bolt <A> and the screw <C>.
Disconnect the hood lock control cable assembly.
Disengage the 5 claws and the 4 clips.
Disconnect the connectors and then remove the instrument panel finish panel sub-assembly lower.
| 8. REMOVE DRIVER SIDE KNEE AIRBAG ASSEMBLY (for RHD) |
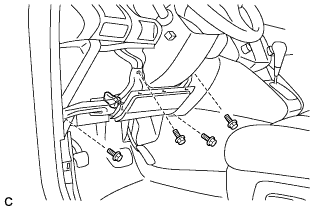 |
Disconnect the connector from the driver side knee airbag assembly.
Remove the 4 bolts and the driver side knee airbag assembly.
| 9. REMOVE AIR CONDITIONER AMPLIFIER ASSEMBLY |
 |
Disconnect the connectors.
Remove the 2 nuts and air conditioner amplifier assembly.
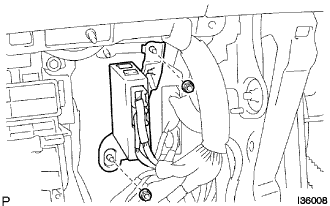
| 10. REMOVE SKID CONTROL ECU ASSEMBLY |
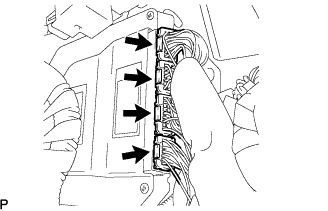 |
Disconnect the skid control ECU assembly connectors.
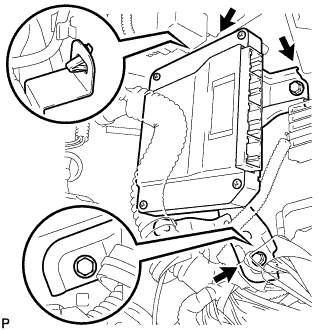 |
Remove the 2 bolts, clip and skid control ECU assembly.
