REMOVAL
Removal / installation
- HINT:
- Use the same procedures for the RH side and LH side.
- The procedures listed below are for the LH side.
- Use the same procedures for the RH side and LH side.
| 1. PRECAUTION |

- CAUTION:
- Be sure to read "PRECAUTION" thoroughly before servicing (Click here).
| 2. DISCONNECT CABLE FROM NEGATIVE BATTERY TERMINAL |
- CAUTION:
- Wait for 90 seconds after disconnecting the cable to prevent the airbag working.
| 3. REMOVE REAR DOOR SCUFF LH PLATE |
Disengage the 4 claws and 2 clips, and remove the rear door scuff plate.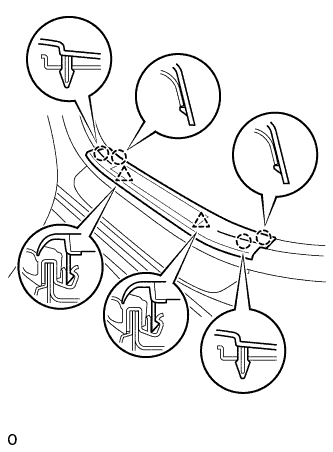

Disconnect the connector. (w/ illumination scuff plate)
| 4. REMOVE REAR DOOR OPENING TRIM LH WEATHERSTRIP |
| 5. REMOVE REAR SEAT ASSEMBLY LH |
Using a clip remover, remove the 3 clips.
Remove the bolt and disconnect the floor anchor side of the fold seat stopper band assembly No.2.
Move the rear seat assembly LH to the rearmost position by operating the rear seat track adjusting handle.
Remove the 2 bolts on the front side.
Move the rear seat assembly LH fully forward by operating the rear seat track adjusting handle.
Remove the 3 bolts on the rear side.
Move the rear seat assembly LH to the center position and adjust the seatback to the vertical position.
Remove the rear seat assembly LH.
| 6. REMOVE DECK SIDE TRIM LH COVER |
Using a moulding remover, disengage 3 claws (A).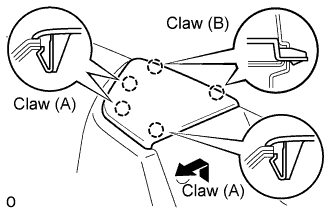
Disengage 2 claws (B) and remove the deck side trim cover by pulling it to inside the vehicle.
| 7. REMOVE REAR SEAT SIDE LH COVER |
Using a clip remover, remove the 3 clips.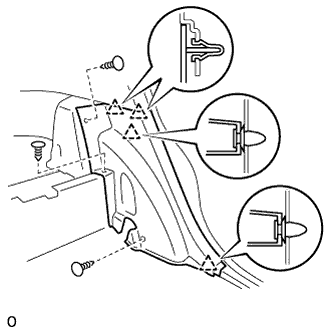
Disengage the 4 clips and remove the rear seat side cover.
| 8. REMOVE REAR AIRBAG SENSOR LH |
Disconnect the connector from the rear airbag sensor LH.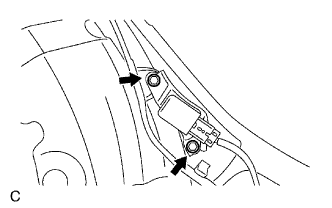
Remove the 2 bolts and the rear airbag sensor LH.