REMOVAL
Removal / installation
| 1. DISCONNECT CABLE FROM NEGATIVE BATTERY TERMINAL |

| 2. REMOVE FRONT DOOR SCUFF PLATE RH |
Disengage the 6 claws and 4 clips, and remove the front door scuff plate.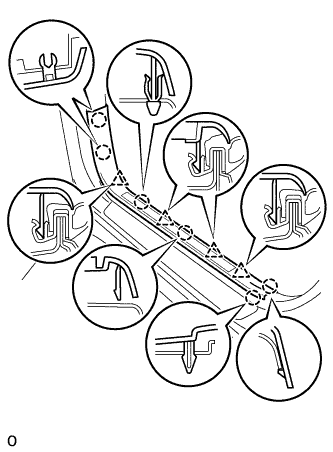

Disconnect the connector. (w/ illumination scuff plate)
| 3. REMOVE COWL SIDE TRIM SUB-ASSEMBLY RH |
- HINT:
- Use the same procedures for the RH side and the LH side.
| 4. REMOVE NO.2 INSTRUMENT PANEL UNDER COVER SUB-ASSEMBLY |
Using a screwdriver, push the 3 claws in the direction indicated by the arrow to disengage and remove the guide on the front of the vehicle.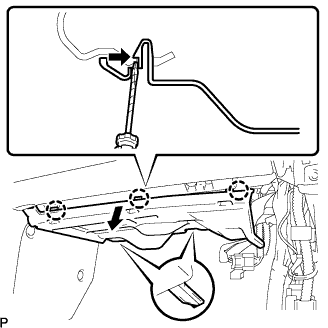
- HINT:
- Tape the screwdriver tip before use.
Disconnect the connectors and remove the instrument panel No.2 under cover sub-assembly.
| 5. REMOVE GLOVE COMPARTMENT DOOR ASSEMBLY |
Remove the 2 bolts <A> and the 2 screws <C>.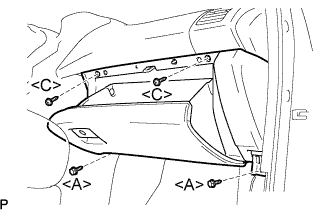
Pull the glove compartment door assembly to the rear to remove it.
Disconnect the connector.
| 6. REMOVE WIPER ECU |
Disconnect the connector.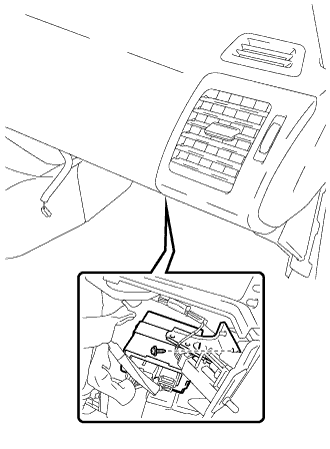
Remove the screw and the wiper ECU.