REMOVAL
Removal / installation
| 1. REMOVE FRONT DOOR INSIDE HANDLE BEZEL PLUG |

Using a screwdriver wrapped with protective tape, disengage the 3 claws and remove the front door inside handle bezel plug.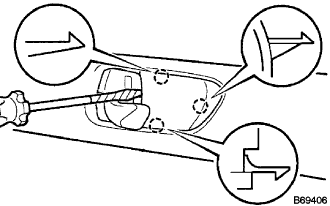

| 2. REMOVE POWER WINDOW REGULATOR MASTER SWITCH ASSEMBLY |
Using a screwdriver wrapped with protective tape, disengage the 2 claws and the 2 clips.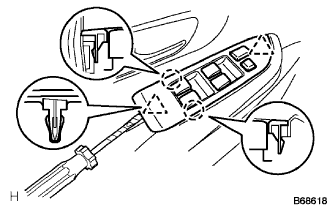
Disconnect the connector and remove the power window regulator master switch assembly.
| 3. REMOVE DOOR ARMREST COVER |
Remove the door armrest cover.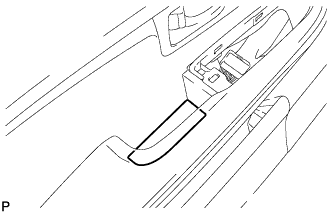
| 4. REMOVE FRONT DOOR LOWER FRAME BRACKET GARNISH |
Using a screwdriver wrapped with protective tape, disengage the 2 clips and claw, and remove the front door lower frame bracket garnish.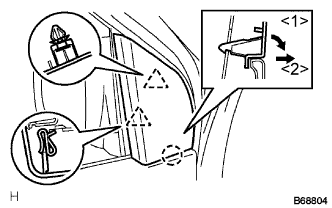
| 5. REMOVE FRONT DOOR TRIM BOARD SUB-ASSEMBLY |
Remove the 2 screws.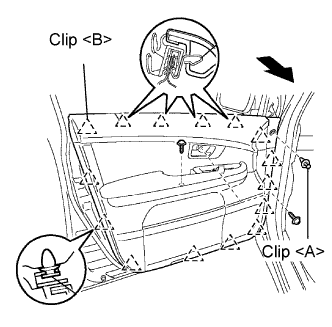
Remove the clip <A>.
Pulling the front door trim board sub-assembly in the direction of the arrow shown in the illustration, disengage the 15 clips <B>.
Disconnect the cables and each connector from the back side of the inside handle and the front door trim board sub-assembly, remove the front door trim board sub-assembly.
Disengage the 2 claws and remove the front door courtesy light.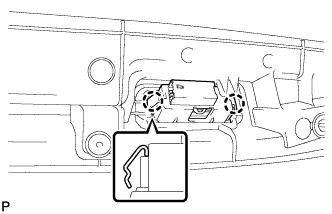
| 6. REMOVE OUTER REAR VIEW MIRROR ASSEMBLY |
Disconnect the connector and remove the clamp.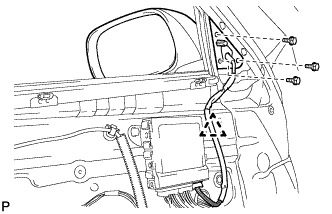
Remove the 3 bolts and the outer rear view mirror assembly.
| 7. REMOVE FRONT DOOR BELT MOULDING ASSEMBLY |
Put protective tape under the moulding.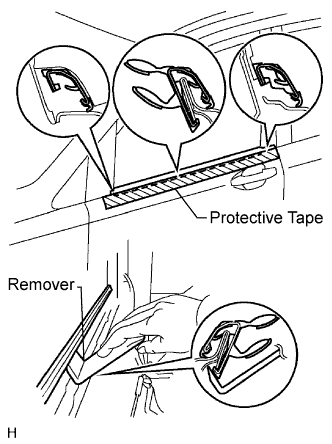
Using a moulding remover, disengage the claws and remove the front door belt moulding assembly.
- HINT:
- Tape the remover tip before use.