INSTALLATION
Removal / installation
| 1. INSTALL TELEVISION CAMERA ECU |

Install the television camera ECU with the 3 bolts.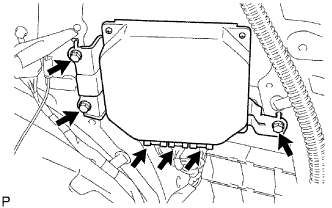

Connect the 3 connectors.
| 2. INSTALL ROOF SIDE GARNISH ASSEMBLY INNER RH |
Engage the 7 clips and install the roof side garnish assembly inner.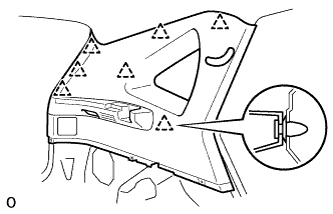
Install the 3 clips.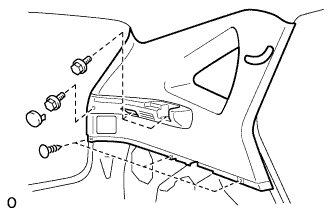
Install the 3 bolts and tonneau cover holder cap.
Engage the 4 claws and install the seat belt bezel.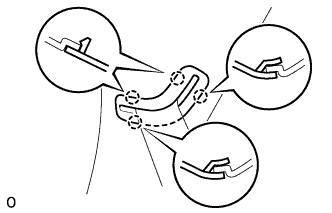
| 3. INSTALL NO.1 TONNEAU COVER HOLDER CAP |
| 4. INSTALL NO.2 ROOM LIGHT ASSEMBLY |
Connect the connector.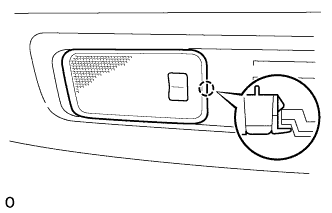
Engage the claw and install the room light assembly No.2.
| 5. INSTALL DECK TRIM SIDE PANEL ASSEMBLY RH |
Engage the 2 clips and install the deck trim side panel assembly.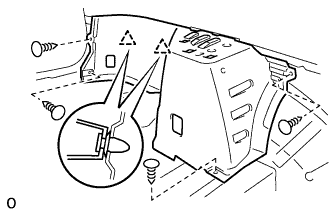
Install the 4 clips.
| 6. INSTALL ROPE HOOK |
Install the 2 rope hooks with the 2 bolts.
- Torque:
- 8.0 N*m{ 80 kgf*cm , 71 in.*lbf }
- HINT:
- Use the same procedure to install the other side.
| 7. INSTALL REAR SEAT SIDE COVER RH |
Engage the 4 clips and install the rear seat side cover.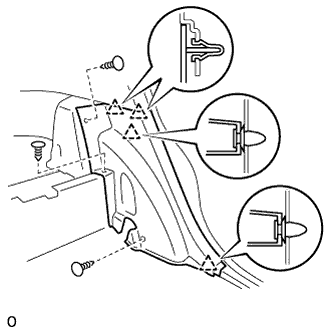
Install the 3 clips.
| 8. INSTALL REAR NO.1 SEAT BELT ASSEMBLY OUTER RH |
Install the rear No.1 seat outer belt assembly with the bolt.
- Torque:
- 42 N*m{ 428 kgf*cm , 31 ft.*lbf }
| 9. INSTALL DECK SIDE TRIM COVER RH |
Engage the 5 claws and install the deck side trim cover.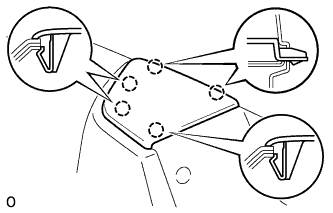
| 10. INSTALL REAR DOOR SCUFF PLATE RH |
Connect the connector. (w/ illumination scuff plate)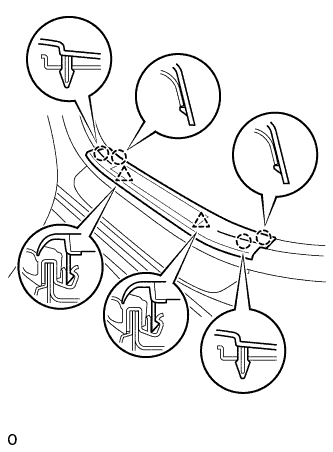
Engage the 4 claws and 2 clips, and install the rear door scuff plate.
| 11. INSTALL REAR FLOOR FINISH SIDE PLATE RH |
Engage the 2 clips and install the rear floor finish side plate.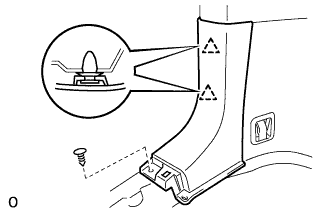
Install the clip.
| 12. INSTALL REAR FLOOR FINISH PLATE |
Engage the 2 claws and 6 clips, and install the rear floor finish plate.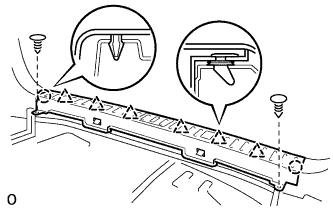
Install the 2 clips.
| 13. INSTALL DECK SIDE TRIM BOX LH |
Install the deck side trim box with the 2 clips.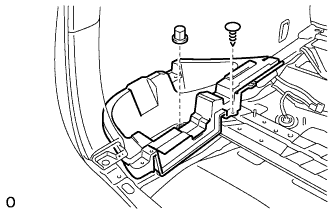
| 14. INSTALL DECK SIDE TRIM BOX RH |
| 15. INSTALL JACK CARRIER ASSEMBLY |
Install the jack carrier assembly, jack assembly and jack carrier support.
| 16. INSTALL BACK DOOR WEATHERSTRIP |
| 17. INSTALL NO.3 DECK BOARD SUB-ASSEMBLY |
Install the deck No.3 board sub-assembly with the 2 bolts and 2 nuts.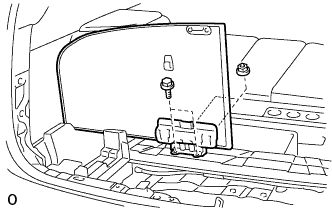
| 18. INSTALL NO.2 DECK BOARD SUB-ASSEMBLY |
Install the deck No.2 board sub-assembly with the 4 bolts and 2 nuts.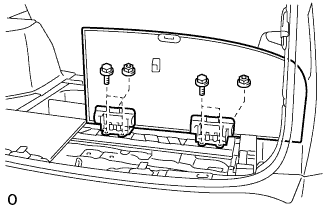
| 19. INSTALL DECK FLOOR BOX REAR |
Install the deck floor box rear with the 2 clips.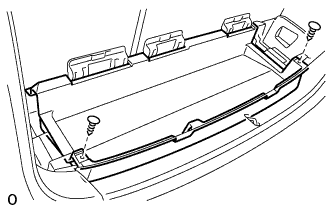
| 20. INSTALL DECK FLOOR BOX FRONT |
Install the deck floor box front with the 2 clips.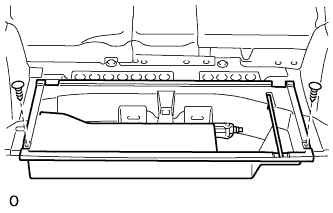
| 21. INSTALL DECK BOARD SUB-ASSEMBLY |
Install the deck board sub-assembly with the 2 bolt.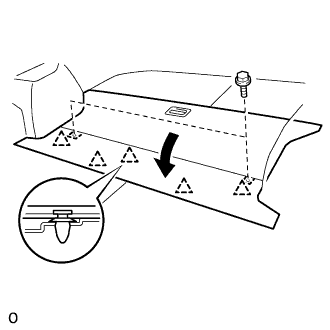
Engage the 5 clips.
| 22. INSTALL TONNEAU COVER ASSEMBLY |
| 23. CONNECT CABLE TO NEGATIVE BATTERY TERMINAL |
| 24. ADJUST TELEVISION CAMERA AIMING |
| 25. ADJUST STEERING ANGLE NEUTRAL POINT |
| 26. ADJUST MAXIMUM STEERING ANGLE |
| 27. PERFORM INITIALIZATION |
- NOTICE:
- Some systems need initialization when disconnecting the cable from the negative battery terminal. (Click here)