Most 1979–85 RX-7s were equipped with a carburetor.
NOTE: Idle mixture adjustment is normally only necessary in
the event of carburetor overhaul. For information on carburetor removal and
installation, please refer to Section 5 of this manual.
- Remove the throttle body, then cut out the idle limiter cap with a hacksaw.
- Assemble and install the carburetor. Be sure to install a new mixture adjusting
screw. Tighten it lightly until it seats, then turn it counterclockwise three
revolutions to attain the preliminary setting.
- Connect a tachometer to the engine, then start the engine.
- With the gear selector set to Neutral (or N), turn the throttle adjusting
screw to adjust the idle speed to 770 rpm (manual transmission) or 870 rpm
(automatic transmission). Read the tachometer as if testing a conventional
4-cylinder engine.
- Set the idle speed to its highest rpm by turning the mixture adjusting screw,
located at the base of the carburetor.
- With the gear selector still set to Neutral (or N), again turn the throttle
adjusting screw to adjust the idle speed to 770 rpm (manual transmission)
or 870 rpm (automatic transmission).
- Turn the mixture adjusting screw clockwise to lower the idle speed to 750
rpm (manual transmission) or 840 rpm (automatic transmission).
CAUTION
When making adjustments with the engine running, especially with the automatic
transmission in drive, ALWAYS make sure the parking brake is firmly set
and the drive wheels are blocked in position.
- On vehicles equipped with an automatic transmission, shift the selector
lever to the D position and adjust the idle speed to 750 rpm by turning the
throttle adjusting screw.
- Shut the engine OFF.
- Install a new idle limiter cap onto the mixture adjustment screw.
NOTE: After adjusting idle speed, the throttle sensor on
the carburetor should also be adjusted. For information on that procedure,
please refer to Section 5 of this manual.
- Disconnect and remove the tachometer.
NOTE: Idle mixture adjustment is normally only necessary when
the variable resistor is replaced. The variable resistor should be replaced
when it lacks continuity between terminals A and C or B and C, or whenever the
engine is replaced.
- Switch all electrical accessories to the off position and remove the fuel
filler cap.
- Connect a tachometer to the engine.
| Fig. 1: Check the variable resistor for continuity
between terminals A and C or B and C
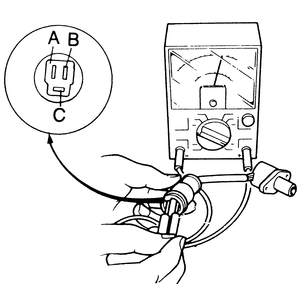
|
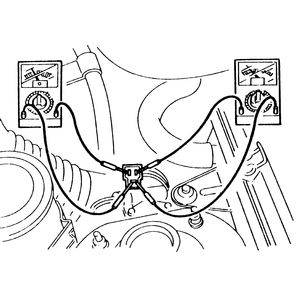
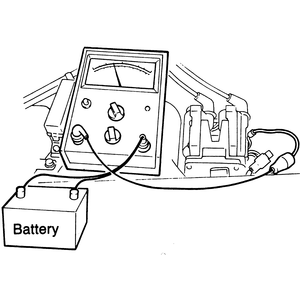
| Fig. 2: Use a pair of voltmeters or test lights to
check the throttle sensor setting — 1984–85
RX-7 with fuel injection
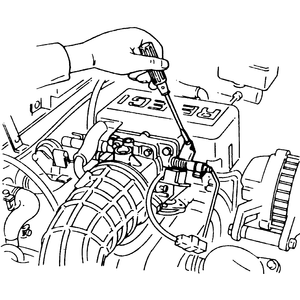
|
| Fig. 3: If necessary, turn the throttle sensor adjusting
screw — 1984–85 RX-7 with fuel injection
|
- Start the engine and let it run until it reaches normal operating temperature.
- Check/adjust the throttle sensor, as described in the idle speed adjustment
procedure.
- Disconnect the vent and vacuum solenoid valve connector.
- Adjust the idle speed to 800 rpm by turning the Air Adjust Screw (AAS) on
the throttle body.
- Set the idle speed to its highest rpm by turning the adjusting screw on
the variable resistor.
- Once again, adjust the idle speed to 800 rpm by turning the Air Adjust Screw
(AAS) on the throttle body.
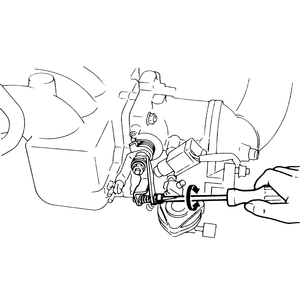
| Fig. 4: Adjust idle speed by turning the AAS
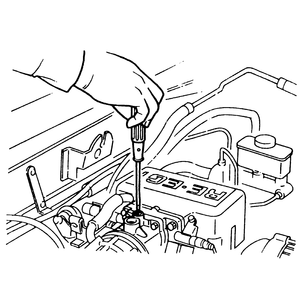
|
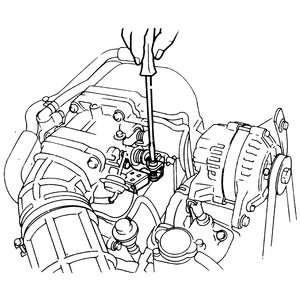
| Fig. 5: Adjust the variable resistor with a screwdriver
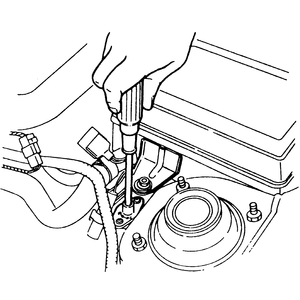
|
- Turn the variable resistor adjusting screw counterclockwise until the engine
speed drops to 780 rpm, then turn it clockwise to reset the engine speed to
800 rpm.
- Shut the engine OFF.
- Disconnect and remove the tachometer.
- Reattach the vent and vacuum solenoid valve connector.
- Fill the head of the variable resistor adjusting screw with an adhesive
agent (Part No. N304 23 795 or equivalent).
NOTE: Idle mixture adjustment is normally only necessary when
the variable resistor is replaced. The variable resistor should be replaced
if it lacks continuity between terminals A and C or B and C, or whenever the
engine is replaced.
| Fig. 6: Connect a jumper wire to the terminals of the
initial set coupler — 1986–89 RX-7
|
| Fig. 7: Connect a tachometer to the service coupler at
the trailing side coil with igniter — 1986–89 RX-7
|
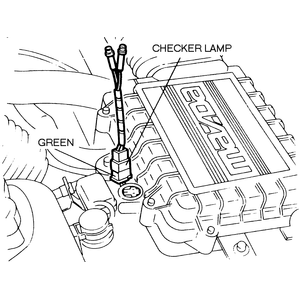
| Fig. 8: Use dual checker lamps to verify the throttle
sensor setting — 1986–89 RX-7
|
| Fig. 9: If necessary, turn the throttle sensor adjusting
screw — 1986–89 non-turbo RX-7
|
| Fig. 10: If necessary, turn the throttle sensor adjusting
screw — 1986–89 turbocharged RX-7
|
| Fig. 11: Adjust the idle speed by turning the AAS on
the throttle body — 1986–89 non-turbo RX-7
|
| Fig. 12: On turbocharged RX-7 models, the AAS is located
on the BAC valve
|
- Switch all electrical accessories to the off position.
- Start the engine and let it run until it reaches normal operating temperature,
then shut off the engine.
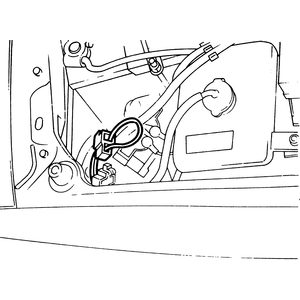
- Connect a jumper wire to the terminals of the initial set coupler.
- Connect a tachometer to the service coupler at the trailing side coil with
igniter. If the tachometer does not function correctly, reconnect it at the
leading side coil with igniter (black coupler).
NOTE: If using an inductive (secondary pick-up) type tachometer,
connect it only at the trailing side of the spark plug wires. If connected
at the leading side coil with igniter, it will not function properly.
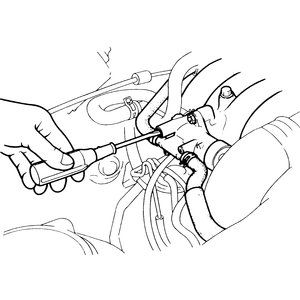
| Fig. 13: Check the variable resistor for continuity
between terminals A and C or B and C
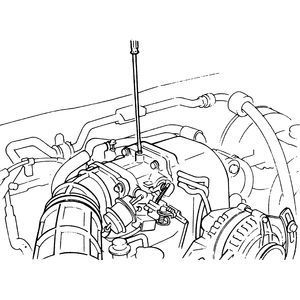
|
| Fig. 14: Adjust the variable resistor with a screwdriver
|
- Check/adjust the throttle sensor, as described in the idle speed adjustment
procedure.
- Remove the blind cap and adjust the idle speed to 750 rpm by turning the
Air Adjust Screw (AAS) on the throttle body.
- Set the idle speed to its highest rpm by turning the adjusting screw on
the variable resistor.
- Once again, adjust the idle speed to 750 rpm by turning the Air Adjust Screw
(AAS) on the throttle body.
- Turn the variable resistor adjusting screw counterclockwise until the engine
speed drops to 730 rpm, then turn it clockwise to reset the engine speed to
750 rpm.
- Shut off the engine and disconnect the tachometer.
- Install the blind cap and disconnect the jumper wire.
NOTE: Be sure to remove the jumper wire, otherwise engine
performance will be reduced.
- Fill the head of the variable resistor adjusting screw with an adhesive
agent (Part No. N304 23 795 or equivalent).

