Previous Next

VOLTAGE ADJUSTMENTS

1978–79 GLC and RX-7
  1. Remove the cover from the regulator.
  2. Check the air gap, point gap and back gap with a feeler gauge (see illustration).
  3. If they do not fall within the specifications given in the Alternator and Regulator Specifications chart, adjust the gap(s) by bending the stationary contact bracket.

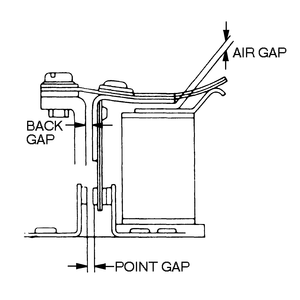
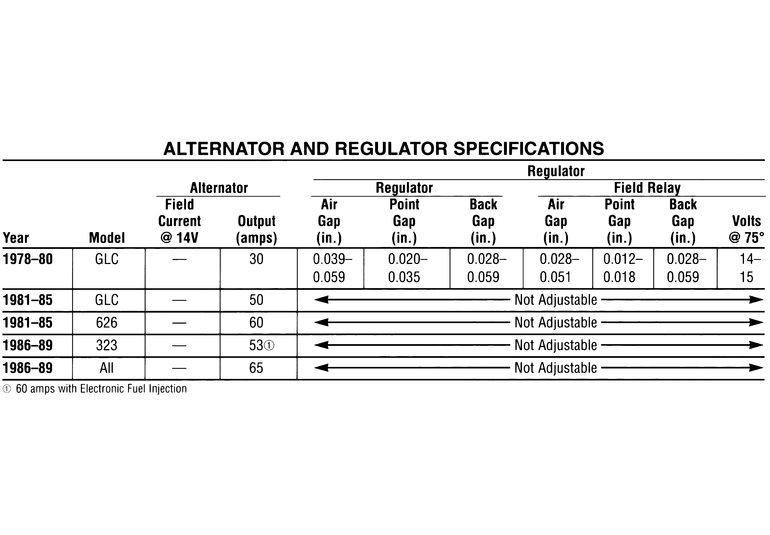
    Fig. 1: The air gap, point gap and back gap are adjustable on 1978–79 GLC and RX-7 voltage regulators

  4. Connect a voltmeter between the A and E terminals of the regulator, on the RX-7. On the GLC, connect a voltmeter between the top terminal of the alternator and the coil mounting bolt.

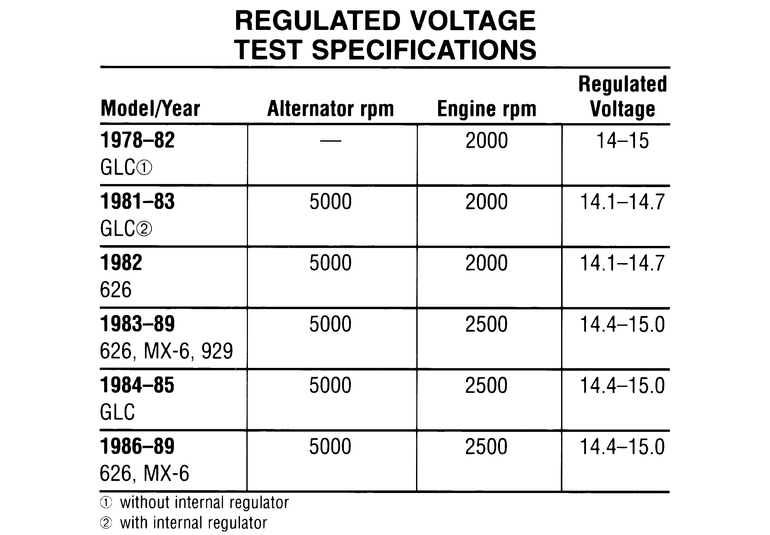
    NOTE: Be sure that the car's battery is fully charged before proceeding with this test. The ammeter must read 5 amps or less.

  5. Start the engine and run it at the rpm specified in the accompanying chart. The voltage reading should as specified in the same chart.
  6. Stop the engine.
  7. Bend the upper plate down to decrease the voltage setting, or up to increase the setting, as required.
  8. If the regulator cannot be brought within specifications, replace it.
  9. When the test is completed, disconnect the voltmeter and replace the regulator cover.

    ALTERNATOR & REGULATOR SPECIFICATIONS

    REGULATOR VOLTAGE SPECIFICATIONS

Previous Next