If the starter motor does not operate at all, inspect the following:
Check the starter coil
Check for poor contact at the battery terminal
- If the starter motor does not stop, inspect the following:
- Check the starter magnetic switch
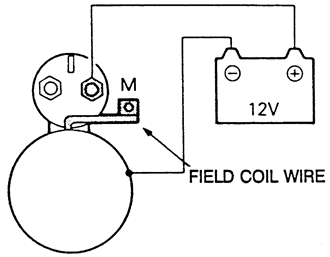
- Disconnect the negative battery cable.
- Remove the starter assembly from the vehicle.
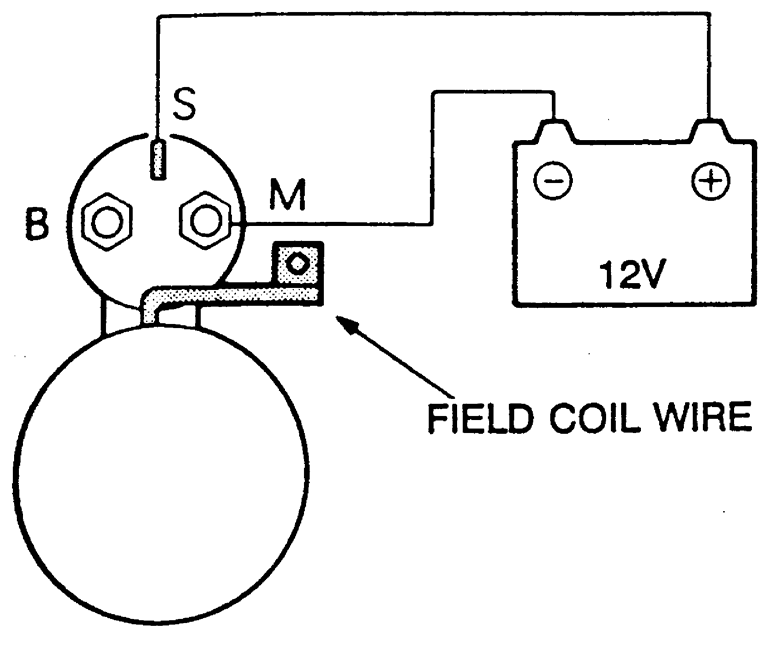
- Disconnect the field coil wire from the M-terminal of the magnetic switch.
| Fig. 1: Magnetic switch pull-in test connections
|
- Connect a 12V battery between S-terminal and M-terminal on the magnetic
switch of the starter.
CAUTION
The test must be performed quickly, in less than 10 seconds, to prevent
the coil from burning.
- If the pinion moves out, the pull-in coil is functioning properly. If
it doesn't, replace the magnetic switch.
- Disconnect the negative battery cable.
- Remove the starter assembly from the vehicle.
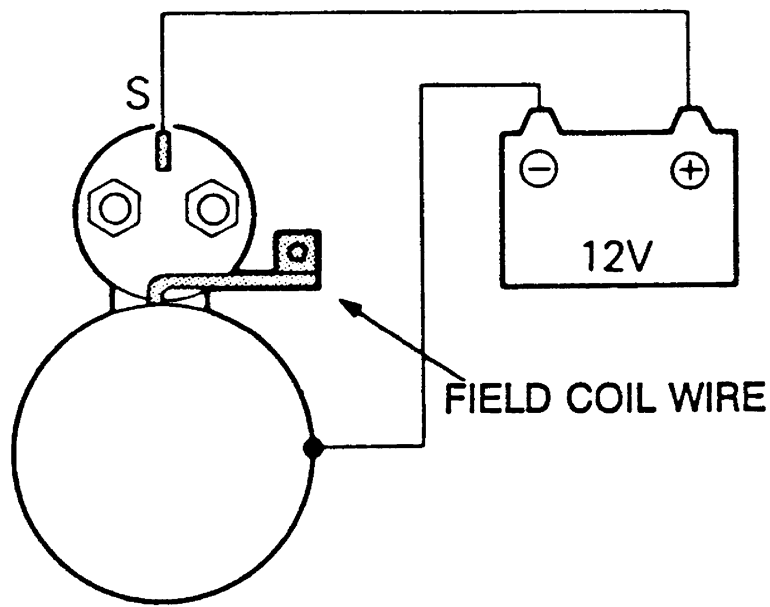
- Disconnect the field coil wire from the M-terminal of the magnetic switch.
| Fig. 2: Starter motor terminal identification for
the magnetic switch hold-in test

|
- Connect a 12V battery between S-terminal and body.
CAUTION
The test must be performed quickly, in less than 10 seconds, to prevent
the coil from burning.
- If the pinion remains out, everything is in order. If the pinion moves
in, the hold-in circuit is open. Replace the magnetic switch.
- Disconnect the negative battery cable.
- Remove the starter assembly from the vehicle.
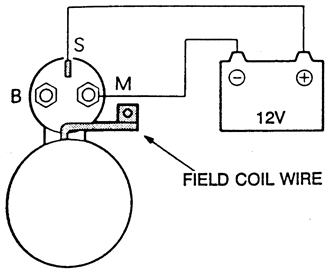
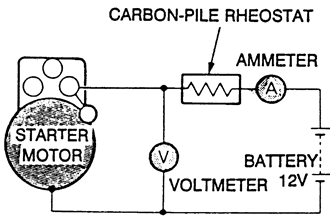
- Place the starter assembly into a vise with soft jaws. Connect a fully
charged 12 volt battery to the starter motor as follows:
- Connect a test ammeter with 100 ampere scale and a carbon pile rheostat
in series with battery positive post and starter motor terminal.
- Connect a voltmeter across the starter motor.
- Rotate the carbon pile to full-resistance position.
| Fig. 3: Starter motor free-running test connections
|
- Connect the battery cable from the negative battery post to the starter
motor body.
- Adjust the rheostat until the battery voltage shown by the voltmeter
is 11.5V for direct drive type starter, which are normally installed
in 1.8L engines. On reduction-drive starters, which are normally installed
in 2.0L engines, adjust the rheostat until the battery voltage shown
by the voltmeter is 11.0 V.
- Confirm that the maximum amperage is within the specifications listed
below and the starter turns freely.
- Direct drive starter — 60 Amps maximum
- Reduction drive starter — 90 Amps maximum
- If the starter is not within specifications, replace the unit.
- Disconnect the negative battery cable.
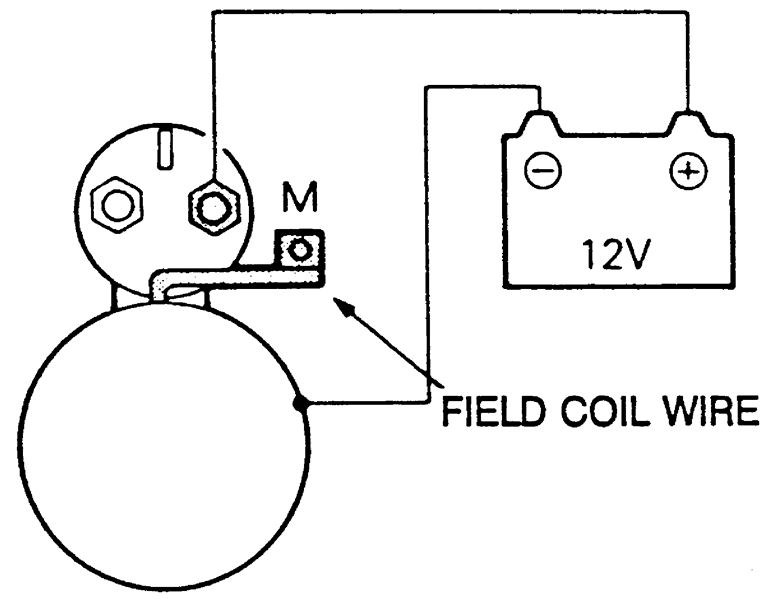
| Fig. 4: Starter motor terminal identification — magnetic
switch return test
|
- Remove the starter assembly from the vehicle.
- Disconnect the field coil wire from the M-terminal of the magnetic switch.
- Connect a 12 volt battery between the M-terminal of the starter and the
starter body.
NOTE: This test must be done quickly, in less than 10
seconds, to prevent coil from burning.
- Pull the pinion out and then release it. If the pinion quickly returns
to its original position, everything is in order. If it doesn't, replace
the magnetic switch.