Previous Next

REMOVAL & INSTALLATION

1.8L Engines
  1. Disconnect the negative battery cable.
  2. Disconnect the sensor harness connector.
  3. Unscrew the cap hold-down screws and lift off the cap.
  4. Matchmark the coupling to the sensor housing and the housing to the engine.

    NOTE: Do not crank the engine during this procedure. If the engine is cranked, the matchmark must be disregarded.

  5. Remove the hold-down nut.
  6. Carefully remove the crank angle sensor assembly from the engine.

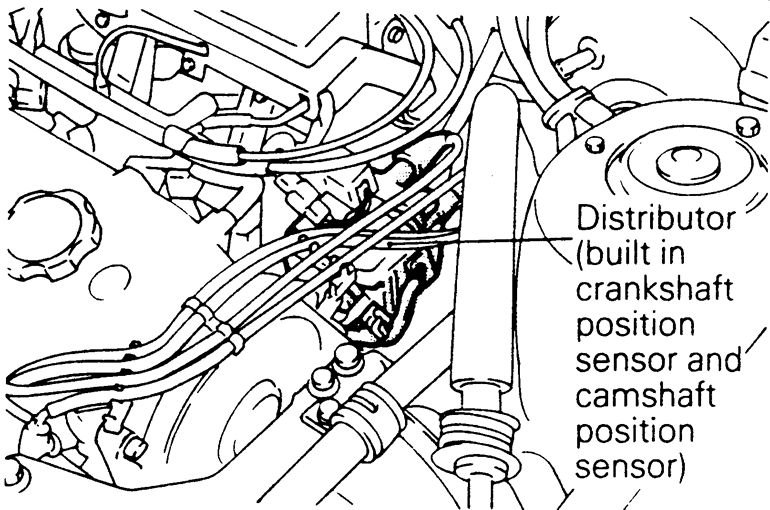
    Fig. 1: On 1.8L the crankshaft and camshaft position sensors are built into the distributor

    To install:

  7. If the timing is not disturbed, perform the following procedures:
    1. Install a new housing O-ring and lubricate with clean oil.
    2. Install the assembly in the engine so the coupling is aligned with the matchmark on the housing and the housing is aligned with the matchmark on the engine. Make sure the sensor assembly is fully seated and the shaft is fully engaged.
    3. Install the hold-down nut.
    4. Connect the harness connector.
    5. Make sure the sealing O-ring is in place, install the cap and tighten the screws.
    6. Connect the negative battery cable.
    7. Adjust the ignition timing, if applicable, and tighten the hold-down nut.
  8. If the timing is disturbed, perform the following procedures:
    1. Install a new housing O-ring and lubricate with clean oil.
    2. Position the engine so the No. 1 piston is at TDC of its compression stroke and the mark on the vibration damper is aligned with 0 on the timing indicator.
    3. Install the sensor in the engine so the factory matchmark on the coupling (notch) is aligned with the matchmark on the housing (punch mark) and the housing is aligned with the matchmark on the engine. Make sure the sensor assembly is fully seated and the shaft is fully engaged.
    4. Install the hold-down nut.
    5. Connect the harness connector.
    6. Make sure the sealing O-ring is in place, install the cap and tighten the screws.
    7. Connect the negative battery cable.
    8. Adjust the ignition timing, if applicable, and tighten the hold-down nut.
2.0L Non-Turbo Engines
  1. Disconnect the negative battery cable.
  2. Detach the crankshaft position sensor electrical connector.
  3. Unfasten the retaining bolt, then remove the sensor.

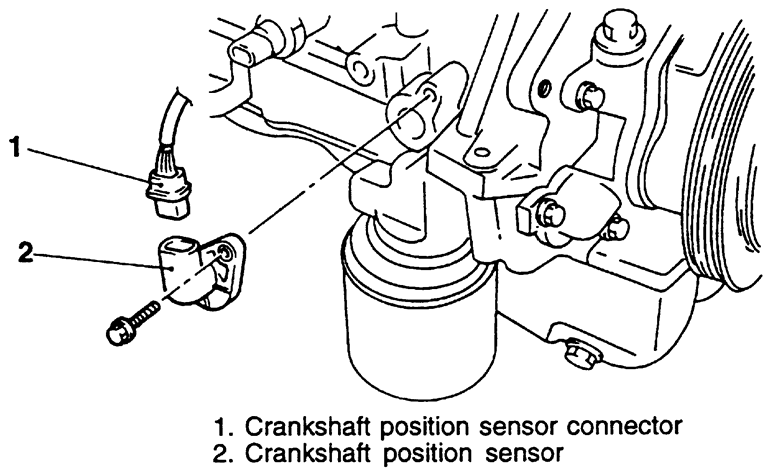
    Fig. 2: Location of the crankshaft position sensor — 1997 2.0L non-turbo engine shown

    To install:

  4. Position the sensor and install the retaining bolt.
  5. Attach the crankshaft position sensor electrical connector.
  6. Connect the negative battery cable.
2.0L Turbo and 2.4L Engines
  1. Disconnect the negative battery cable.
  2. Remove the timing belt, as outlined in Section 3 of this manual.
  3. Unplug the sensor connector.
  4. Unfasten the retaining bolts, then remove the sensor from the vehicle.
  5. Installation is the reverse of the removal procedure.

Previous Next