Previous Next

Tie Rod Ends

REMOVAL & INSTALLATION

  1. Disconnect the battery negative cable. Raise the vehicle and support safely.

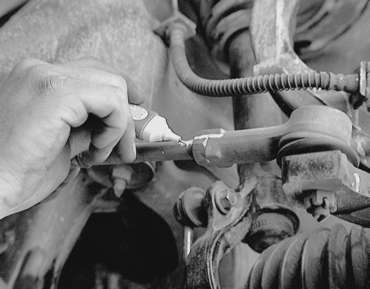
    Fig. 1: Matchmark the installed position of the tie rod end

  2. Wire brush the threads on the tie rod shaft and lubricate with penetrating oil. Loosen the locknut.
  3. Remove the cotter pin and nut and press the tie rod end from the steering knuckle.

    Fig. 2: Use a pair of needle-nose pliers to remove the cotter pin from the tie rod end

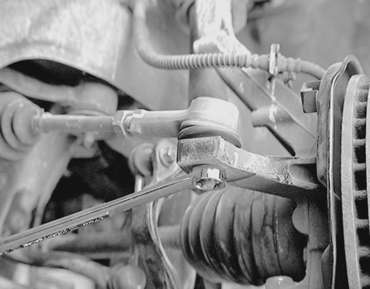
    Fig. 3: Unfasten the tie rod end nut . . .

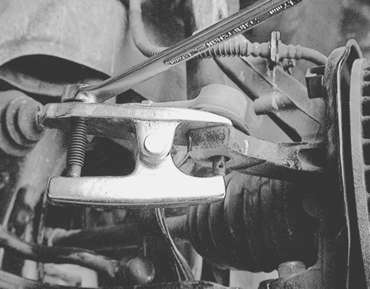
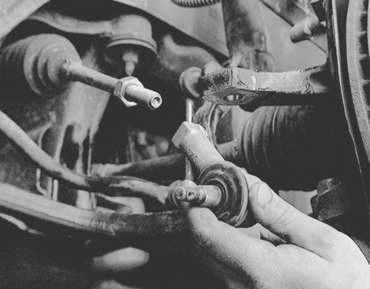
    Fig. 4: . . . then install a suitable puller

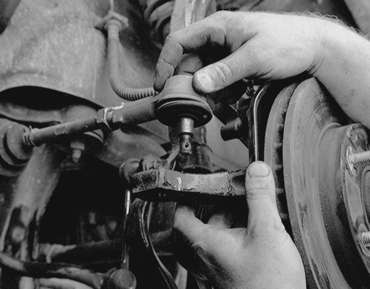
    Fig. 5: Separate the tie rod end from the steering knuckle

  4. Hold the tie rod shaft with locking pliers and turn the tie rod end off, counting the number of turns for installation.

    Fig. 6: Unscrew the tie rod end, counting the number of turns for installation purposes

    To install:

  5. Install the tie rod end the same number of turns that it took to remove the old one. Tighten the locknut to secure tie rod in place.
  6. Install the tie rod stud into the steering knuckle and install nut. Tighten the nut to 25 ft. lbs. (34 Nm) and install new cotter pin.
  7. Perform front end alignment.

Previous Next