Previous Next

ADJUSTMENT

1990–94 Vehicles
  1. Make sure the parking brake cable is free and is not frozen or sticking. With the engine running, forcefully depress the brake pedal 5–6 times.

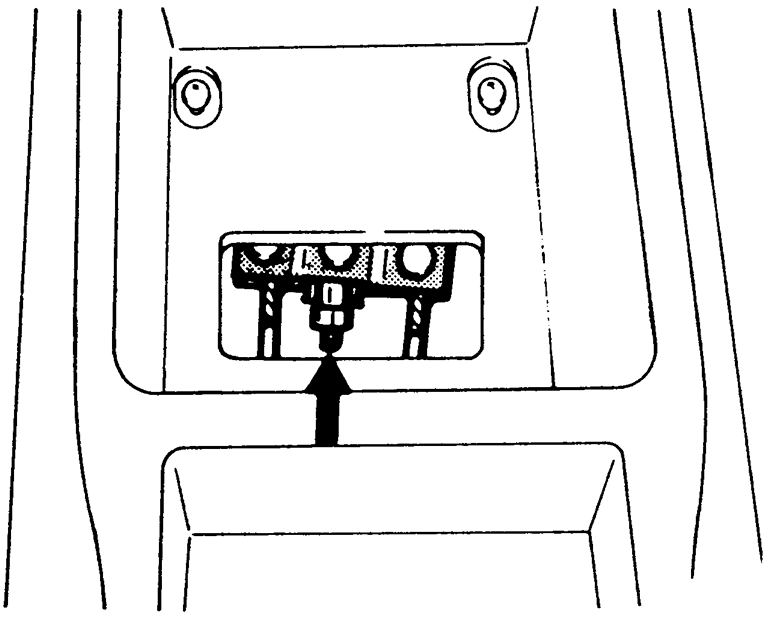
    Fig. 1: Location of the parking brake cable adjusting nut — 1990–94 vehicles

  2. Apply the parking brake while counting the number of notches. Check desired parking brake stroke should be 5–7 notches.
  3. If adjustment is required, remove the carpeting from inside the floor console. This will expose the adjusting nut within the console.
  4. Loosen the locknut on the cable rod. Rotate the adjusting nut to adjust the parking brake stroke to the 5–7 notch setting. After making the adjustment, check there is no looseness between the adjusting nut and the parking brake lever, then tighten the locknut.

    NOTE: Do not adjust the parking brake too tight. If the number of notches is less than specification, the cable has been pulled too much and the automatic adjuster will fail or the brakes will drag.

  5. After adjusting the lever stroke, raise the rear of the vehicle and safely support. With the parking brake lever in the released position, turn the rear wheels to confirm that the rear brakes are not dragging.
  6. Check that the parking brake holds the vehicle on an incline.
1995–98 Vehicles
  1. Pull the parking brake lever with a force of about 45 lbs. (196 N) and count the number of notches. On vehicles with disc brakes, the value should be 3–5 notches. On vehicles with drum brakes, the value should be 5–7 notches.
  2. If the parking brake stroke is not within the standard value, adjust is necessary.
  3. Remove the carpeting from inside the floor console. This will expose the adjusting nut within the console.
  4. Loosen the adjusting nut to the end of the cable rod, freeing the parking brake cable.

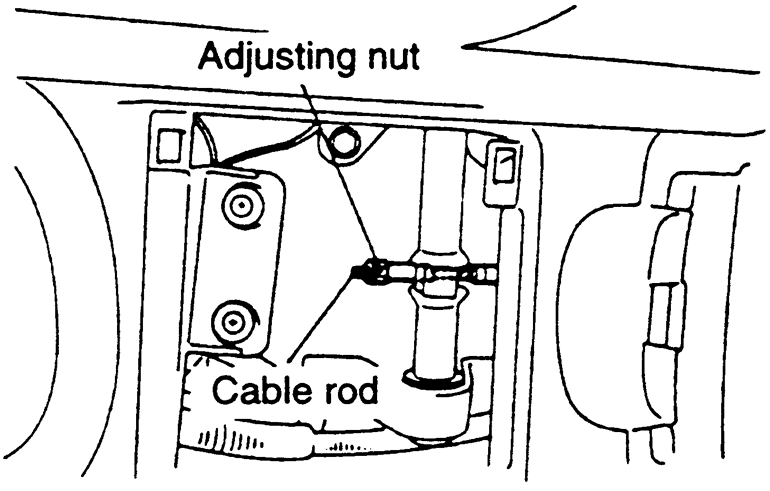
    Fig. 2: Location of the cable rod adjusting nut

  5. For drum brakes, perform the following:
    1. With the engine idling, forcefully depress the brake pedal 5 or 6 times and make sure the pedal stroke stops changing. If the pedal stroke stops changing, the automatic-adjustment mechanism is functioning normally, and the clearance between the shoe and drum is correct.
  6. For disc brakes, perform the following:
    1. Remove the adjustment hole plug, then using a flat tipped screwdriver, turn the adjuster in the direction of the arrow (shown in the accompanying figure), which expands the shoe) so that the disc will not rotate.

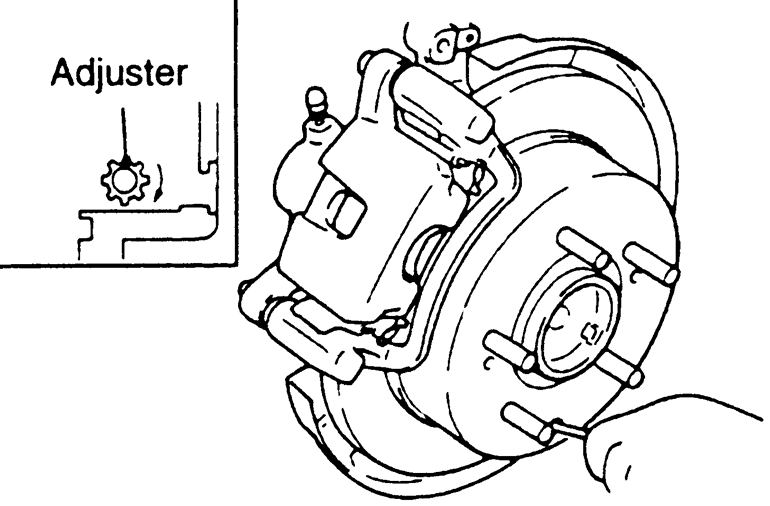
      Fig. 3: Location of the adjuster wheel — vehicles with disc brakes

    2. Return the adjuster 5 notches in the direction opposite to the direction of the arrow.
    3. Turn the adjusting nut to adjust the parking brake lever stroke to within the standard value range.

      NOTE: If the number of brake lever notches engages is less that the standard value, the cable has been pulled excessively. Be sure to adjust it to the standard value.

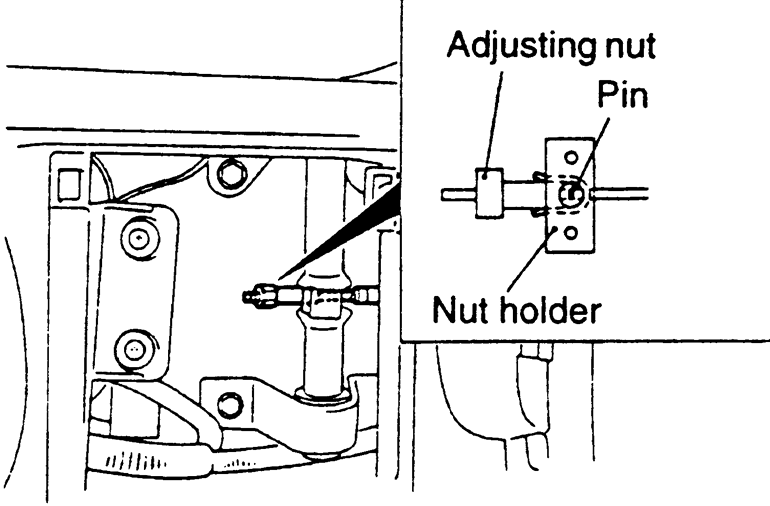
      Fig. 4: Make sure there is no play between the adjusting nut and the pin

    4. After making the adjustment, check to be sure that there is no play between the adjusting nut and the pin. Also check that the adjusting nut is securely held at the nut holder.
    5. After adjusting the lever stroke, jack up and support the rear of the vehicle.
    6. With the parking brake lever released, turn the rear wheel to confirm that the rear brakes are not dragging.

Previous Next