Previous Next

Brake Disc (Rotor)

REMOVAL & INSTALLATION

  1. Raise the vehicle and support safely. Remove appropriate wheel assembly.
  2. Remove the caliper and brake pads. Support the caliper out of the way using wire, it is not necessary to disconnect the brake line from the caliper.
  3. For rear disc brake rotor, disconnect the parking brake connection at the rear caliper assembly.
  4. The rotor on some models is held to the hub by 2 small threaded screws. Remove screws, if equipped, and pull the rotor from the hub assembly.

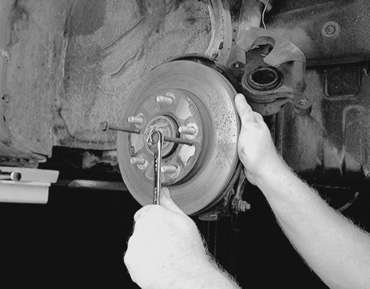
    Fig. 1: On some vehicles you may have to thread in 2 bolts . . .

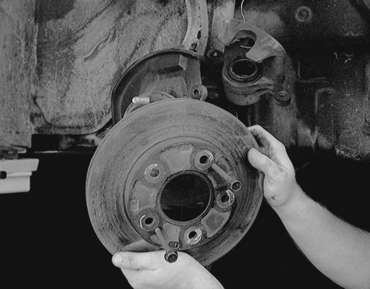
    Fig. 2: . . . in order to pull the rotor away from the hub

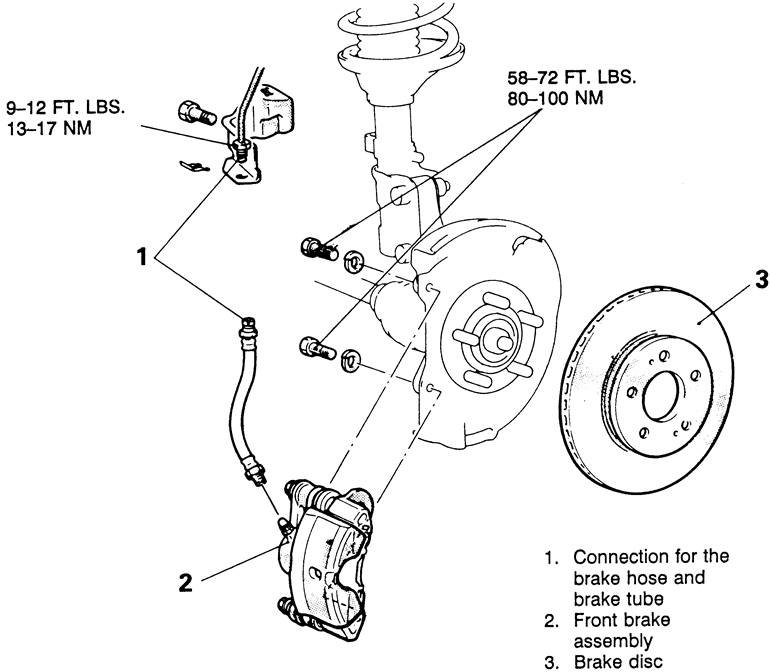
    Fig. 3: Exploded view of a typical front disc (rotor) removal

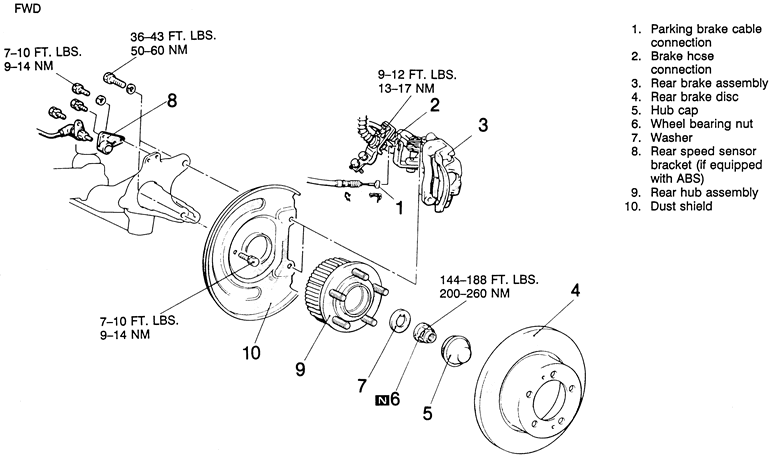
    Fig. 4: Rear brake rotor (disc) and related components — 1991 Laser and Talon with FWD shown, other FWD vehicles similar.

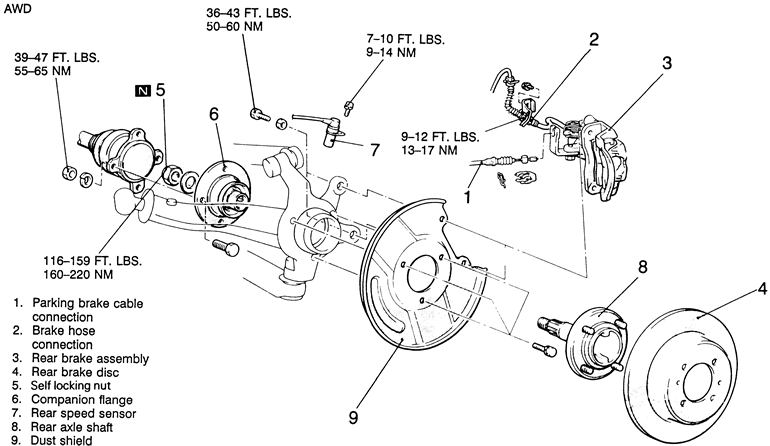
    Fig. 5: Rear brake rotor (disc) and related components — 1993 Laser and Talon with AWD shown, other AWD vehicles are similar.

  5. Installation is the reverse of the removal process.

Previous Next