NOTE: If using a pressure bleeder, follow the instructions
furnished with the unit and choose the correct adapter for the application.
Do not substitute an adapter that "almost fits" as it will not work and could
be dangerous.
Due to the location of the fluid reservoir, bench bleeding of the master cylinder
is not recommended. The master cylinder is to be bled while mounted on the brake
booster. If the fluid reservoir runs dry, bleeding of the entire system will
be necessary. Two people will be required to bleed the brake system.
- Fill the brake fluid reservoir with clean brake fluid.
- For 1990–94 vehicles, disconnect the brake tube from the master cylinder.
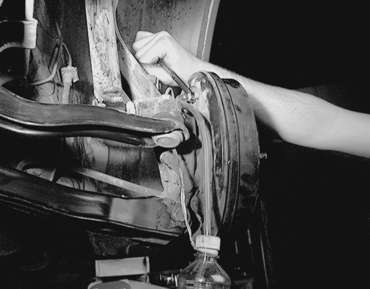
| Fig. 1: Close the outlet ports on the master cylinder
using fingers–1990–94 vehicles shown

|
- Have a helper slowly depress the brake pedal. Once depressed, hold it in
that position. Brake fluid will be expelled from the master cylinder.
| Fig. 2: Location of the master cylinder outlet ports
on 1995–98 vehicles
|
CAUTION
When bleeding the brakes, keep your face away from area. Spewing fluid may
cause facial and/or visual damage. Do not allow brake fluid to spill on
the car's finish; it will remove the paint.
- While the pedal is held down, use a finger to close the outlet port of the
master cylinder. While the port is closed, have the helper release the brake
pedal.
- Repeat this procedure 3 or 4 times, until all air is bled from the master
cylinder. Check the brake fluid in the reservoir every 4–5 times, making
sure the reservoir does not run dry. Add clean DOT 3 brake fluid to the reservoir
as needed. All air is bled from the master cylinder when the fluid expelled
from the port is free of bubbles.
- Connect the brake tube to the port on the master cylinder. Add clean fluid
to fill the reservoir to the appropriate level.
- Fill the master cylinder with fresh brake fluid. Check the level often during
this procedure. Raise and safely support the vehicle.
- Starting with the wheel farthest from the master cylinder (passenger side
rear wheel), remove the protective cap from the bleeder and place where it
will not be lost. Clean the bleeder screw.
- Have an assistant start the engine and run at idle.
CAUTION
When bleeding the brakes, keep face away from the brake area. Spewing fluid
may cause physical and/or visual damage. Do not allow brake fluid to spill
on the car's finish; it will remove the paint.
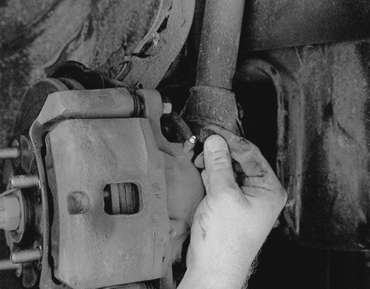
- If the system is empty, the most efficient way to get fluid down to the
wheel is to loosen the bleeder about 1⁄2 – 3⁄4 turn,
place a finger firmly over the bleeder and have a helper pump the brakes slowly
until fluid comes out the bleeder. Once fluid is at the bleeder, close it
before the pedal is released inside the vehicle.
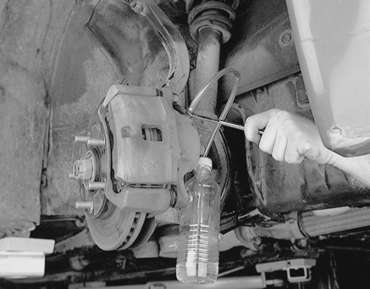
| Fig. 3: Attach a piece of hose submerged in clear
brake fluid, then loosen the bleeder valve
|
| Fig. 4: Bleed the air from the brake system in the
sequence shown

|
NOTE: If the pedal is pumped rapidly, the fluid will churn
and create small air bubbles, which are almost impossible to remove from
the system. These air bubbles will accumulate and a spongy pedal will result.
- Once fluid has been pumped to the caliper, open the bleed screw again, have
the helper press the brake pedal to the floor, lock the bleeder and have the
helper slowly release the pedal. Wait 15 seconds and repeat the procedure
(including the 15 second wait) until no more air comes out of the bleeder
upon application of the brake pedal. Remember to close the bleeder before
the pedal is released inside the vehicle each time the bleeder is opened.
If not, air will be introduced into the system.
- If a helper is not available, connect a small hose to the bleeder, place
the end in a container of brake fluid and proceed to pump the pedal from inside
the vehicle until no more air comes out the bleeder. The hose will prevent
air from entering the system.
| Fig. 5: Remove the bleeder valve cap . . .
|
| Fig. 6: . . . then attach a hose with the other end
submerged in brake fluid and loosen the valve
|
- Repeat the procedure on the remaining calipers/wheel cylinders in the following
order:
- Left front caliper
- Left rear caliper/wheel cylinder
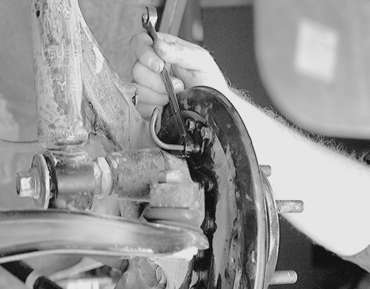
| Fig. 7: Remove the brake line from the back of
the brake backing plate
|
| Fig. 8: View of the brake line after disconnection
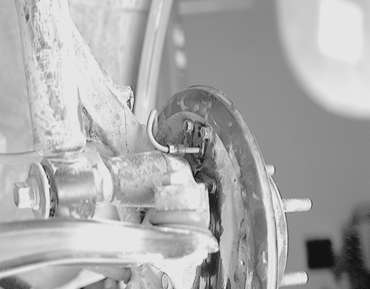
|
| Fig. 9: Remove the bleeder valve from the brake
backing plate

|
- Right front caliper
- Hydraulic brake systems must be totally flushed if the fluid becomes contaminated
with water, dirt or other corrosive chemicals. To flush, bleed the entire
system until all fluid has been replaced with the correct type of new fluid.
- Install the bleeder cap on the bleeder to keep dirt out. Always road test
the vehicle after brake work of any kind is done.


